Disclosure: Some links on this page below are affiliate links, meaning, at no additional cost to you, we will earn a commission if you click through and purchase. Read our disclosure for more info.
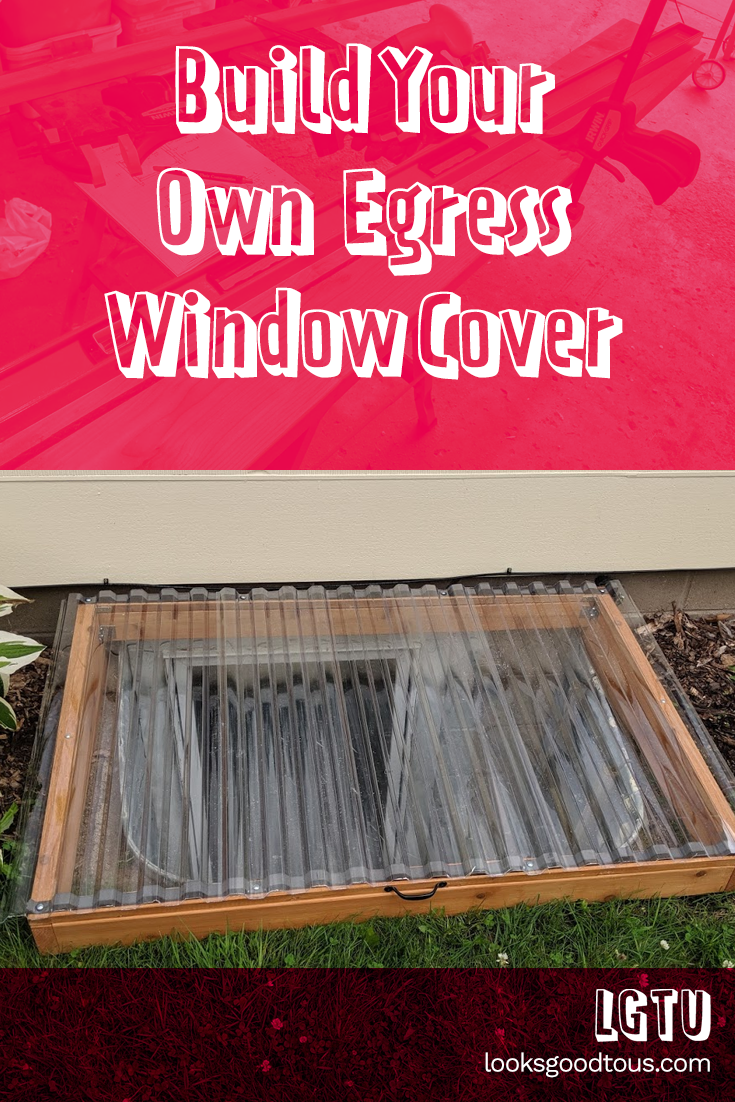
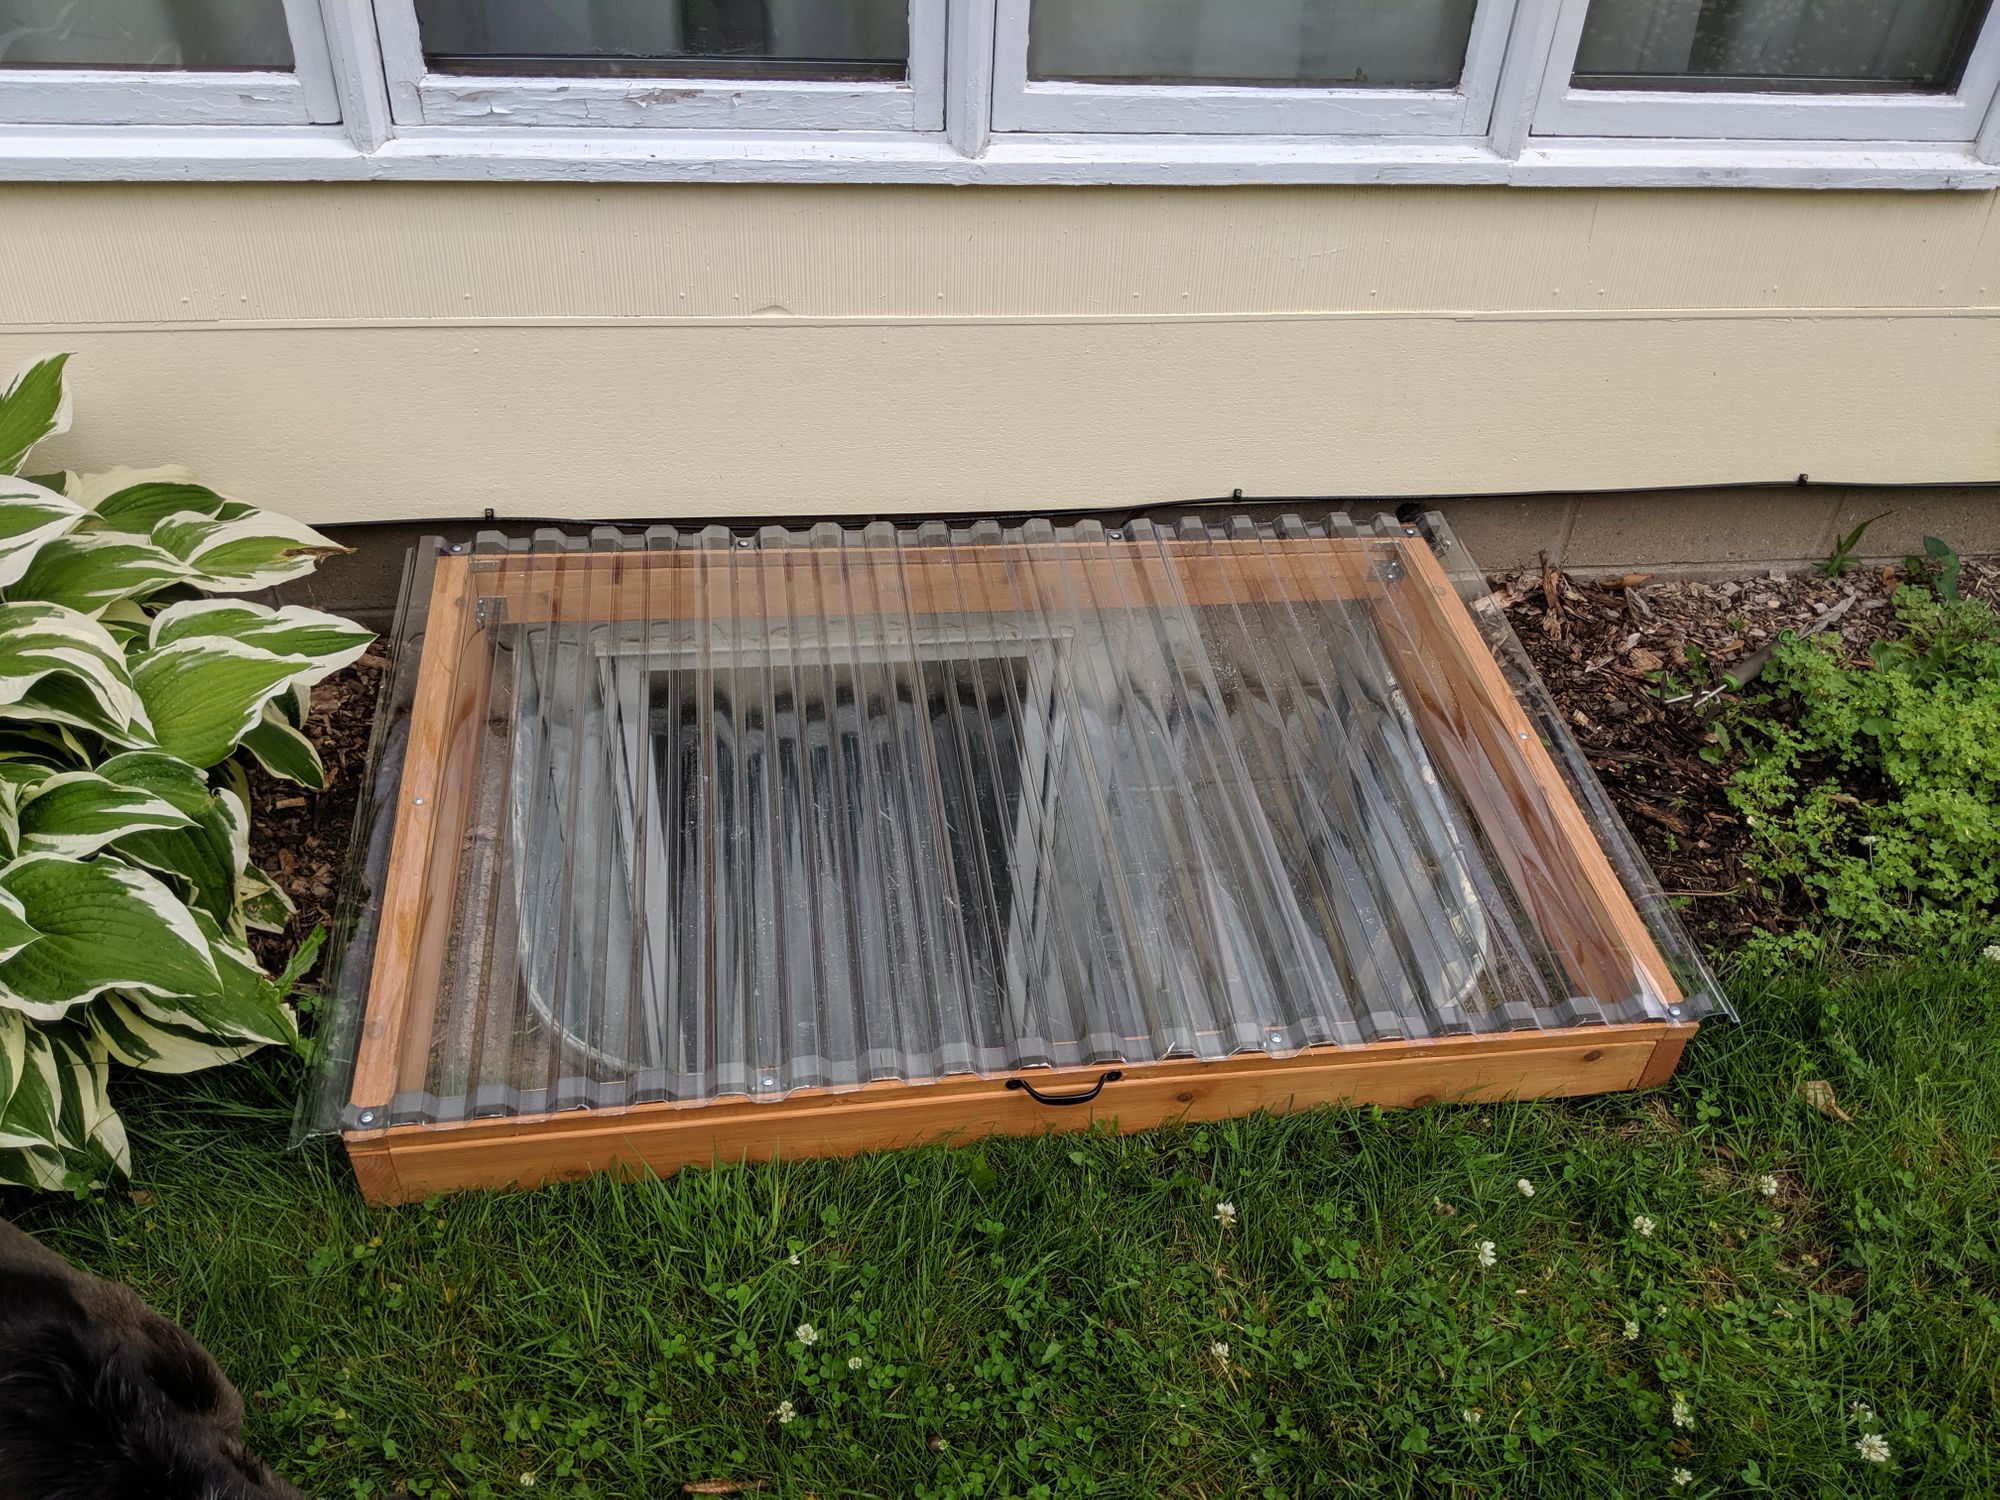
In this guide, we'll be building a beautiful framed Cedar egress window cover with a hatch. I wasn't enthusiastic about any existing designs and examples I saw on YouTube or blogs but I am super pleased with how this turned out!
Materials List
Frame
- 2x4 Cedar lumber (ground contact)
- 2x8 or 2x10 or 2x12 Cedar lumber (ground contact)
- (4) 2in corner braces
- #10 2 1/2" exterior deck screws
Cover
- 2x1 Cedar boards (treated)
- (4) 1 1/2" square corner braces
- Door Handle
- Coverlite polycarbonate roofing sheets
- Coverlite Greca foam closure strips
- Coverlite Greca roof hinge sheet
- 3/4" self-drilling lath screws
- 3/16 x 1/2 x 1/16" Neoprene (rubber) washers
- (2) 2 x 1-1/2" door hinges
Extra Options
- Cedar "Natural" One Coat Semi-Stain
- Cedar deck and fence brightener
- Landscaping fabric (for weeds/grass)
- Paver Base
- Paver leveling sand
- Window lock for interior of cover
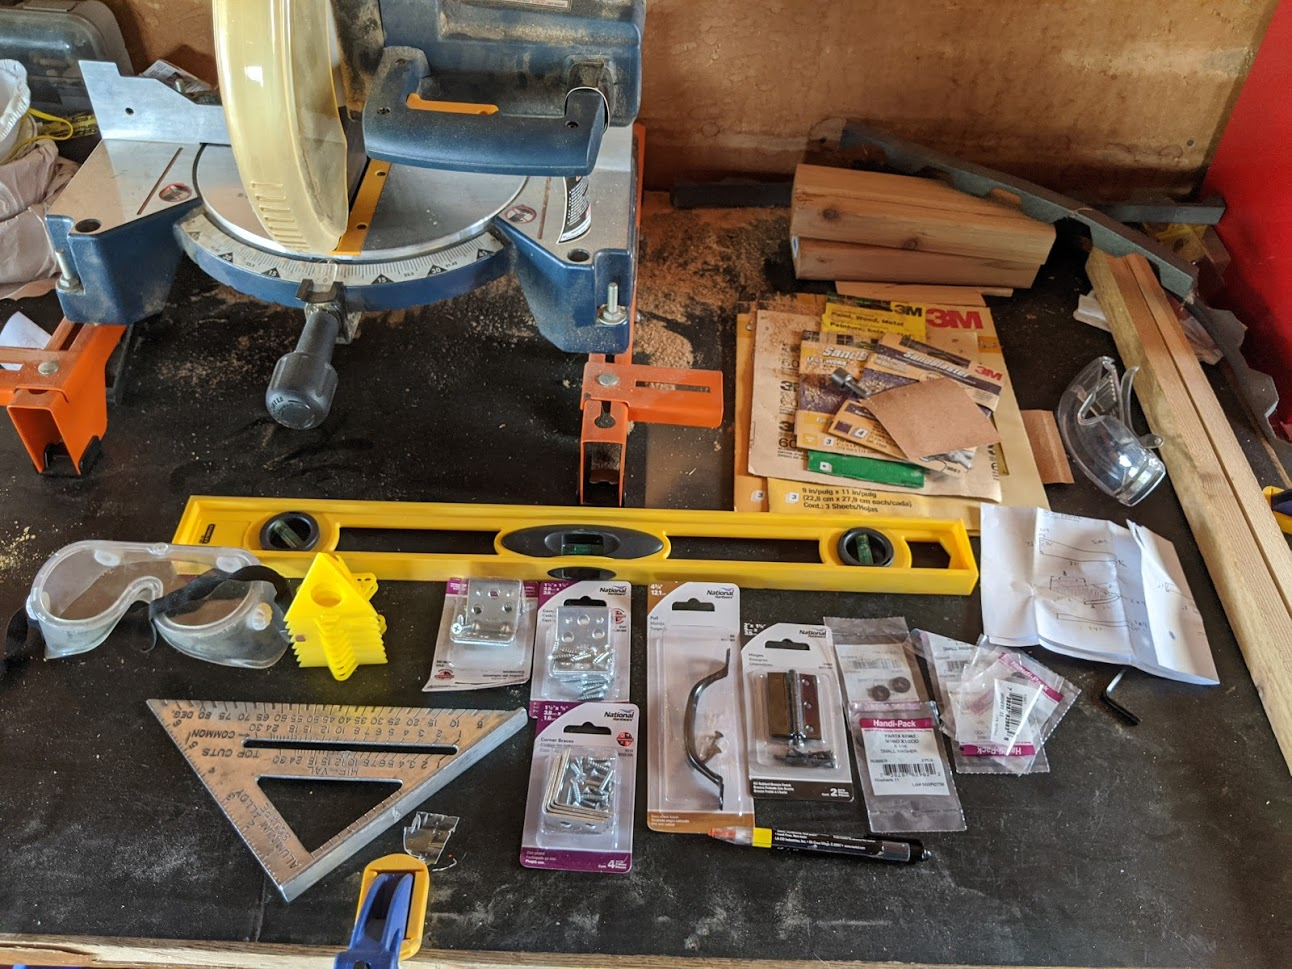
Tools & Equipment
- Power Drill
- Skill Saw
- Foam staining pad
- 72" Level (recommended)
- Miter Saw (recommended)
- Table Saw (optional)
- Bunch of clamps
- Safety equipment
All materials and equipment can be found with shopping links above. I tried to link to the exact products I used! I found everything I needed at Home Depot or Menards.
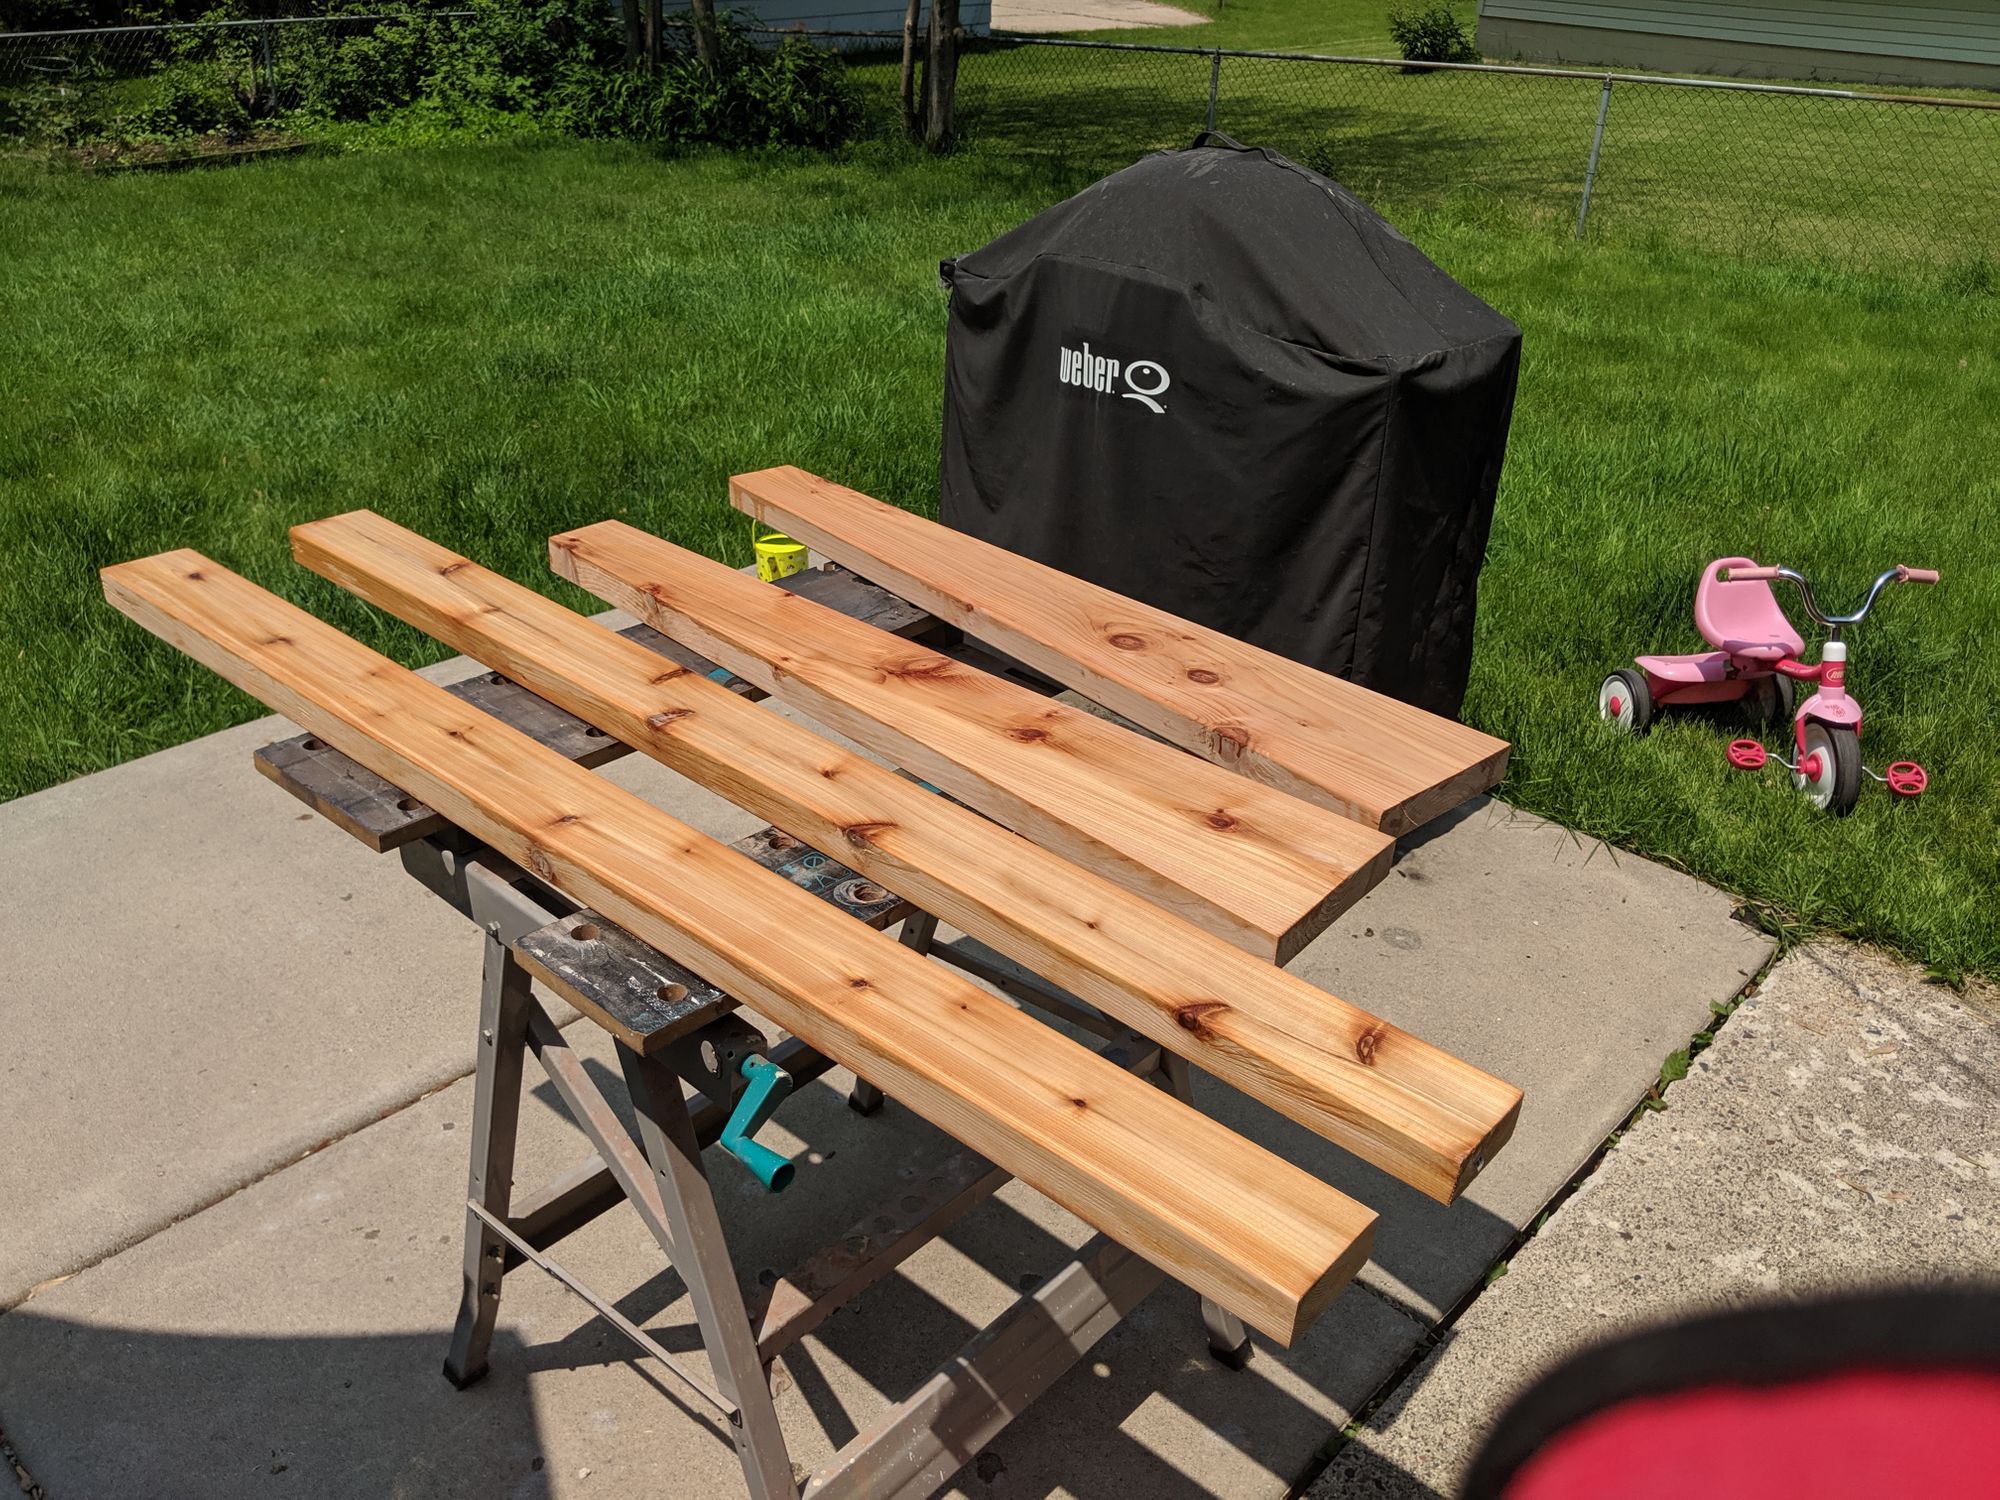
Choosing the Wood
I went with treated Cedar boards from Menards. I like the look of Cedar and decided to do the extra work and use a semi-stain coat to add some color and protect against natural weathering. Home Depot's "ground contact" weather treated boards are good, since this will be sitting on paver sand slash the ground directly. If you don't want to do that, you could choose to use a different outdoor wood like composite or even classier stuff like Brazilian Ipe. All that matters are the dimensions!
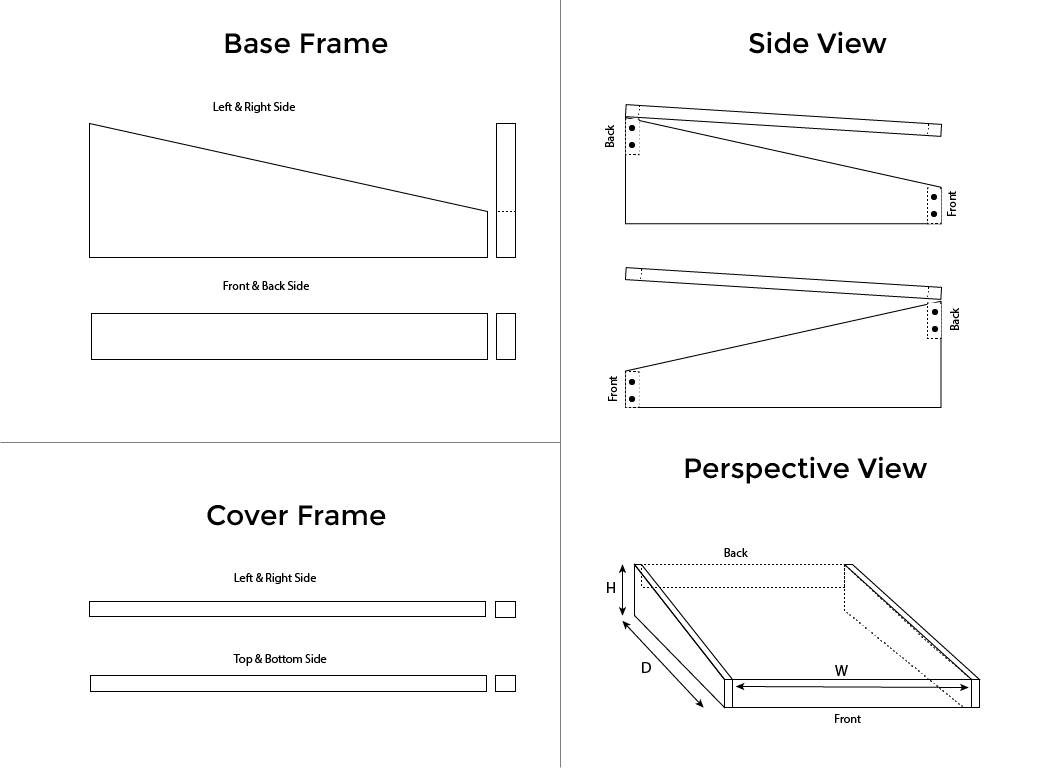
Visual Diagram
I really enjoy putting together IKEA furniture and their visual walkthroughs are easy to follow. It reminds me of when I played with LEGO as a kid. I'm a visual person so I prefer seeing how something is built and then reading about it for details.
Here's a set of diagrams of how the frame and cover are assembled:
Step 1: Preparation
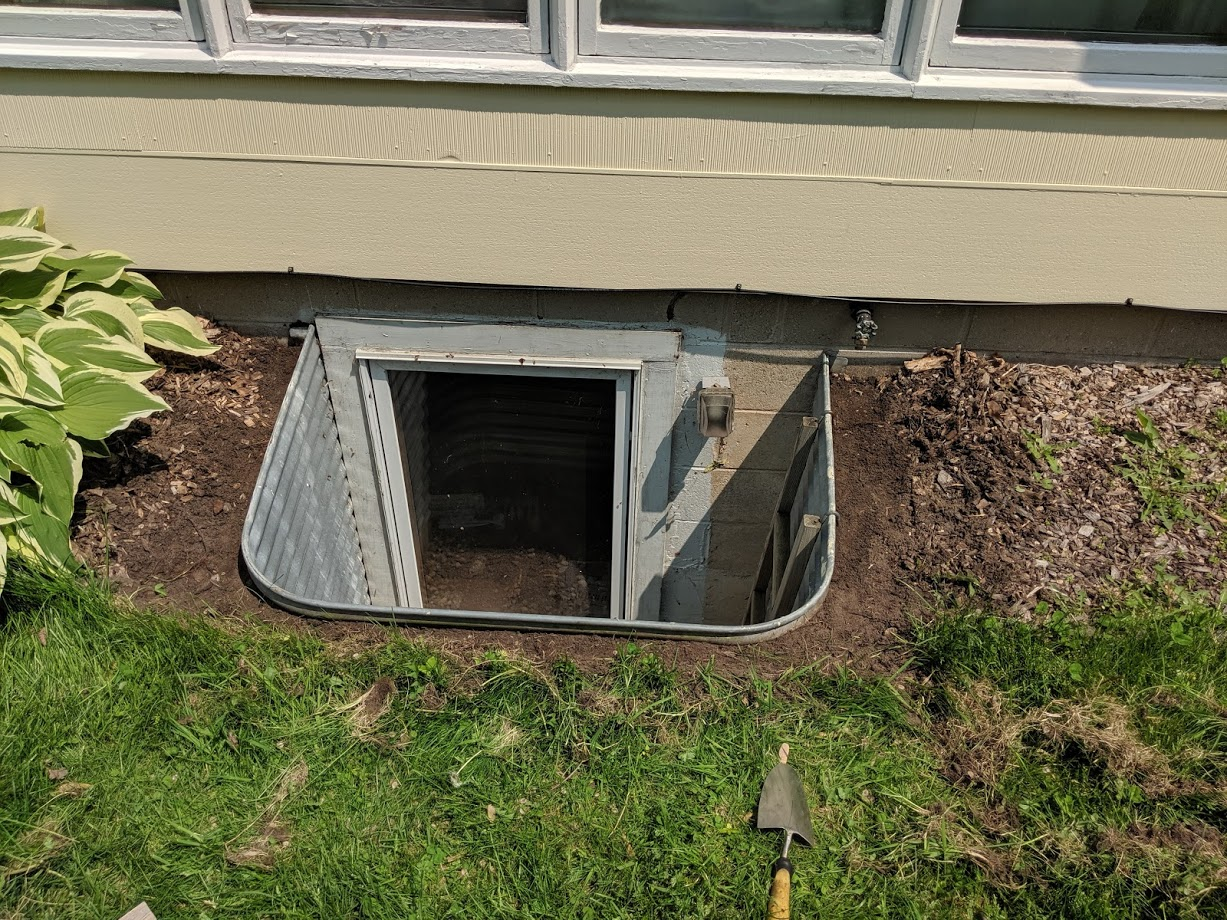
Measure the Well
Start by measuring your window well to determine all the dimensions for the boards you'll need. These measurements are shown in the diagram above!
- Well Width (W) – Add an extra 1-2" for spacing on the side
- Well Depth (D) – Measure from house wall to outside edge of well, add extra 1 1/2" to account for 2x4 and an extra 1-2" for inner spacing
- Height (H) – Measure from ground outside well to top of bottom siding of house. This can also be as high as you are willing to cut diagonally. This measured 9" for me so I chose a 2x8. It should be steep enough to let water run down the cover.
You would then multiply each calculation by each window cover you're building (2 in my case). Based on the final numbers, you may be able to buy longer boards or shorter boards depending on how you want to cut them up.
The Coverlite sheets come in multiple lengths but all have a maximum width of 27" so you will need to take that Well Width divided by 27" to tell you how many sheets to buy. In my case my well width was 56" so I needed 3 sheets.
Prepare the Ground
My window well had landscaping around it that butted up against the well. I had to remove the grass and chips to prepare the space around the well so that the frame sat level.

I recommend digging around and then filling with paving base and using leveling sand on top. You can use a level and measuring tape to level the sand around the well, ensuring consistent height for the frame. The paving base and sand combo should ensure you don't get weeds or grass growing within the frame. You could also go the extra mile and use landscaping sheets!
It's probably best to make the surrounding sand extend a bit beyond the edges of your cover and then clean it up afterwards.
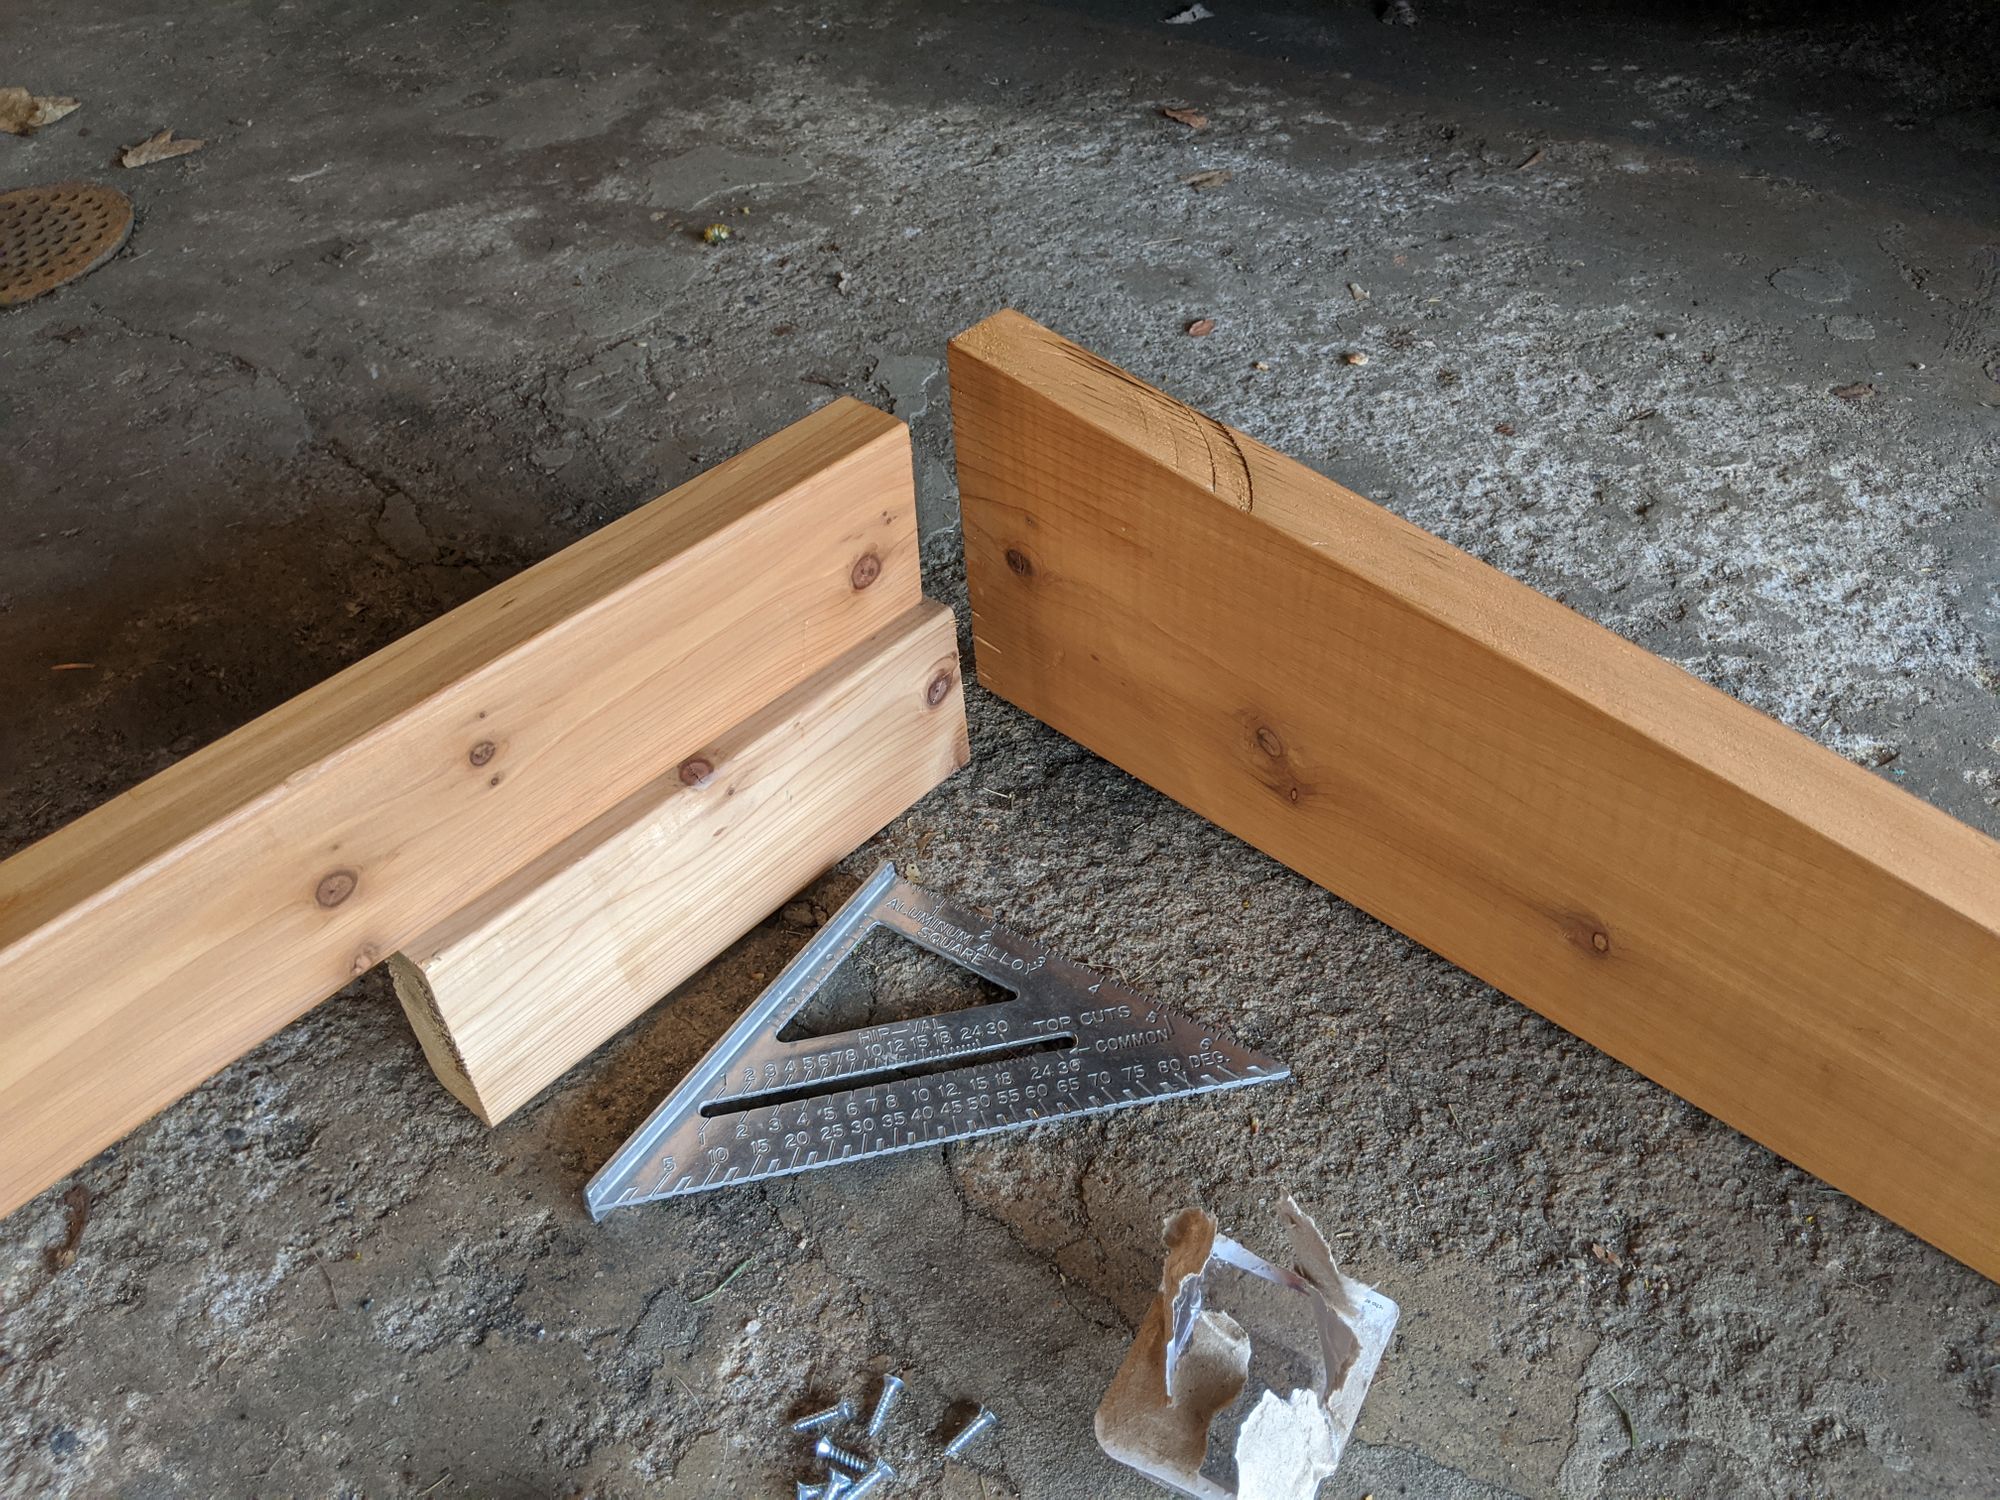
Step 2: Cut the wood
Based on your previous well measurements, you will need to calculate the total board length for your cuts. For example, if your Well Width is 50", you need 100" of 2x4 for the front and back sides of the frame.
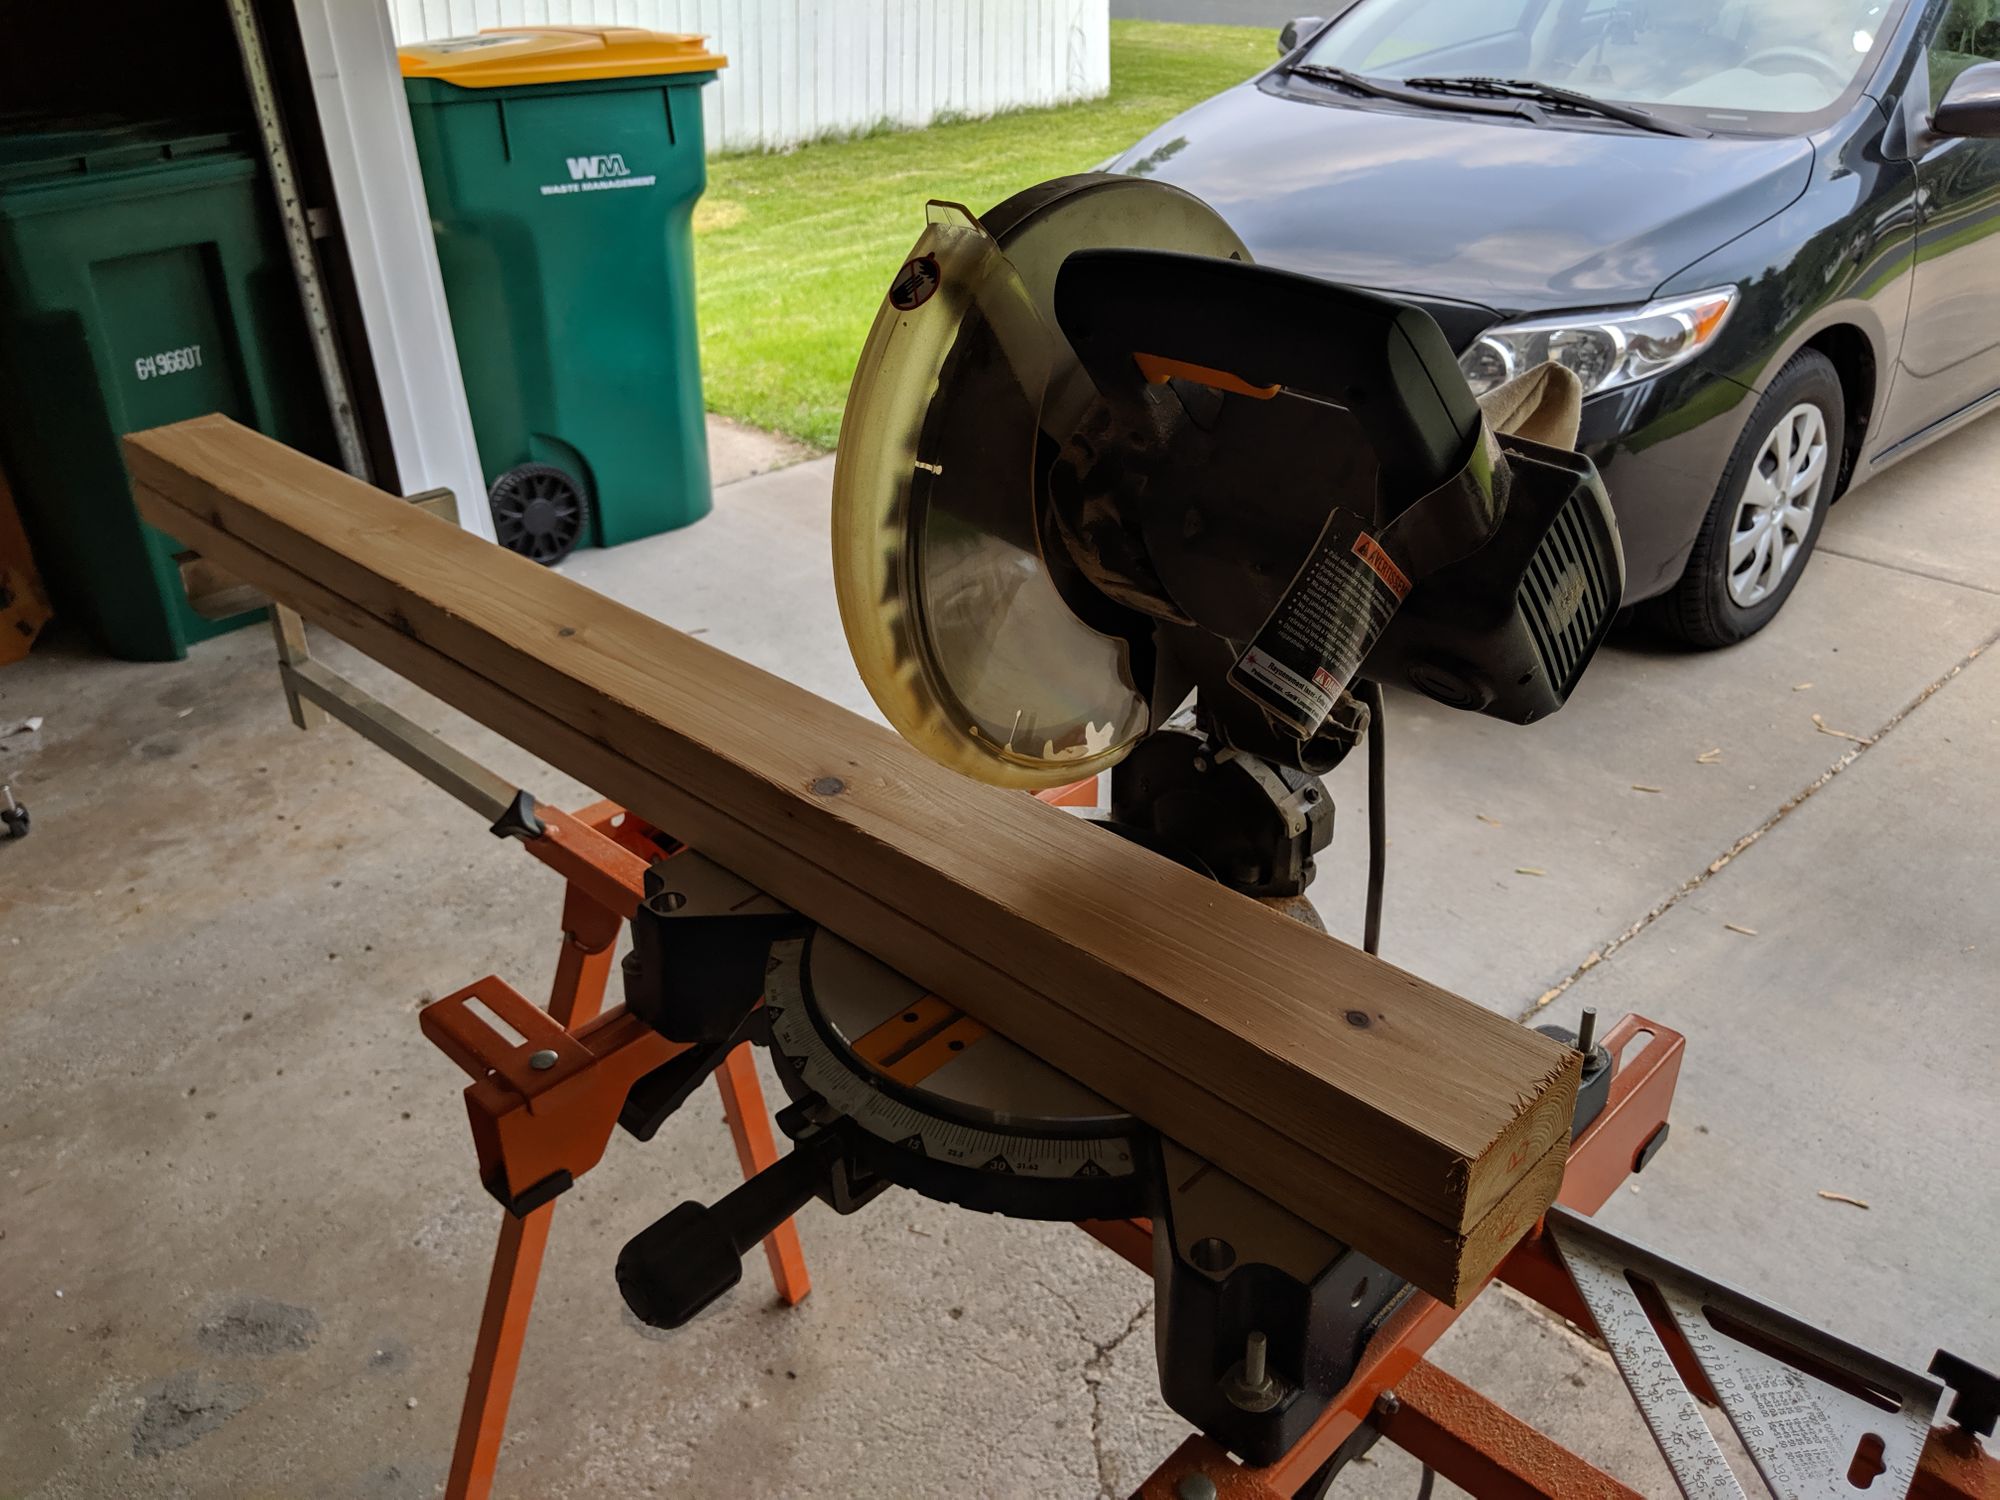
This is pretty straightforward with the cover and two of the sides of the frame. I used my miter saw. For cedar, I'd recommend a good crosscut blade to get that finer edge though even with an all-purpose blade you'll be fine. One trick I came across was to use a knife edge and make a cut line to help avoid splinters.
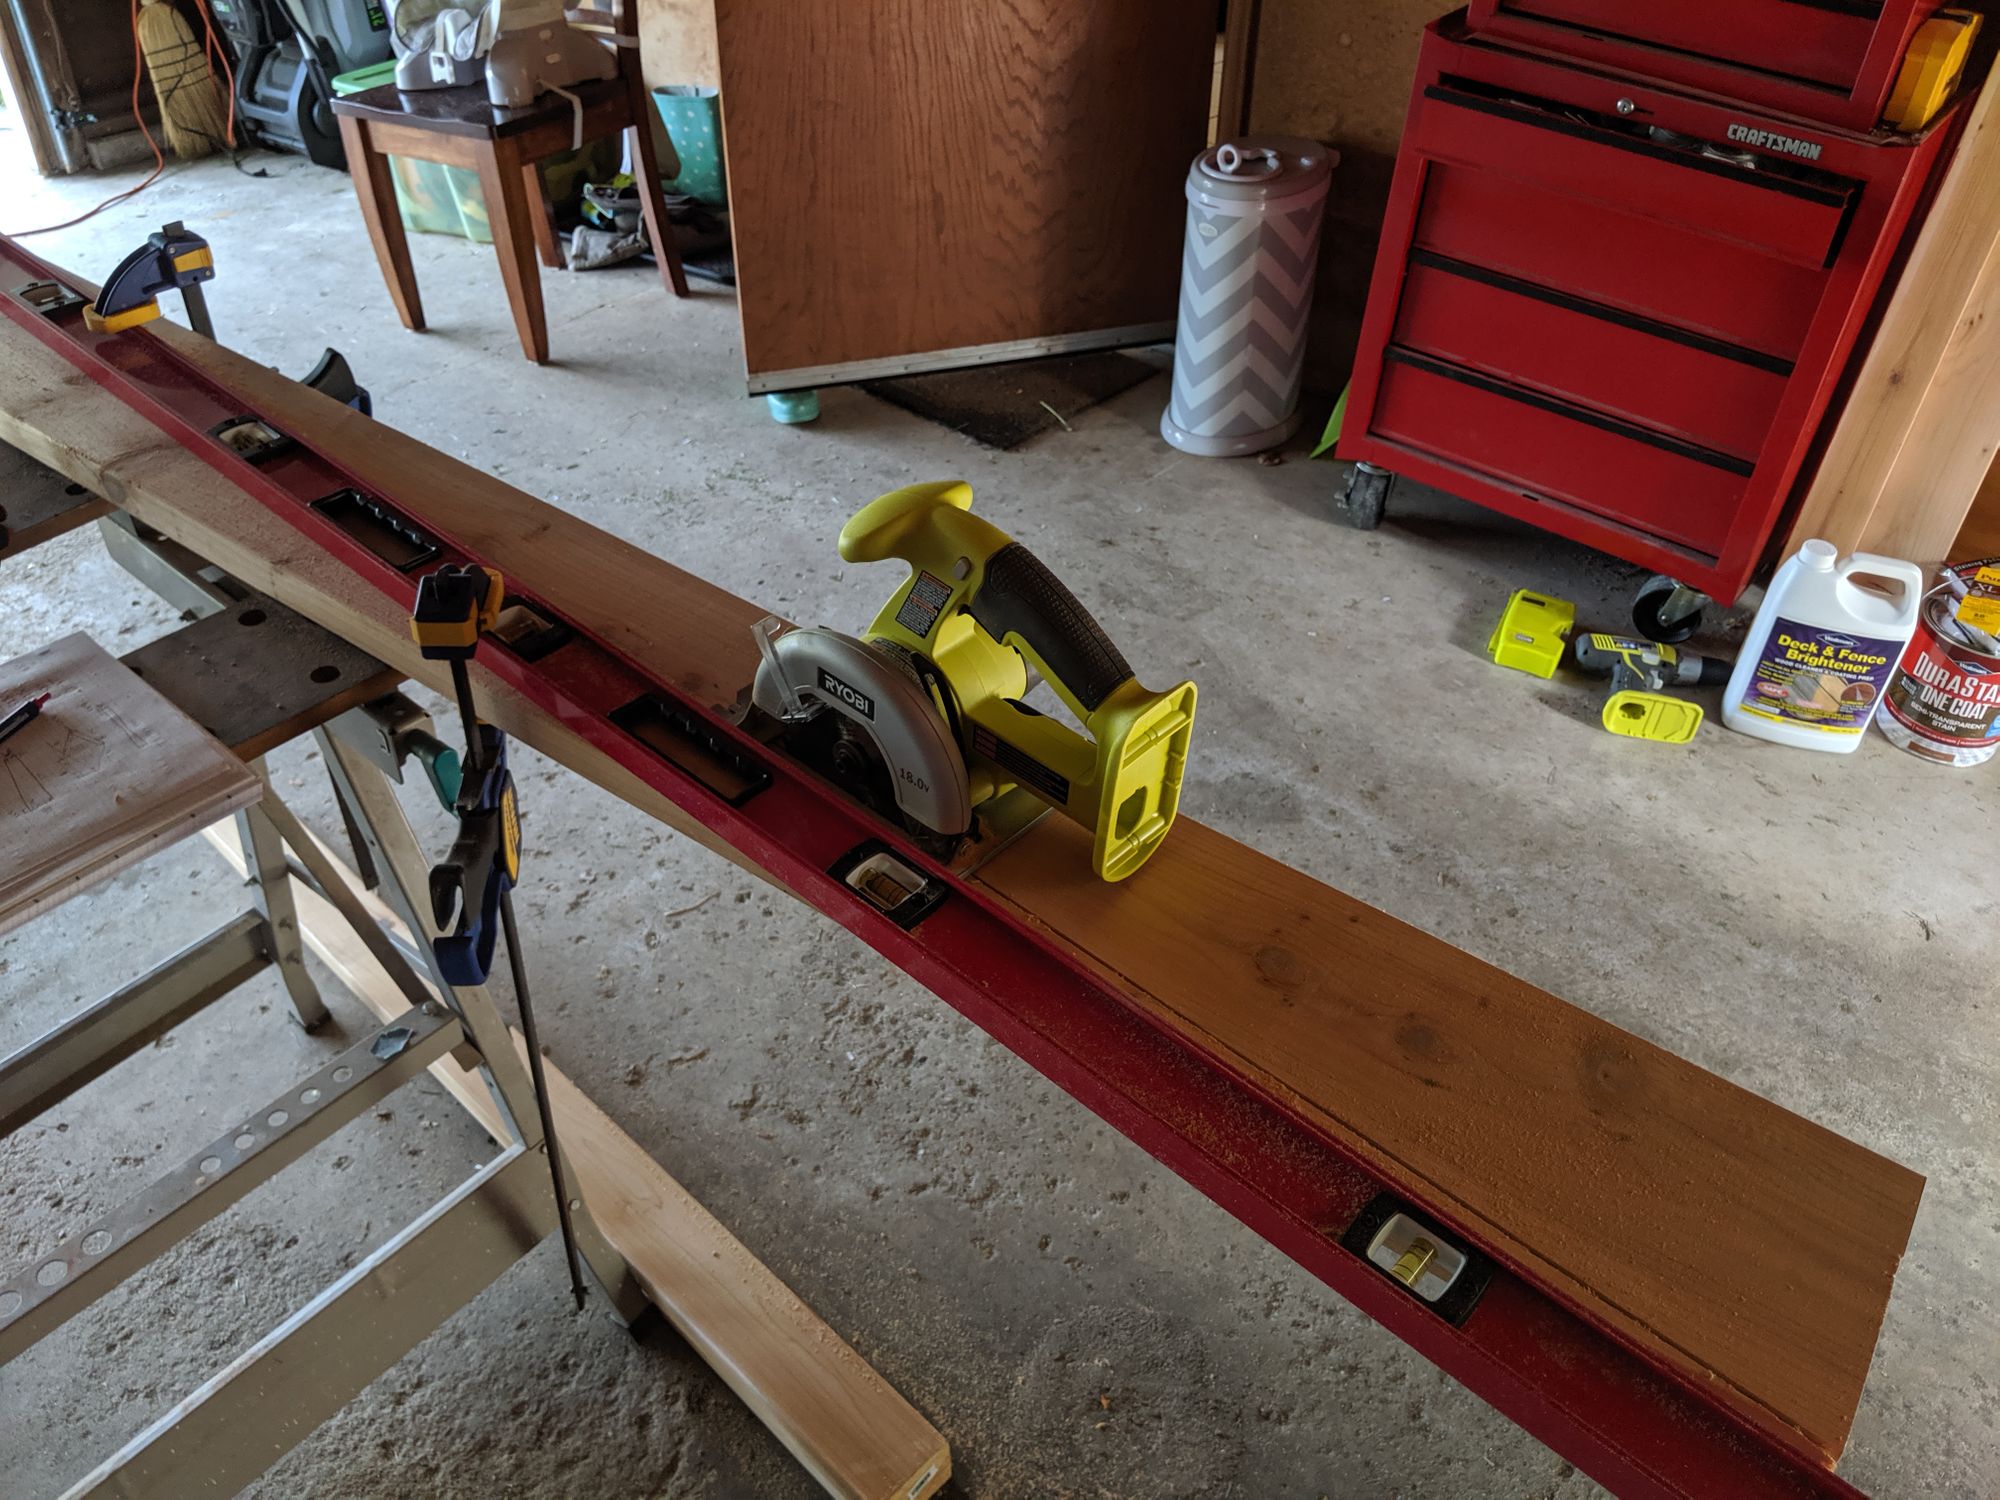
Cutting the diagonal sides
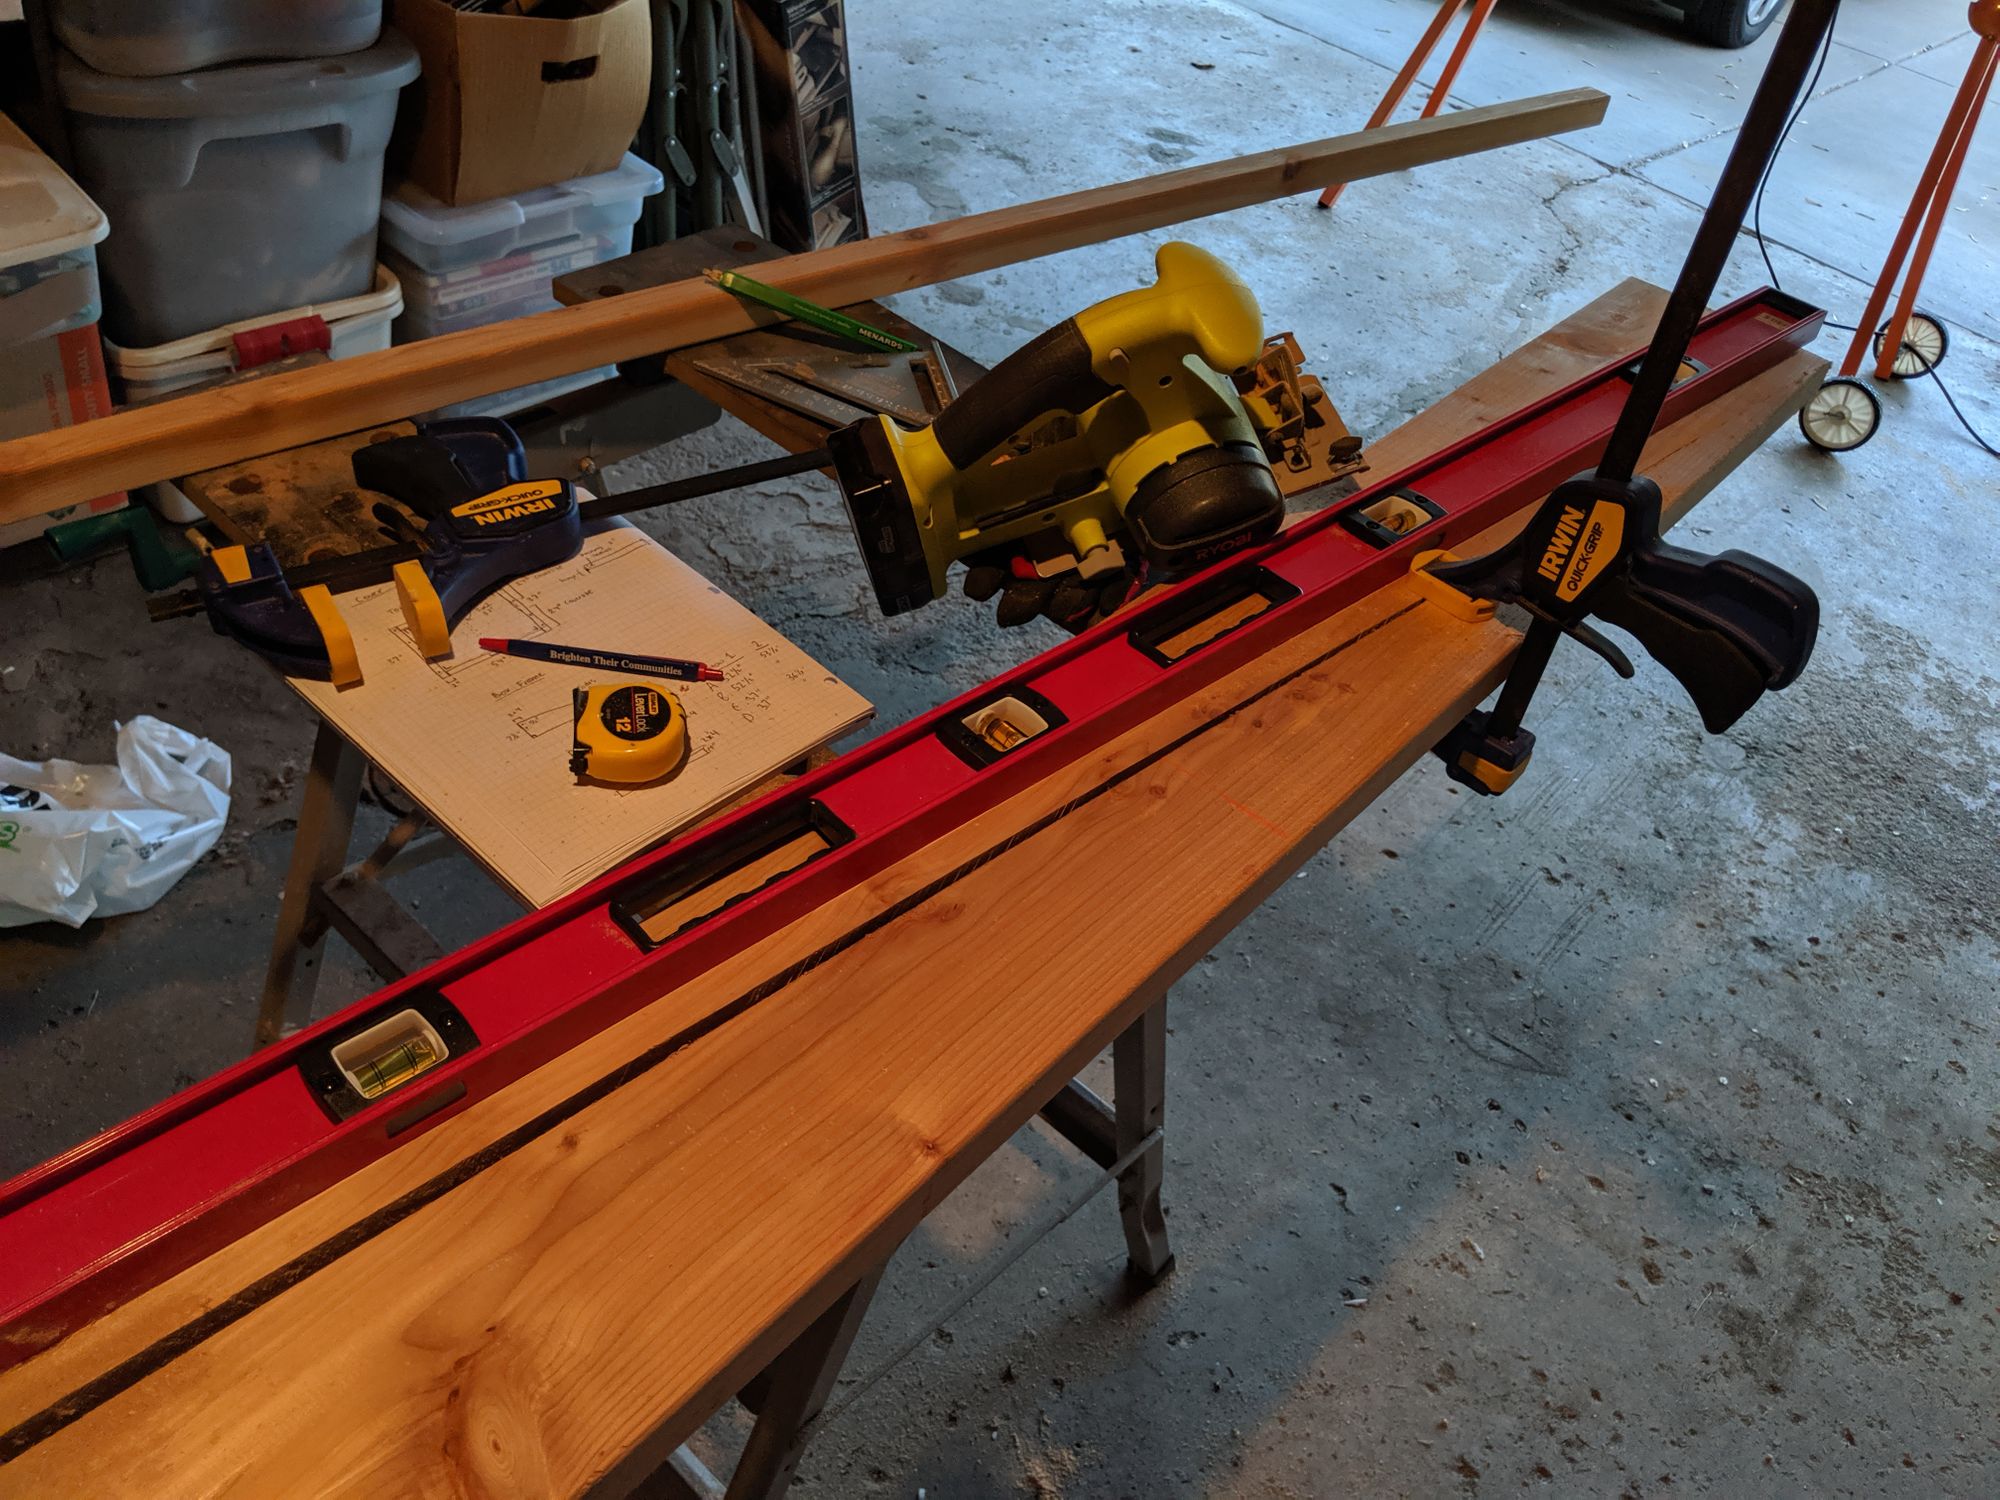
This was the most challenging cut for me because I don't have a table saw. Instead what I did was set up some clamps and a 72" level (best purchase in awhile!) so that I could use my skillsaw to follow the edge and cut a straight line through the wood. I'm happy to report that even a small 6" skillsaw will work but it won't be a super clean cut. I'd definitely recommend a larger blade if you have one.
The important thing is to take into account the edge of the saw because it's offset from the blade, so the cut will be about 3/8-1/2" away from the level.
Calculating the Right Board Length
Cutting the board diagonally means you will need a long board. How long exactly? Good question! We need to turn to some grade school math. And by "turn to" I mean, ask a math-minded friend.
To help, I made a little visual representation:
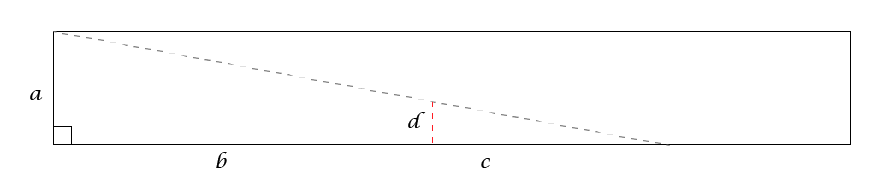
For example: The depth of my frame needed to be 36" (b) and the height of the board is 7.5" (a). Because we want to have the sides connect to the 2x4 lumber, we don't want a full triangle, we have a height d that is 3.5" that will cut the triangle short. c then becomes the missing length of board we need!
This is a ratio problem, meaning there's a smaller triangle inside the big one and we can create an equation to solve for c.
Did I mention math isn't my strong suit? With the help of my math-inclined friend Erik, he provided the equation to solve for c:

OK! Now this is where I take over. I made a handy diagonal cut calculator so you can use it too:
Step 3: Prep the Wood
Now that we have measured cuts of our wood we can prep them for being outside.
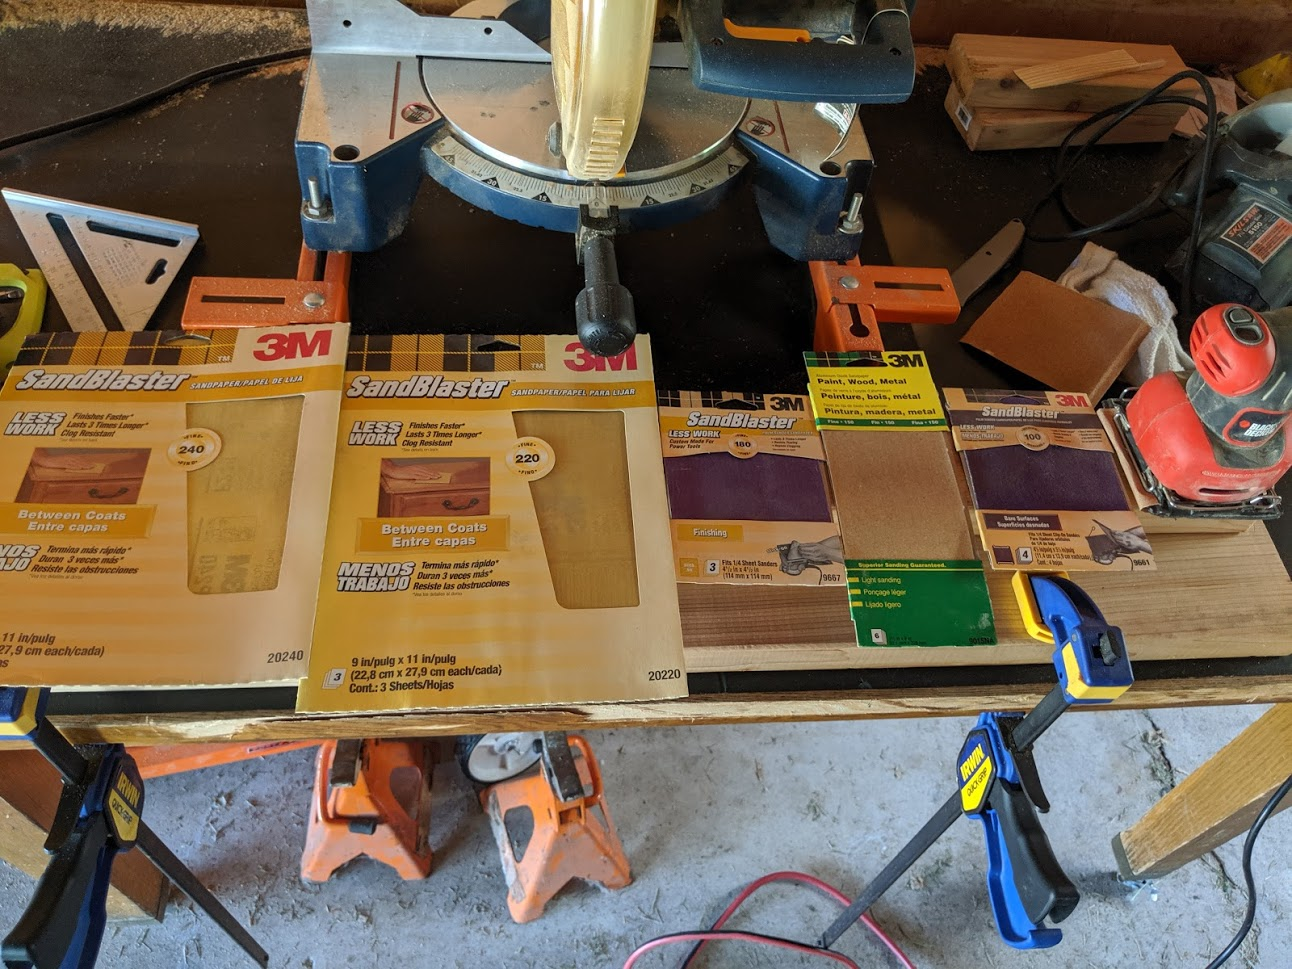
Sanding the wood (optional)
Let's face it, no one will see these up close but I still lightly sanded all the wood down to have better staining and frankly because my cuts were a bit rough.
The appropriate way to sand is to start with higher grit and go lower but like I said, this is not fine woodwork.
Cleaning the wood
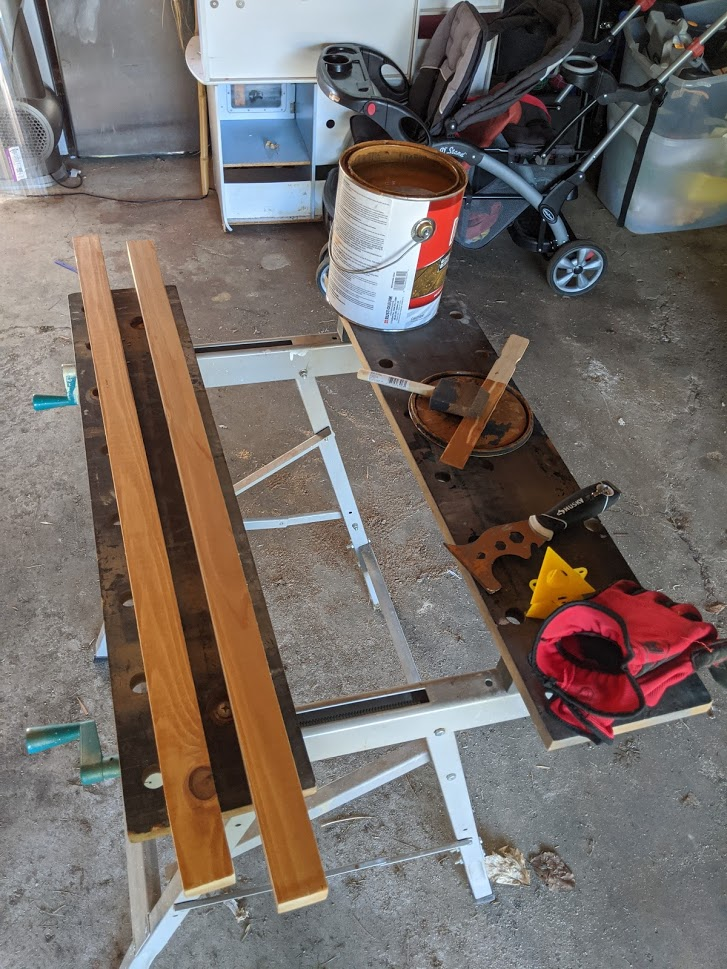
Before applying stain, you should clean the wood and wipe it down. Optionally you can use a deck cleaner/brightener to clean the wood but if buying fresh from the store I'm not sure I see a huge benefit to it. Some articles suggest it's still good due to coating on store-bought wood. I did apply a cleaner as shown below:
Read the directions on your cleaner. For mine I used a stiff brush to wash the wood and it said to keep it wet for at least 10 minutes. When dry, take a hose to it to wash the boards off and wipe them dry.
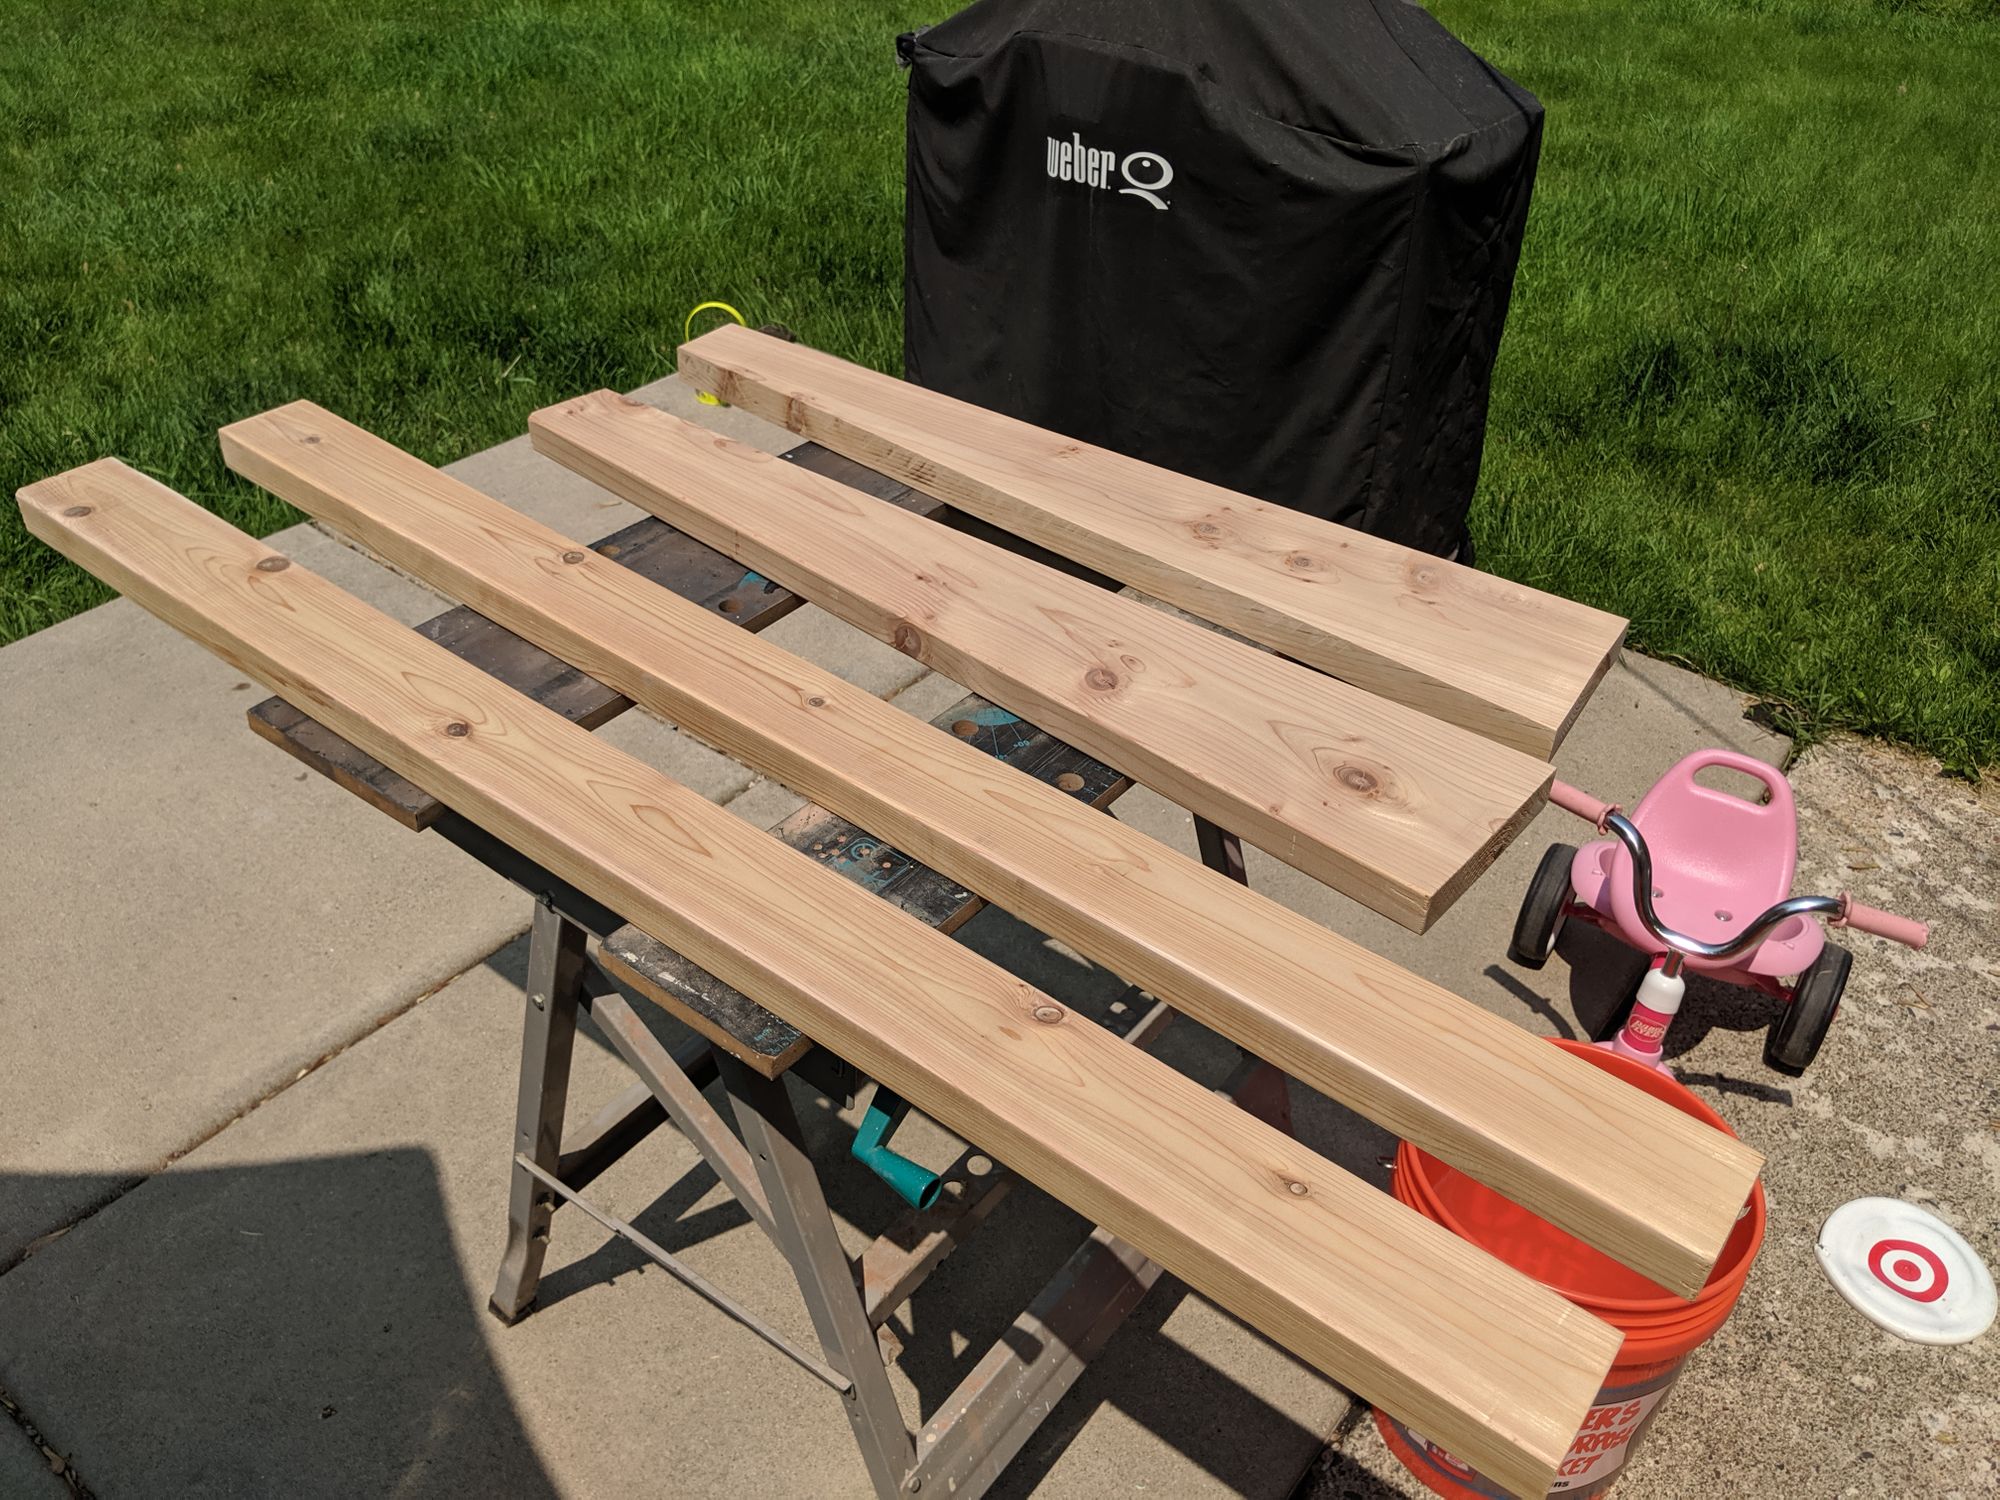
Protection from weathering
If you're using cedar, when exposed to the elements it will start to turn that weathered gray. When I started this project I never knew that but it explains why so many decks and outdoor projects turn grey over time. I prefer the "natural" red look of cedar myself. If you're like me and don't want grey wood, the advice is to use a single coat of semi-stain which will need to be reapplied every 4-5 years or so to maintain protection against UV. By the way, if you're treating a deck it might better to use sealer rather than stain.
I used Durastain One Coat Semi Stain to apply the coat and it was pretty easy using a foam pad.
Alternatively for less maintenance you could choose a wood that doesn't need staining like composite or Ipe. That comes at a cost, though!
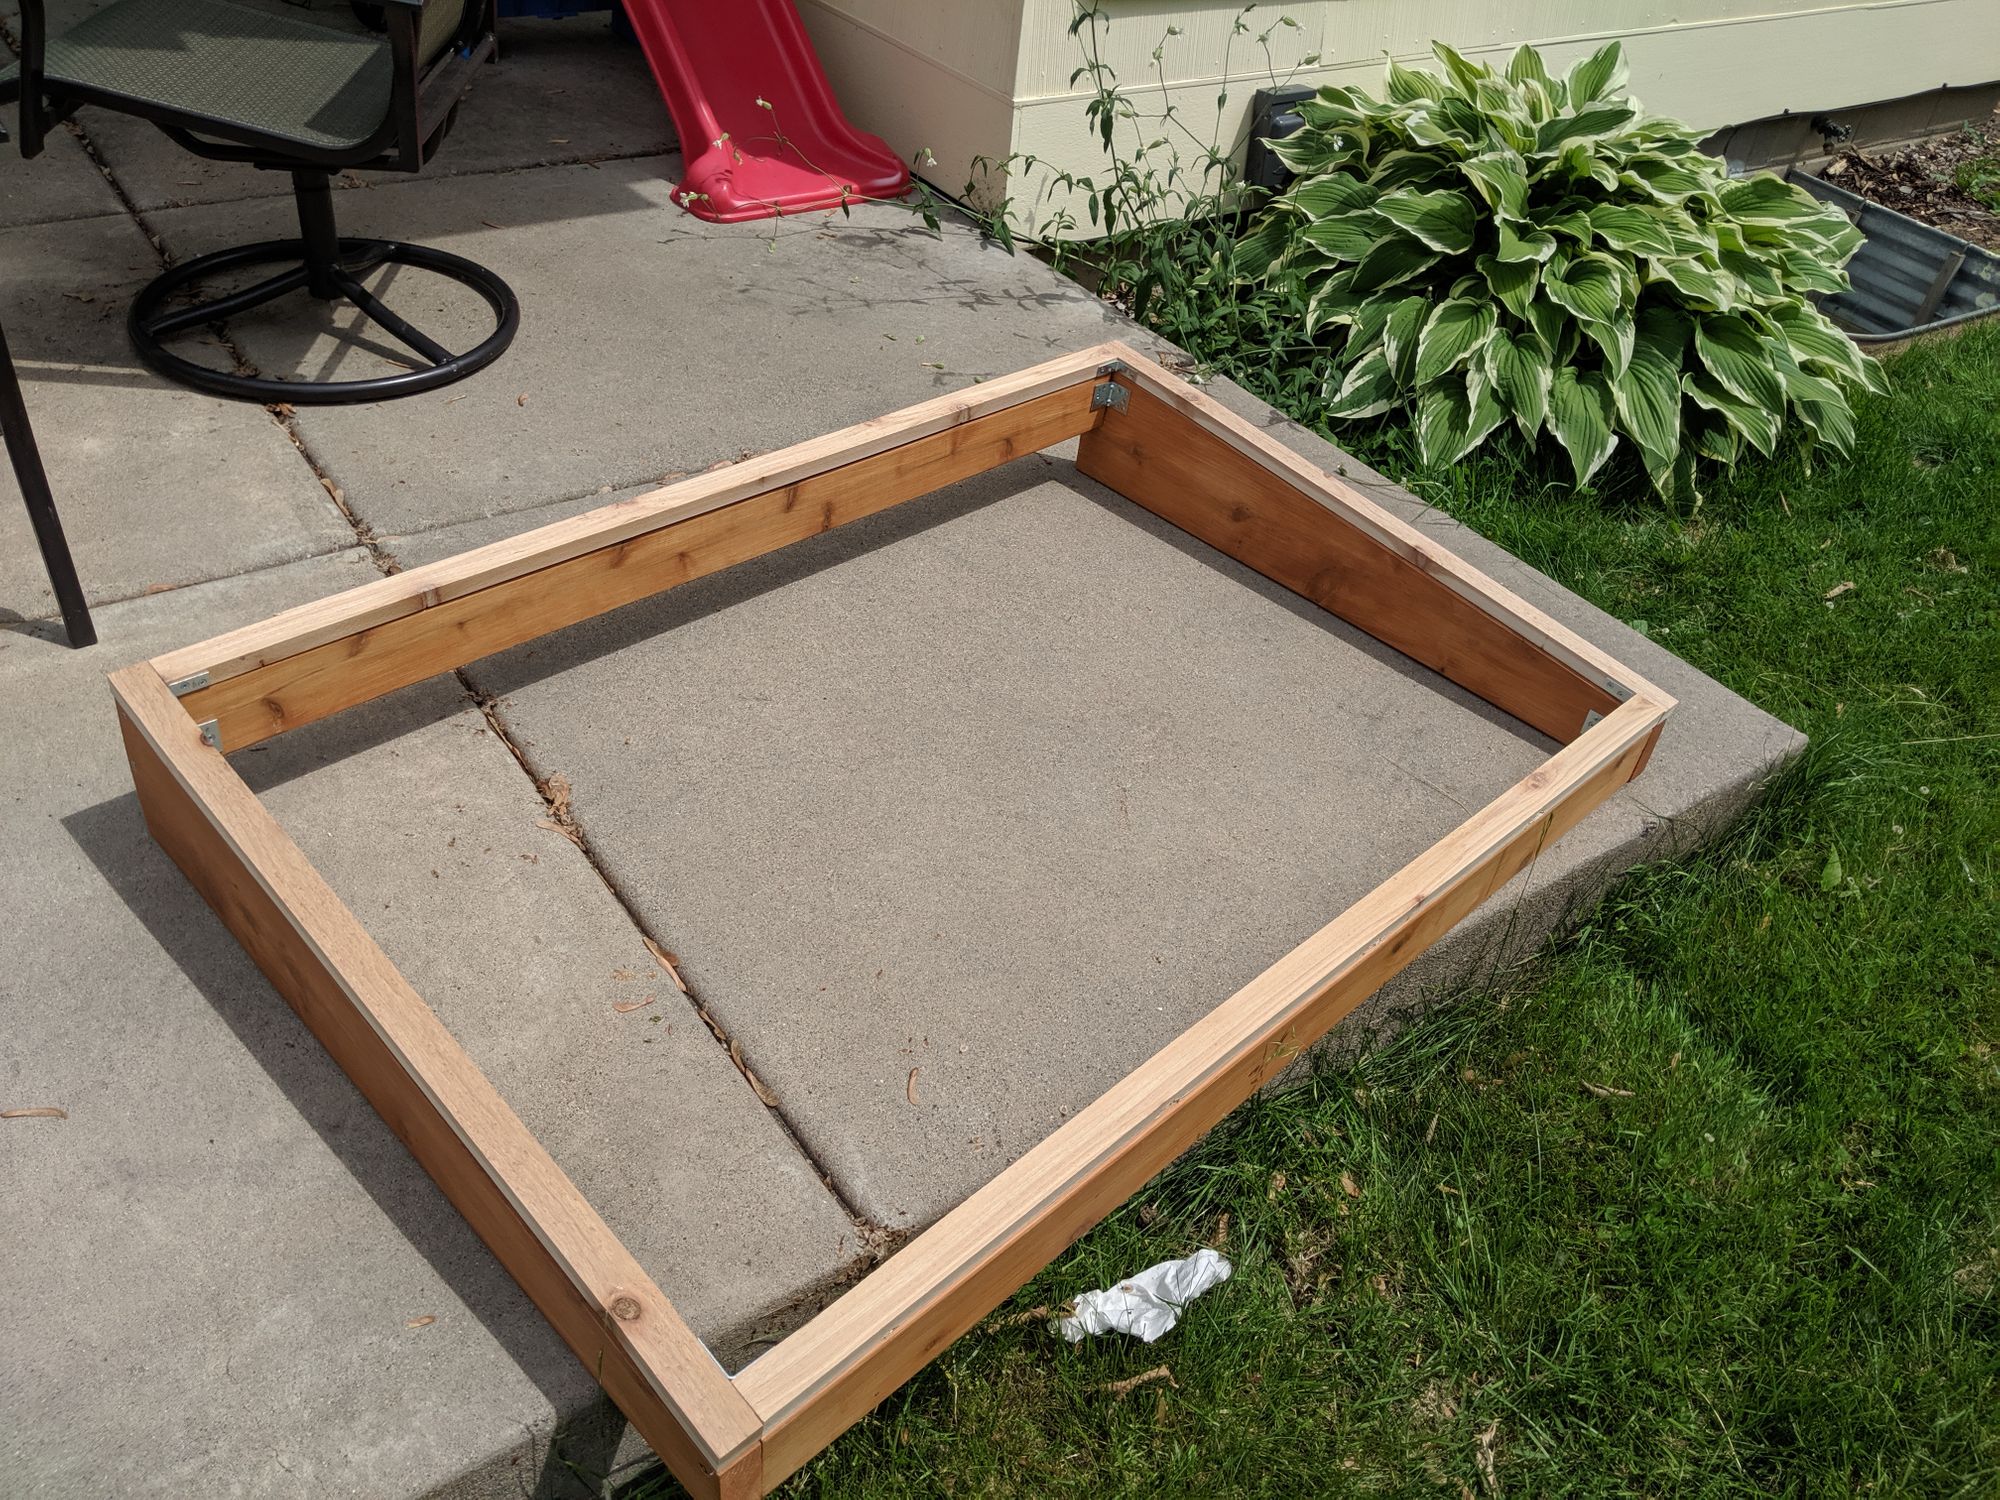
Step 4: Assemble the base frame
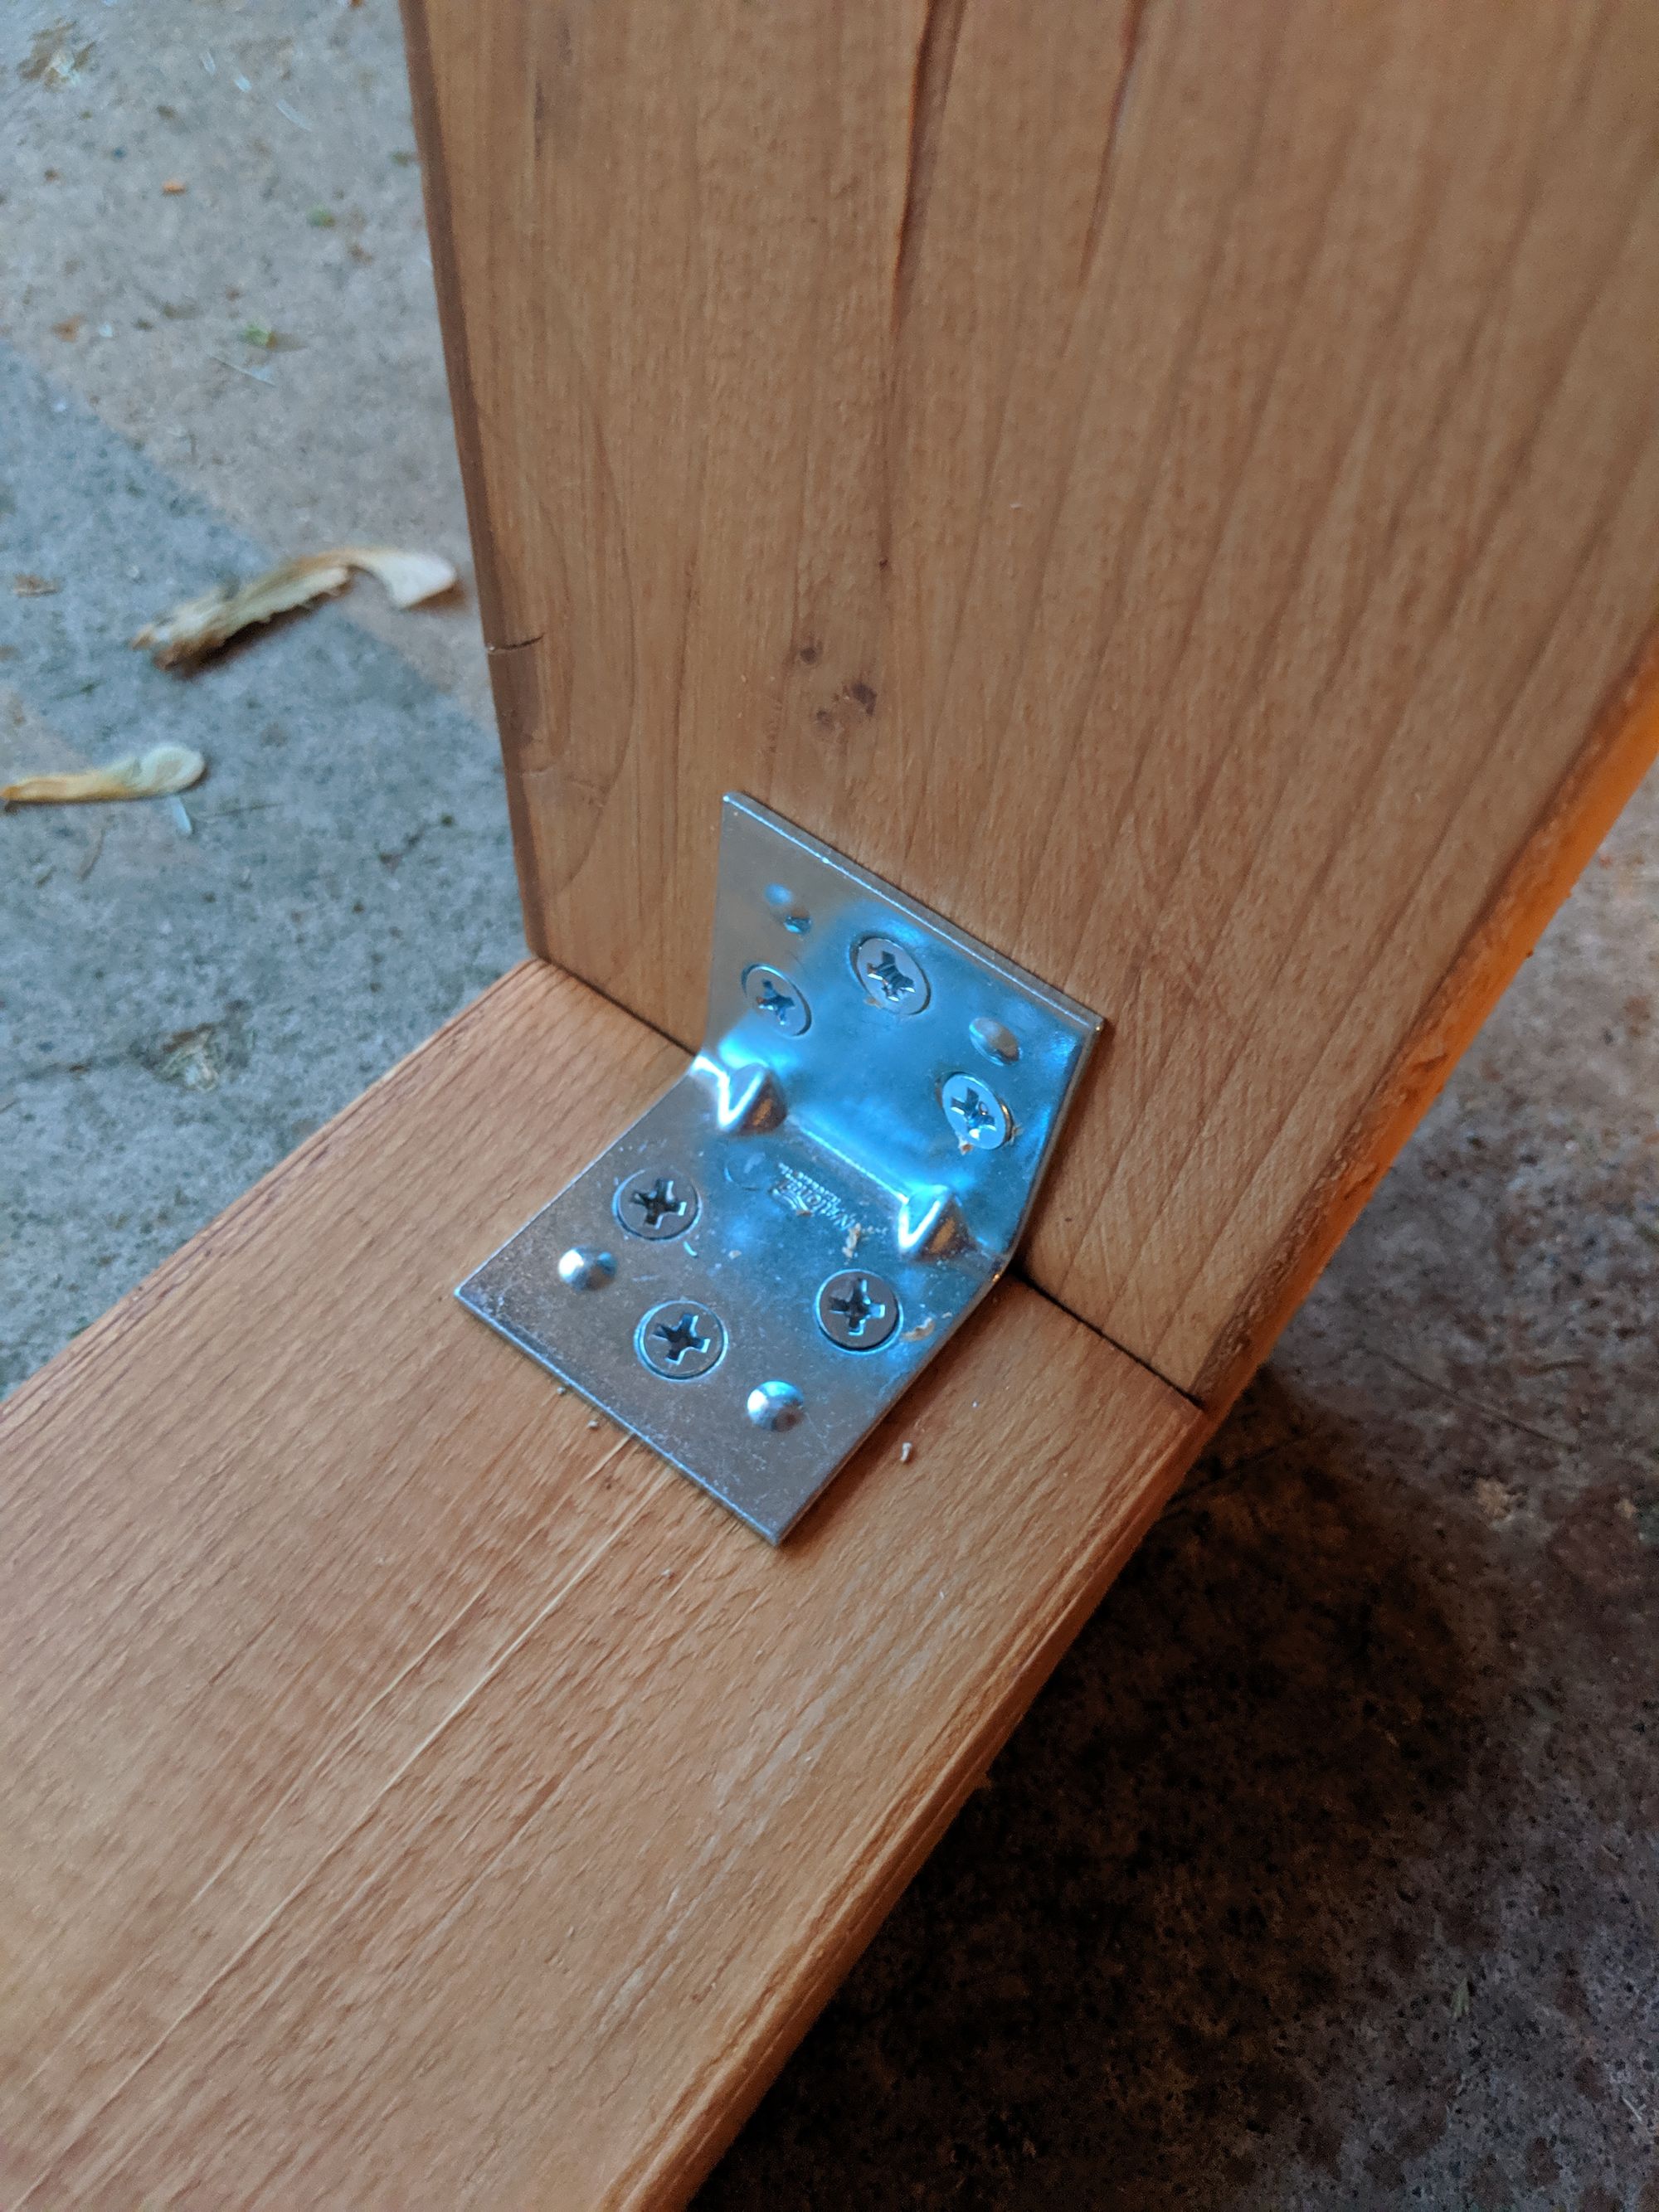
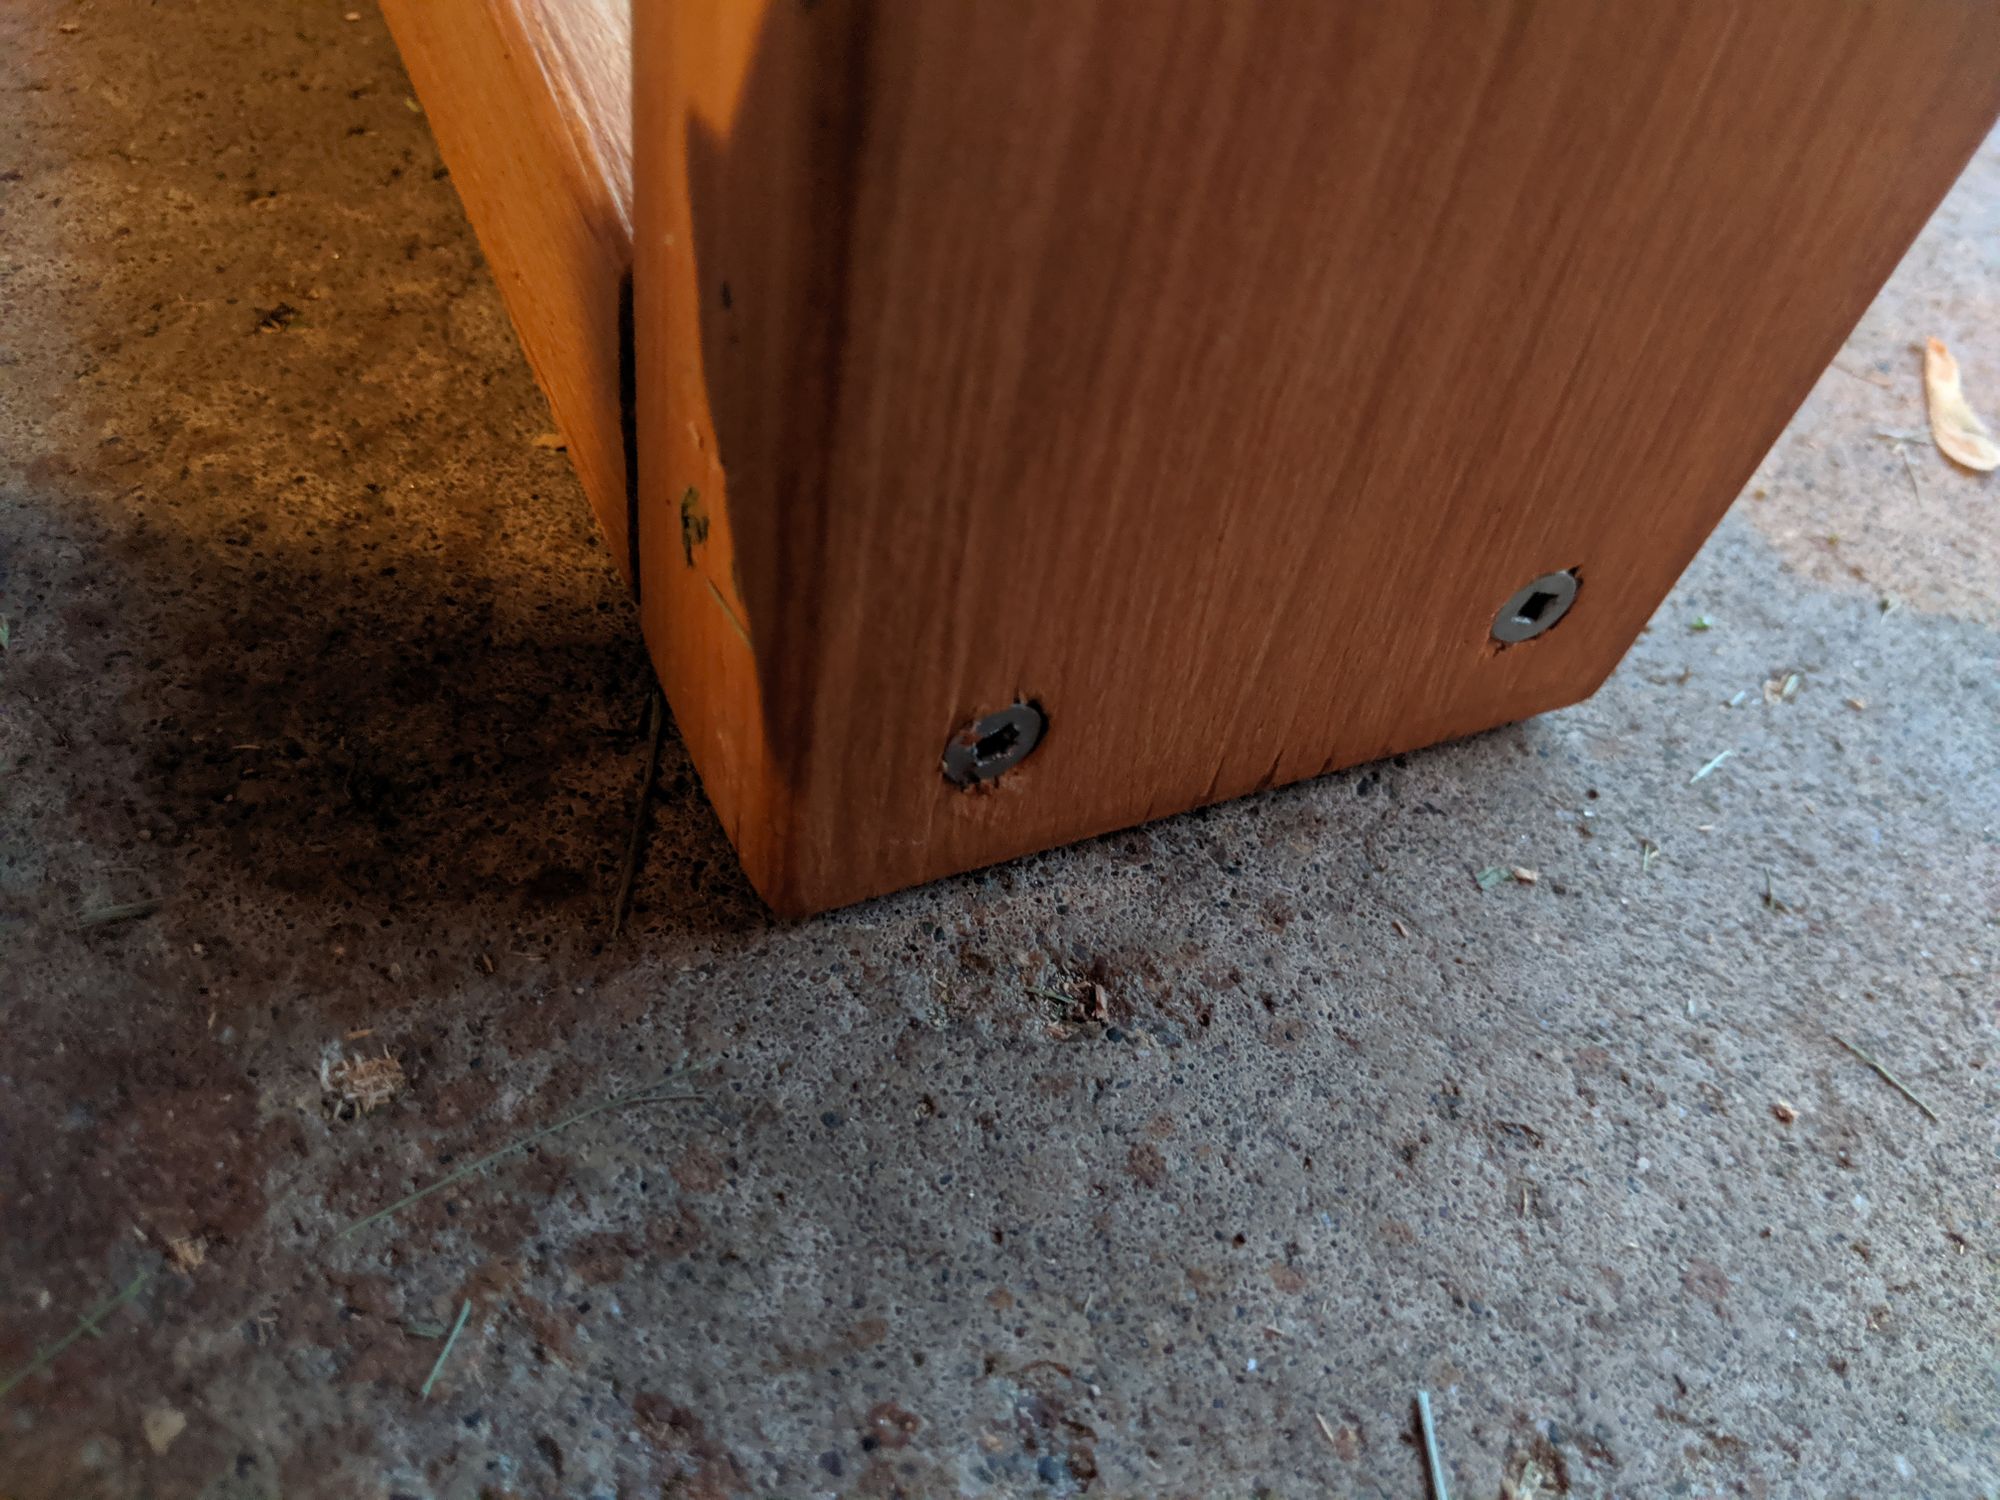
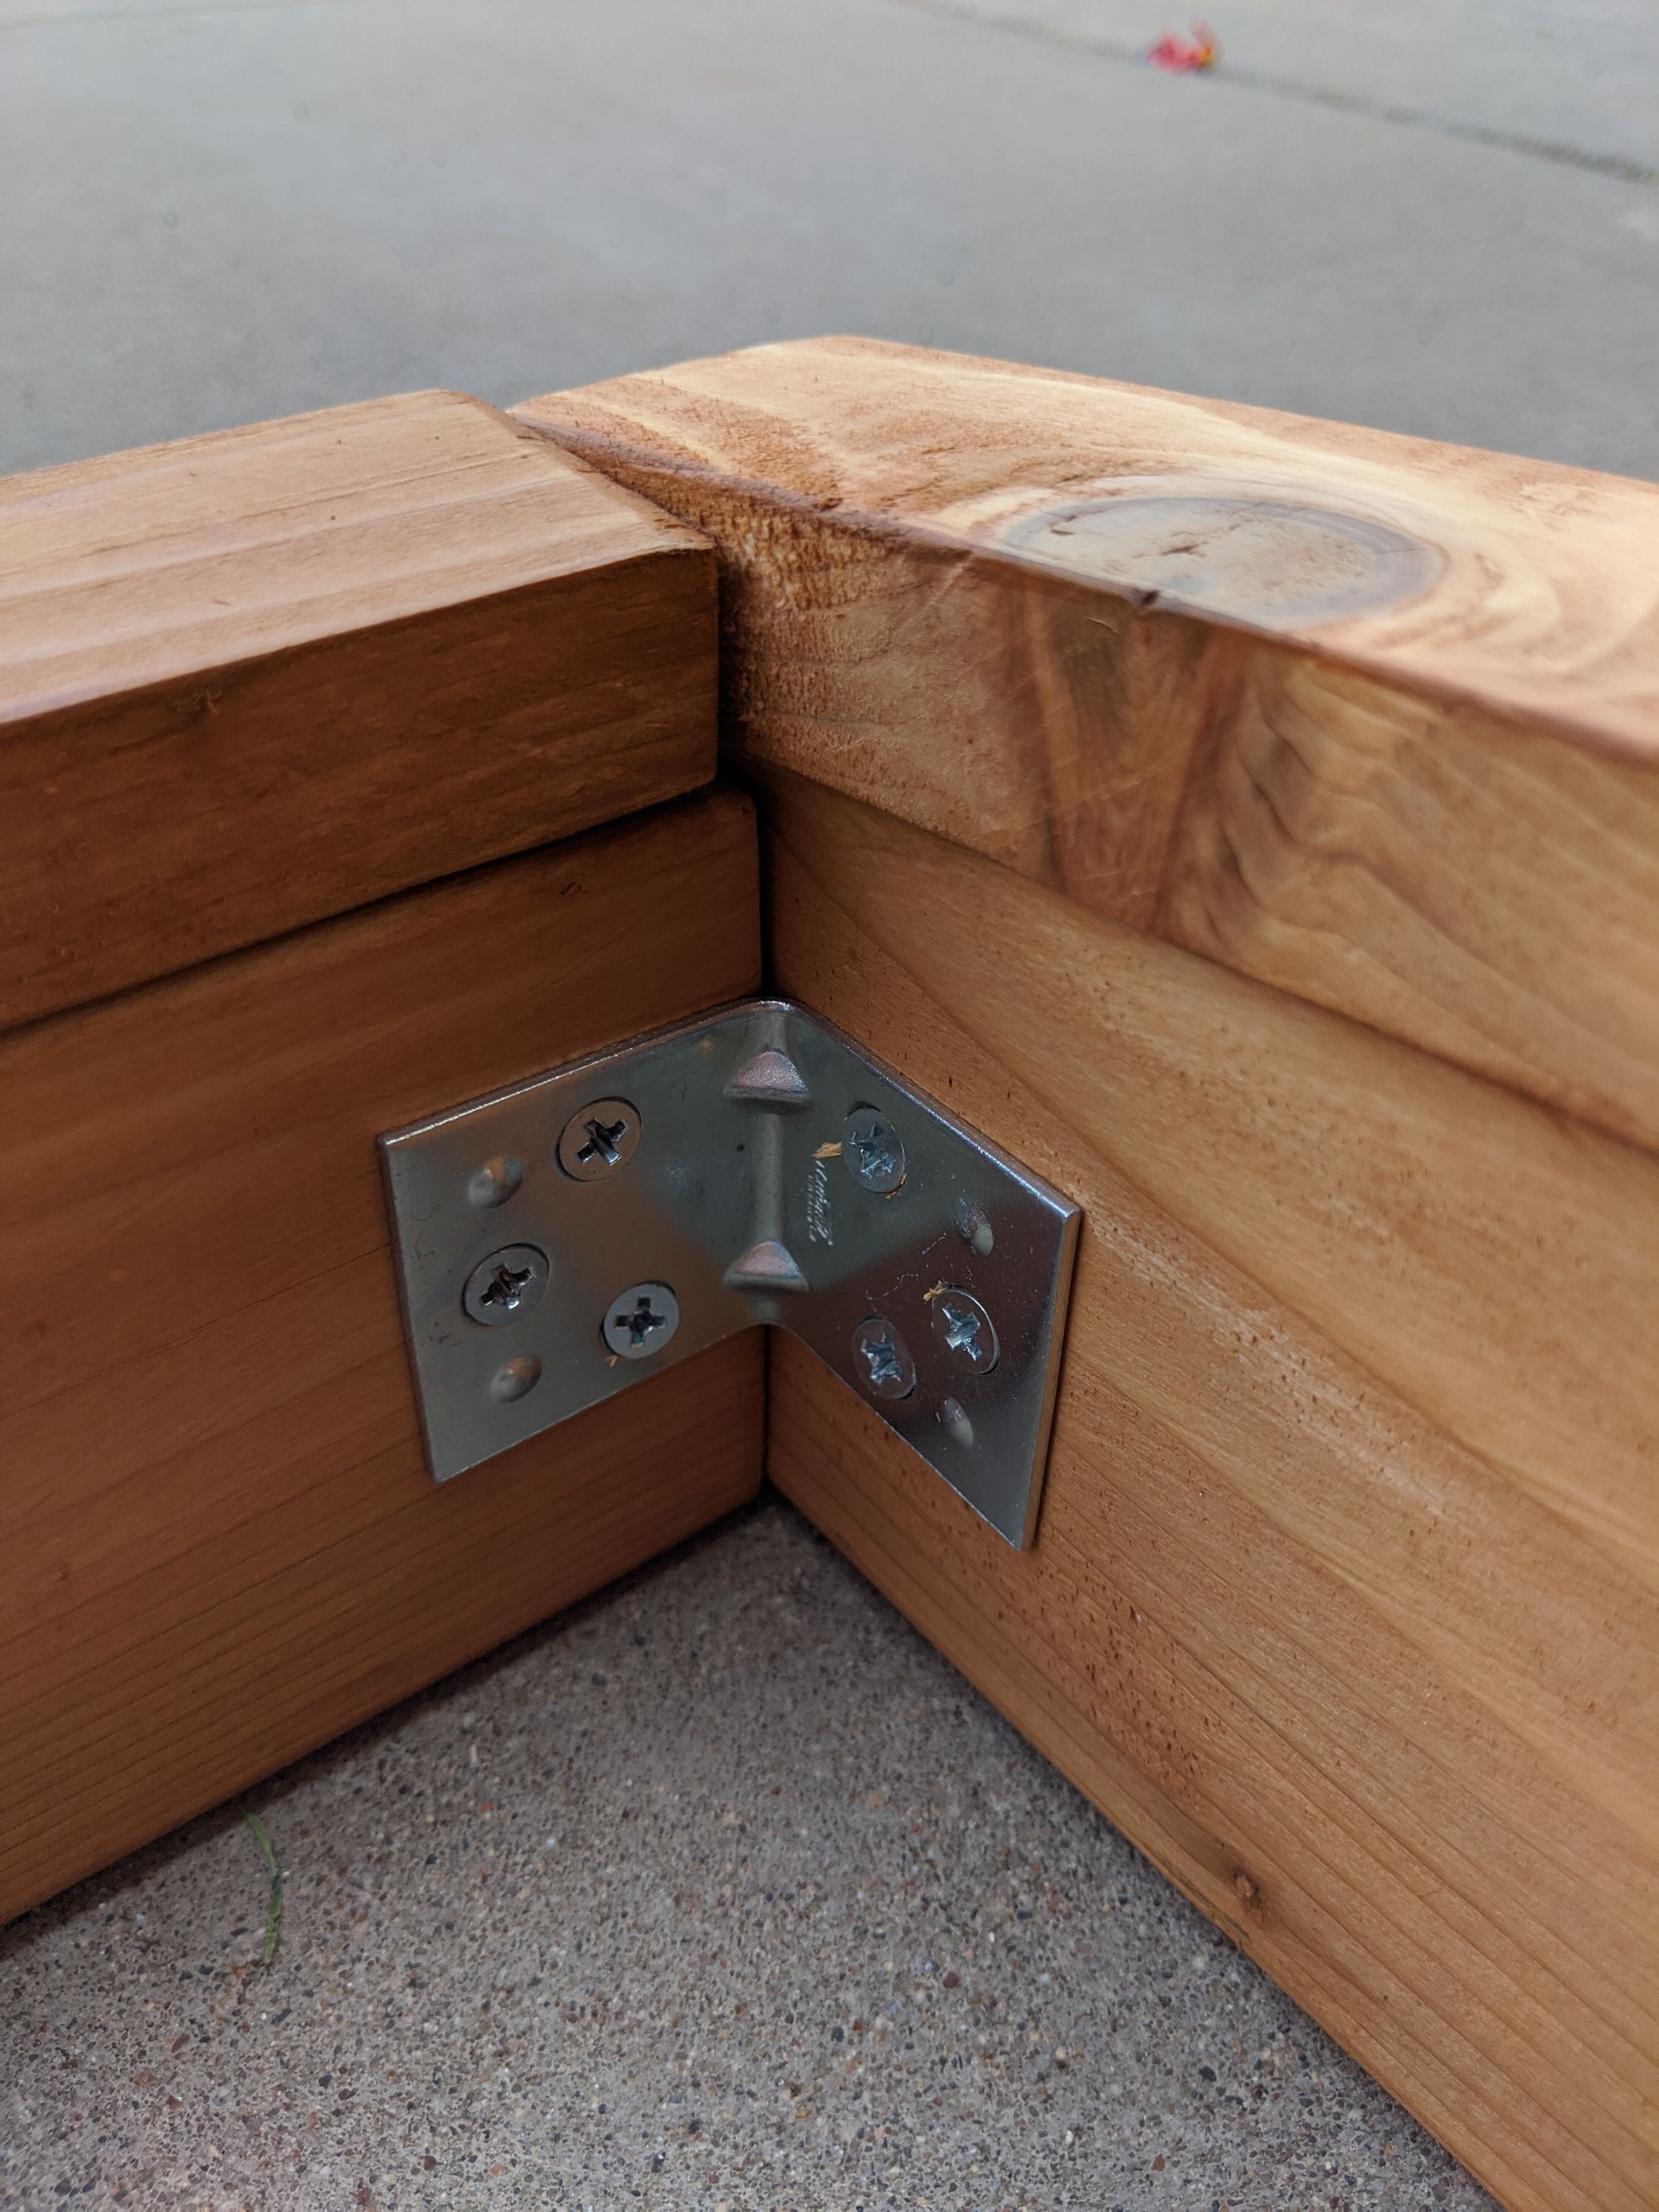
This isn't too difficult. Take the 2x4 pieces and side 2x8 (or whatever you chose) and screw them together using the deck screws (2 screws for each side of the 2x4s). Cedar is prone to splitting so I advise pre-drilling first with a smaller bit and then screwing. Once they're screwed in, use corner braces inside to add some stability. Those screws for the braces are small enough I didn't bother pre-drilling and it doesn't need to be exactly aligned. Aesthetically, I'd have preferred black braces but didn't find any suitable precoated ones and I didn't want to spray them.
The front and back 2x4s are sandwiched between the sides, keep that in mind (see visual diagram above).
The back 2x4 should be slightly below (1/8" or so) flush with the top of the sides to allow the cover to sit better on the incline.
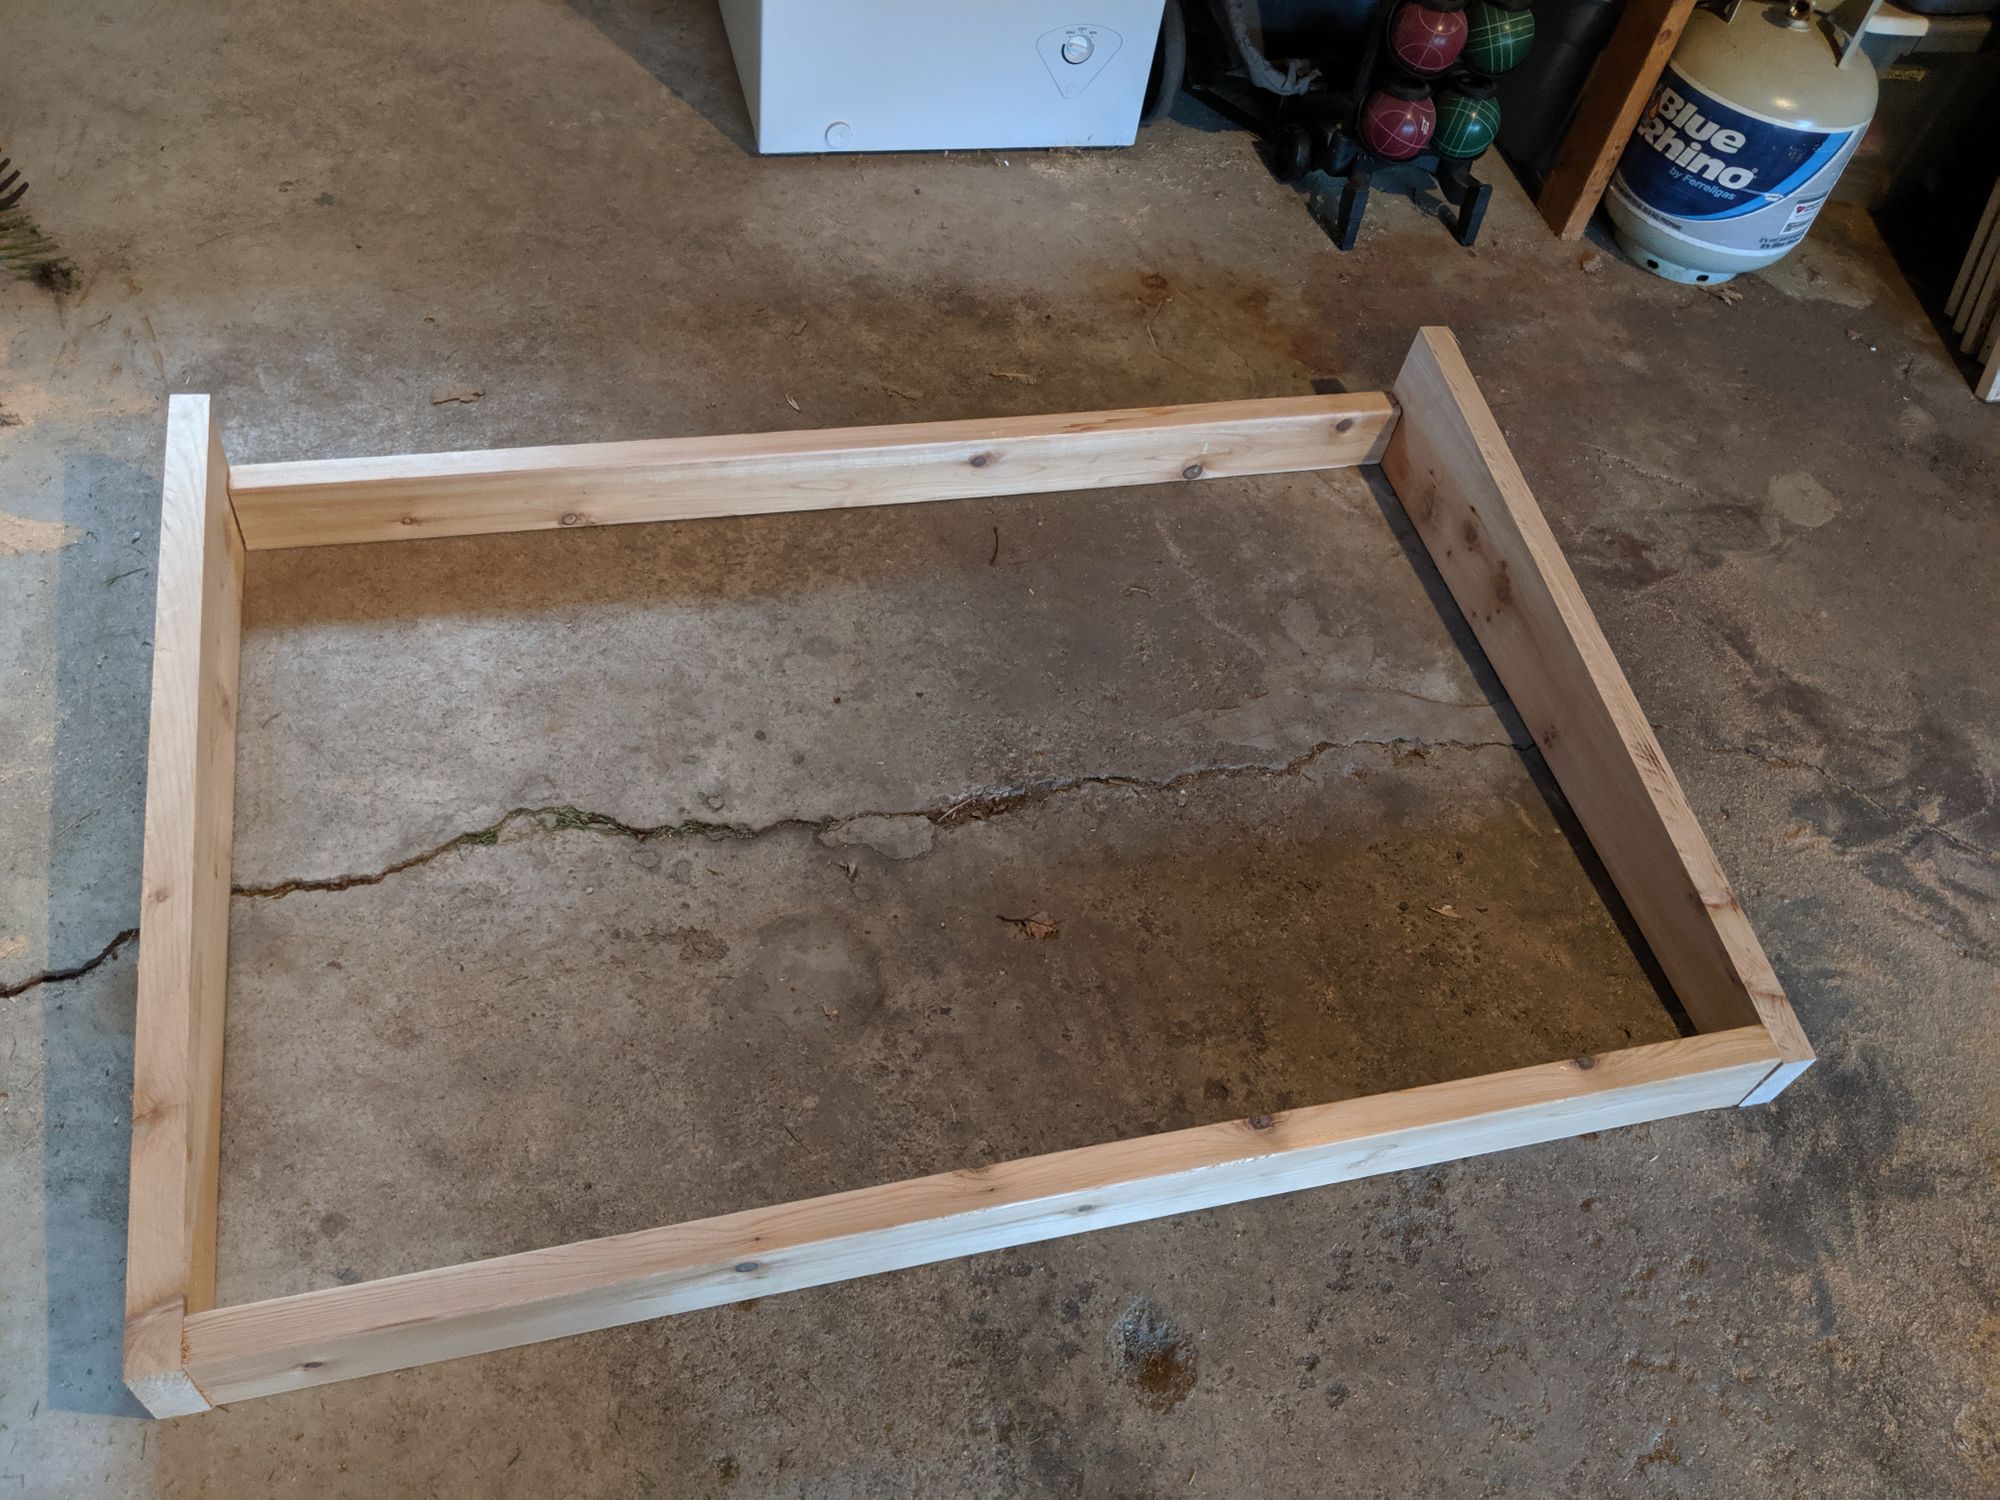

\Once assembled, haul it out and make sure things look good when you put it in place over the window. If your measurements were right, everything should be good.

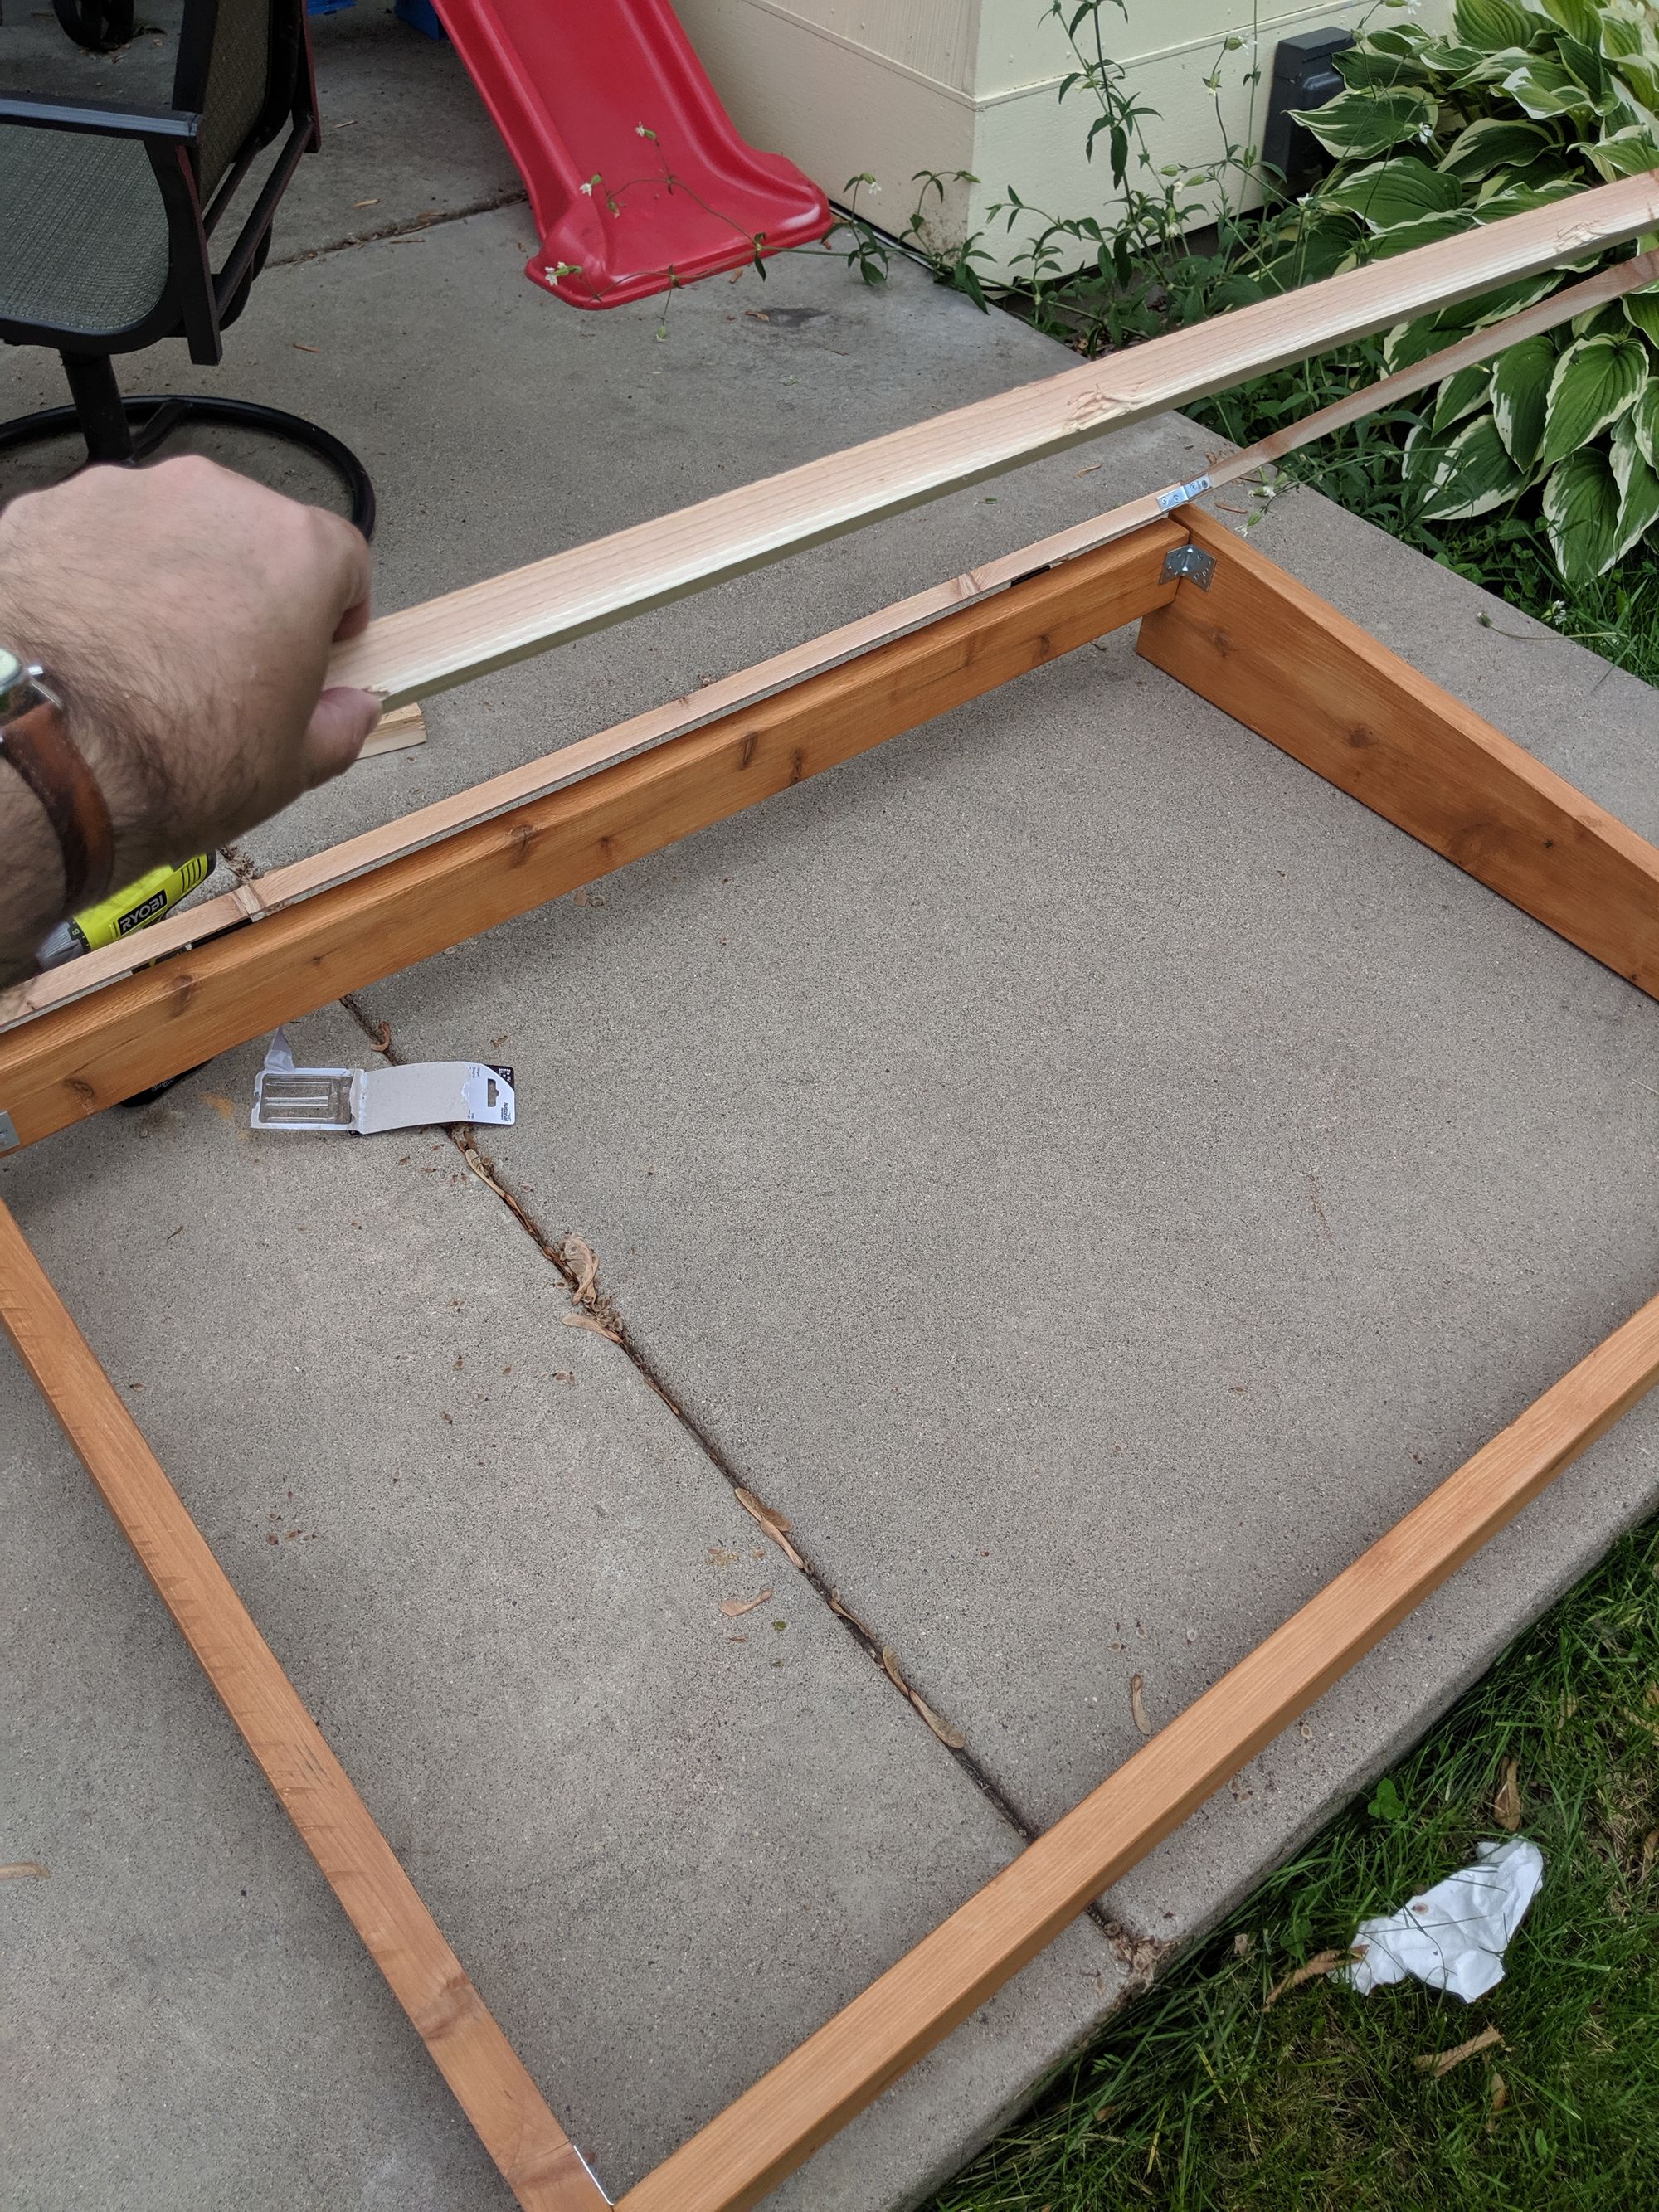
Step 5: Assemble the cover
The cover frame is assembled similarly to the base frame except I chose not to use deck screws and rely on braces only since it was using thinner 2x1 boards.
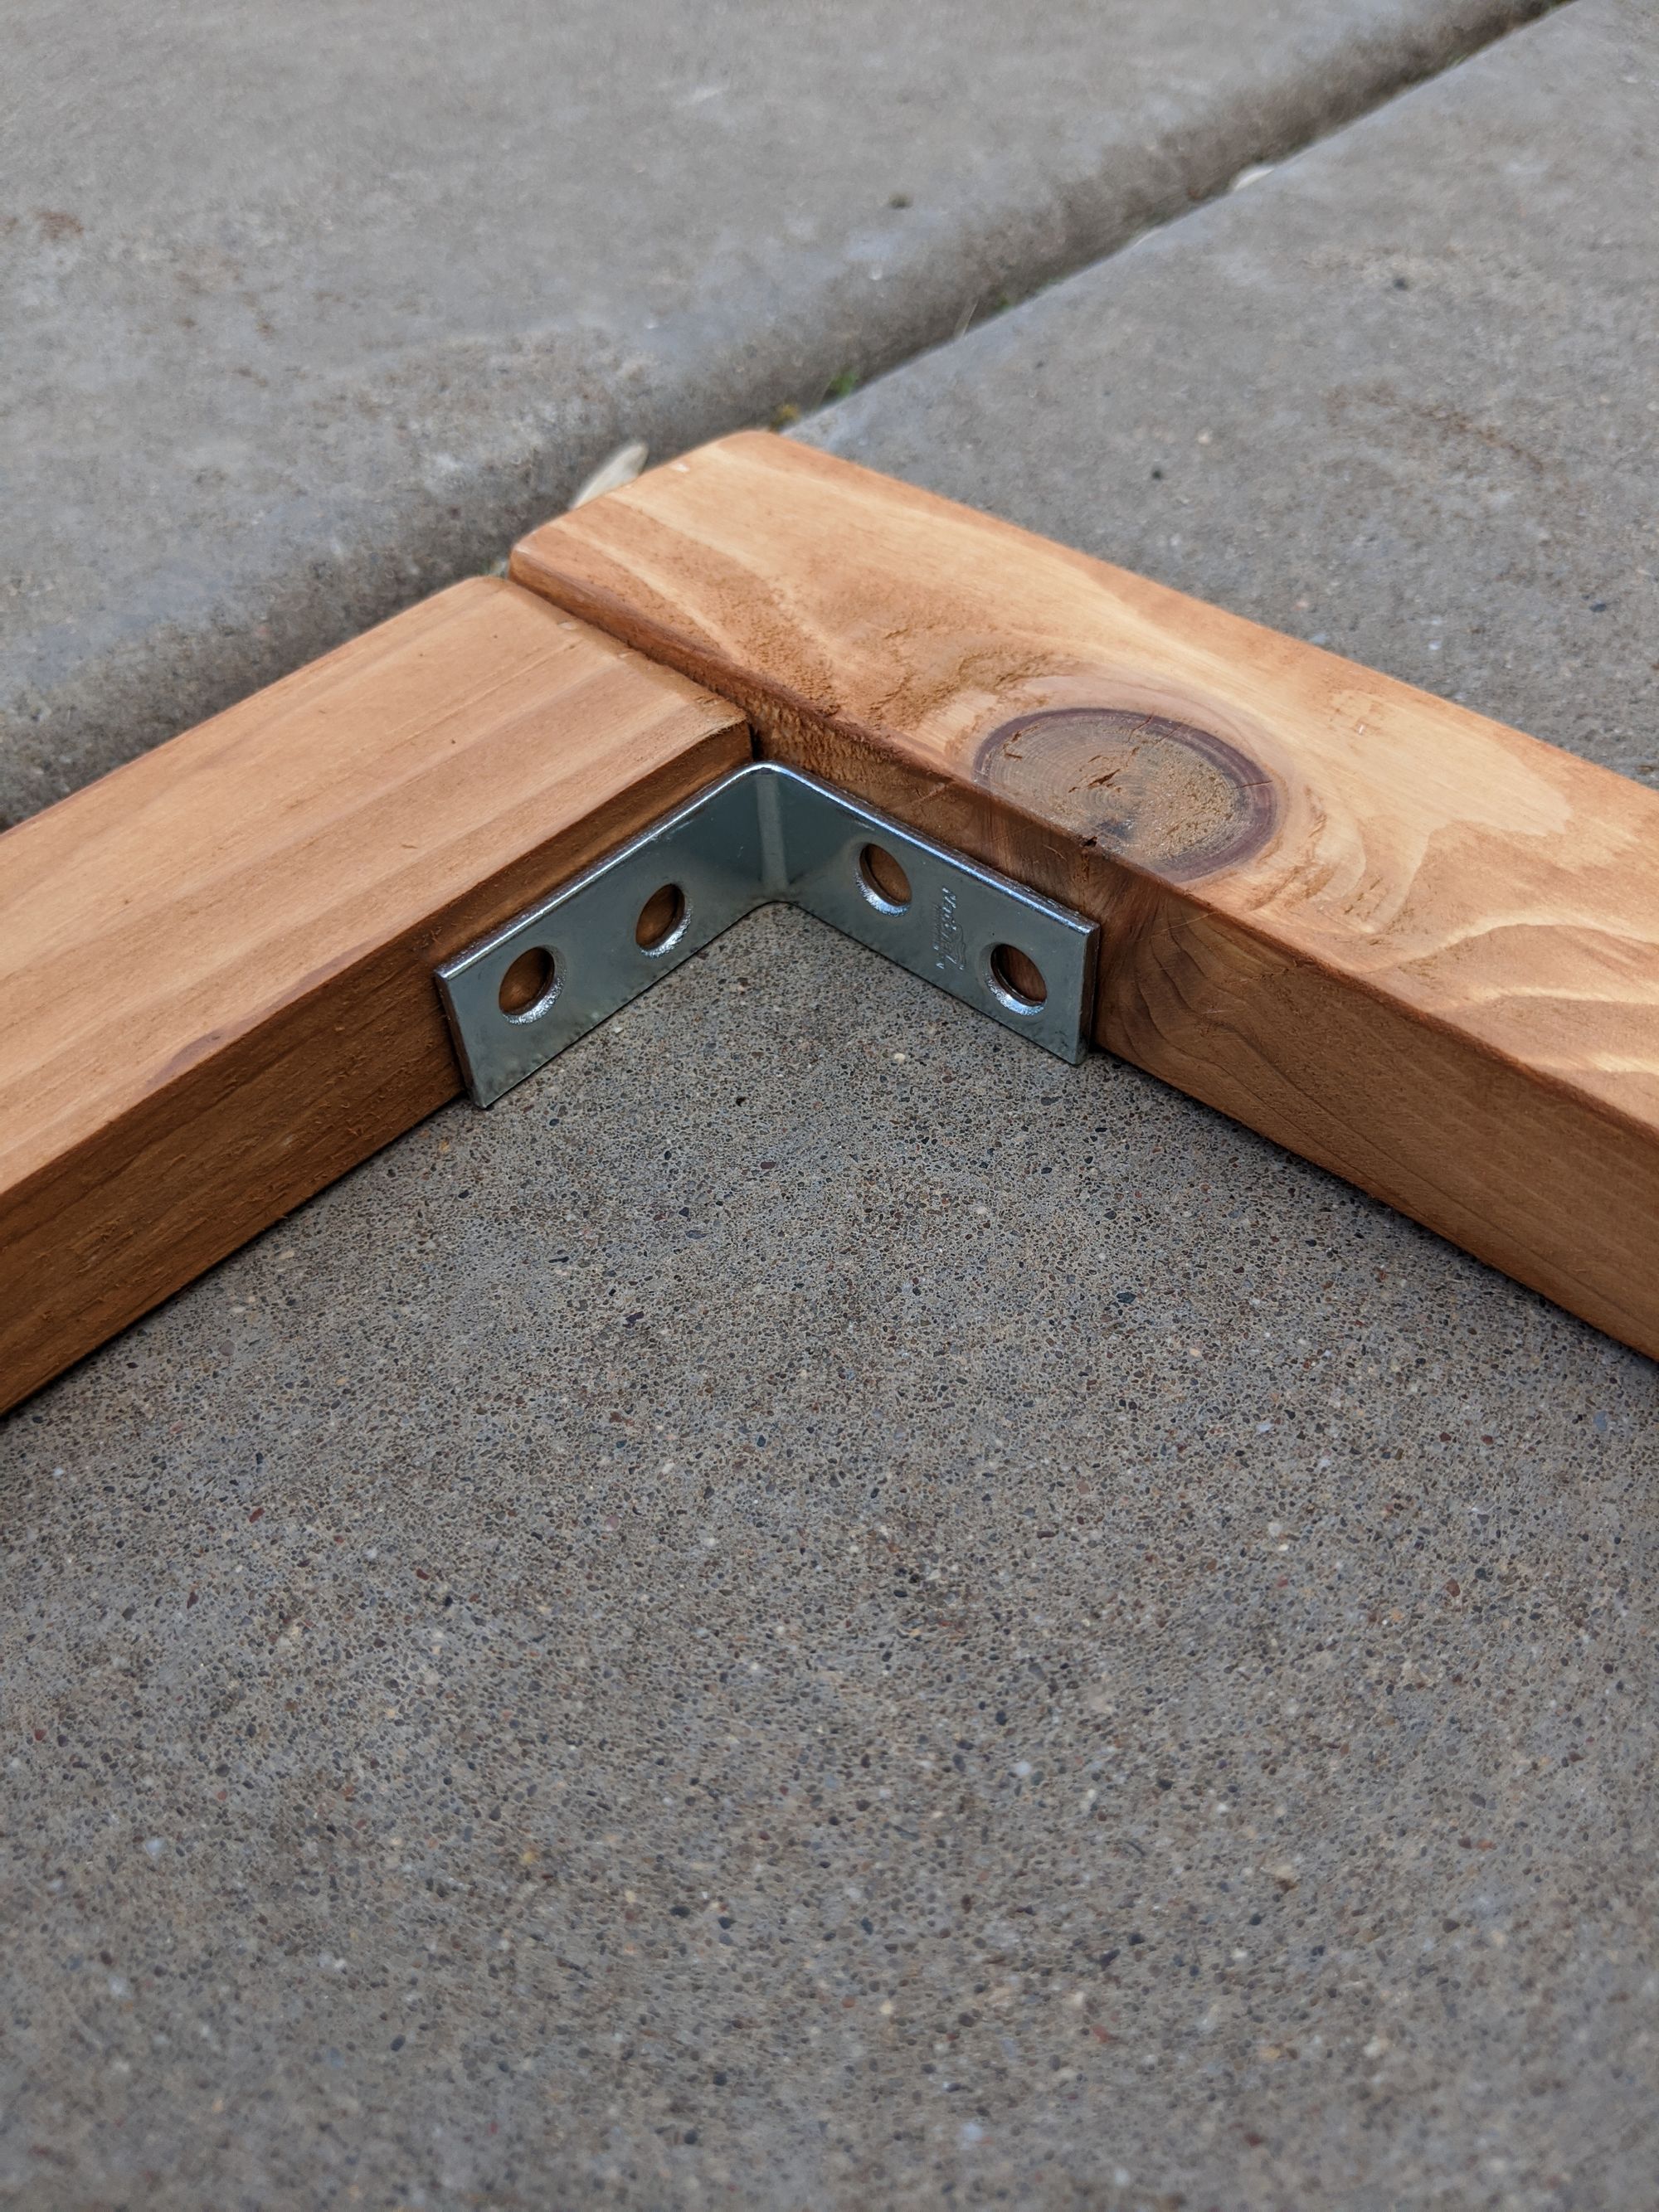
Keep in mind the cover will also be held together when the Coverlite is screwed in on top too.
Above in the photo you can see I stained the cover after assembling once to ensure dimensions, it also sits nicely on top of the frame. I found with the wood I had I needed to utilize the bends properly to get it to sit flush. It'd be best to have straight wood but I worked with what I had.
Once fit is determined, you can attach the cover hinges in the rear.
Step 5: Attach the Coverlite panels
Assembling the frame and cover were pretty straightforward, simple steps. Attaching the Coverlite panels took a bit more work.
Measure and trim panel length
The panels will be laid out so rain/snow will stream downwards through the valleys of the cover. The panel length will probably be 8-12' depending on how much you purchased. Since the cover depth is much less than that (36" for me) you'll need to cut the panels.
Measure the length you'll need and use a grease pencil or other marker to draw using a straight edge on the panel material.
Use a skill saw with a fine-toothed blade to cut the material and wear safety glasses because the material will have particles. The finer the blade, the smoother the cut. I could only find an 80-tooth blade for my saw but 120+ is better. Just ensure the blade is rated to cut plastic/PVC/etc.
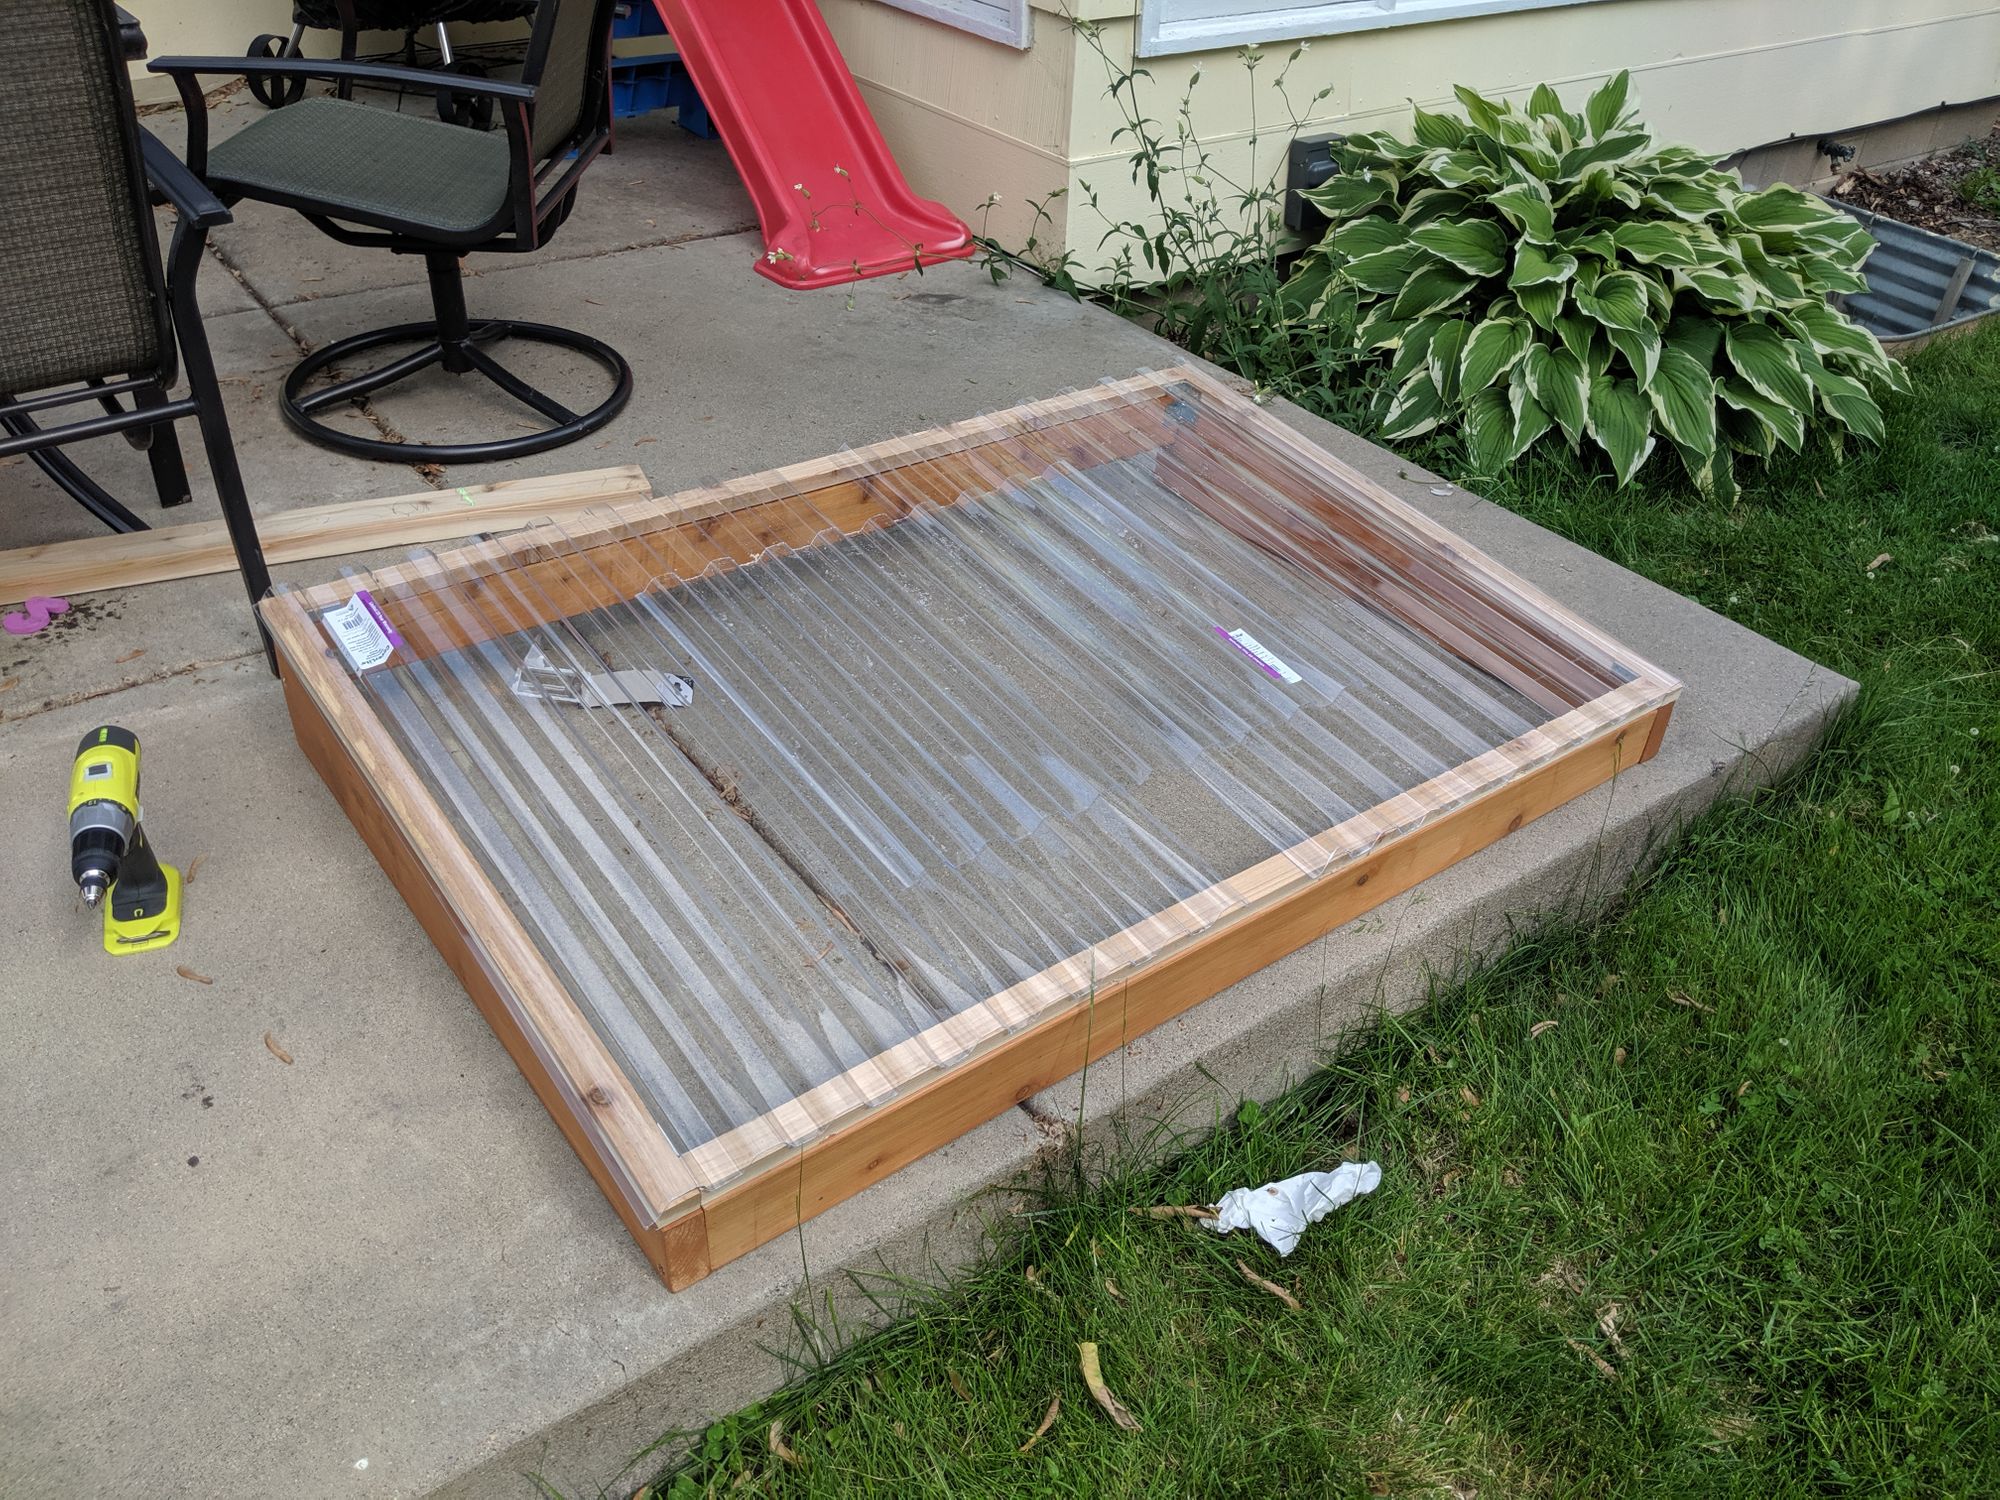
Lay down panels over cover to determine cut measurements
The best way I found to mark where to cut the panels was by laying them down in the way I intended to attach to the frame. I laid down the two sides first (UV-side up!) and then the middle panel to fill the gap.
The Coverlite material uses a "greca" structure which is a "w" kind of design. You want the first valley to be flush with the left side of the cover on the wood so you can easily screw it down. The cover will look like this visually when viewed from head on:
Once laid out, it should look like this:
Mark and drill holes
Mark screw holes with a grease pencil or other marker; I put 3 on each side and then one every 6-8in or so along the top and bottom.
Important: Use a drill bit slightly larger than your screw (1/12" or so) to account for expansion and contraction of the panel in different temperatures. DO NOT drill into the wood under the panels! I made that rookie mistake and the drill holes were too large for my screws to catch.
If this happens to you, my dad showed me how to use bamboo skewers to fix it. Just push them in the holes with wood glue then use a box cutter to cut them off, leaving a filled hole that can be screwed into. Sand the top once it dries to leave a smooth edge.
Lay out foam closure strips
Before screwing in the panels you can insert the foam closure strips that go with the Coverlite panels. You can slip them under the ridges/valleys to form a seal so things don't get under the panels. You don't need to drill into them, they are super soft and the screws will easily penetrate the material.

Use a box cutter to cut the strips flush with the wood when you're all done.
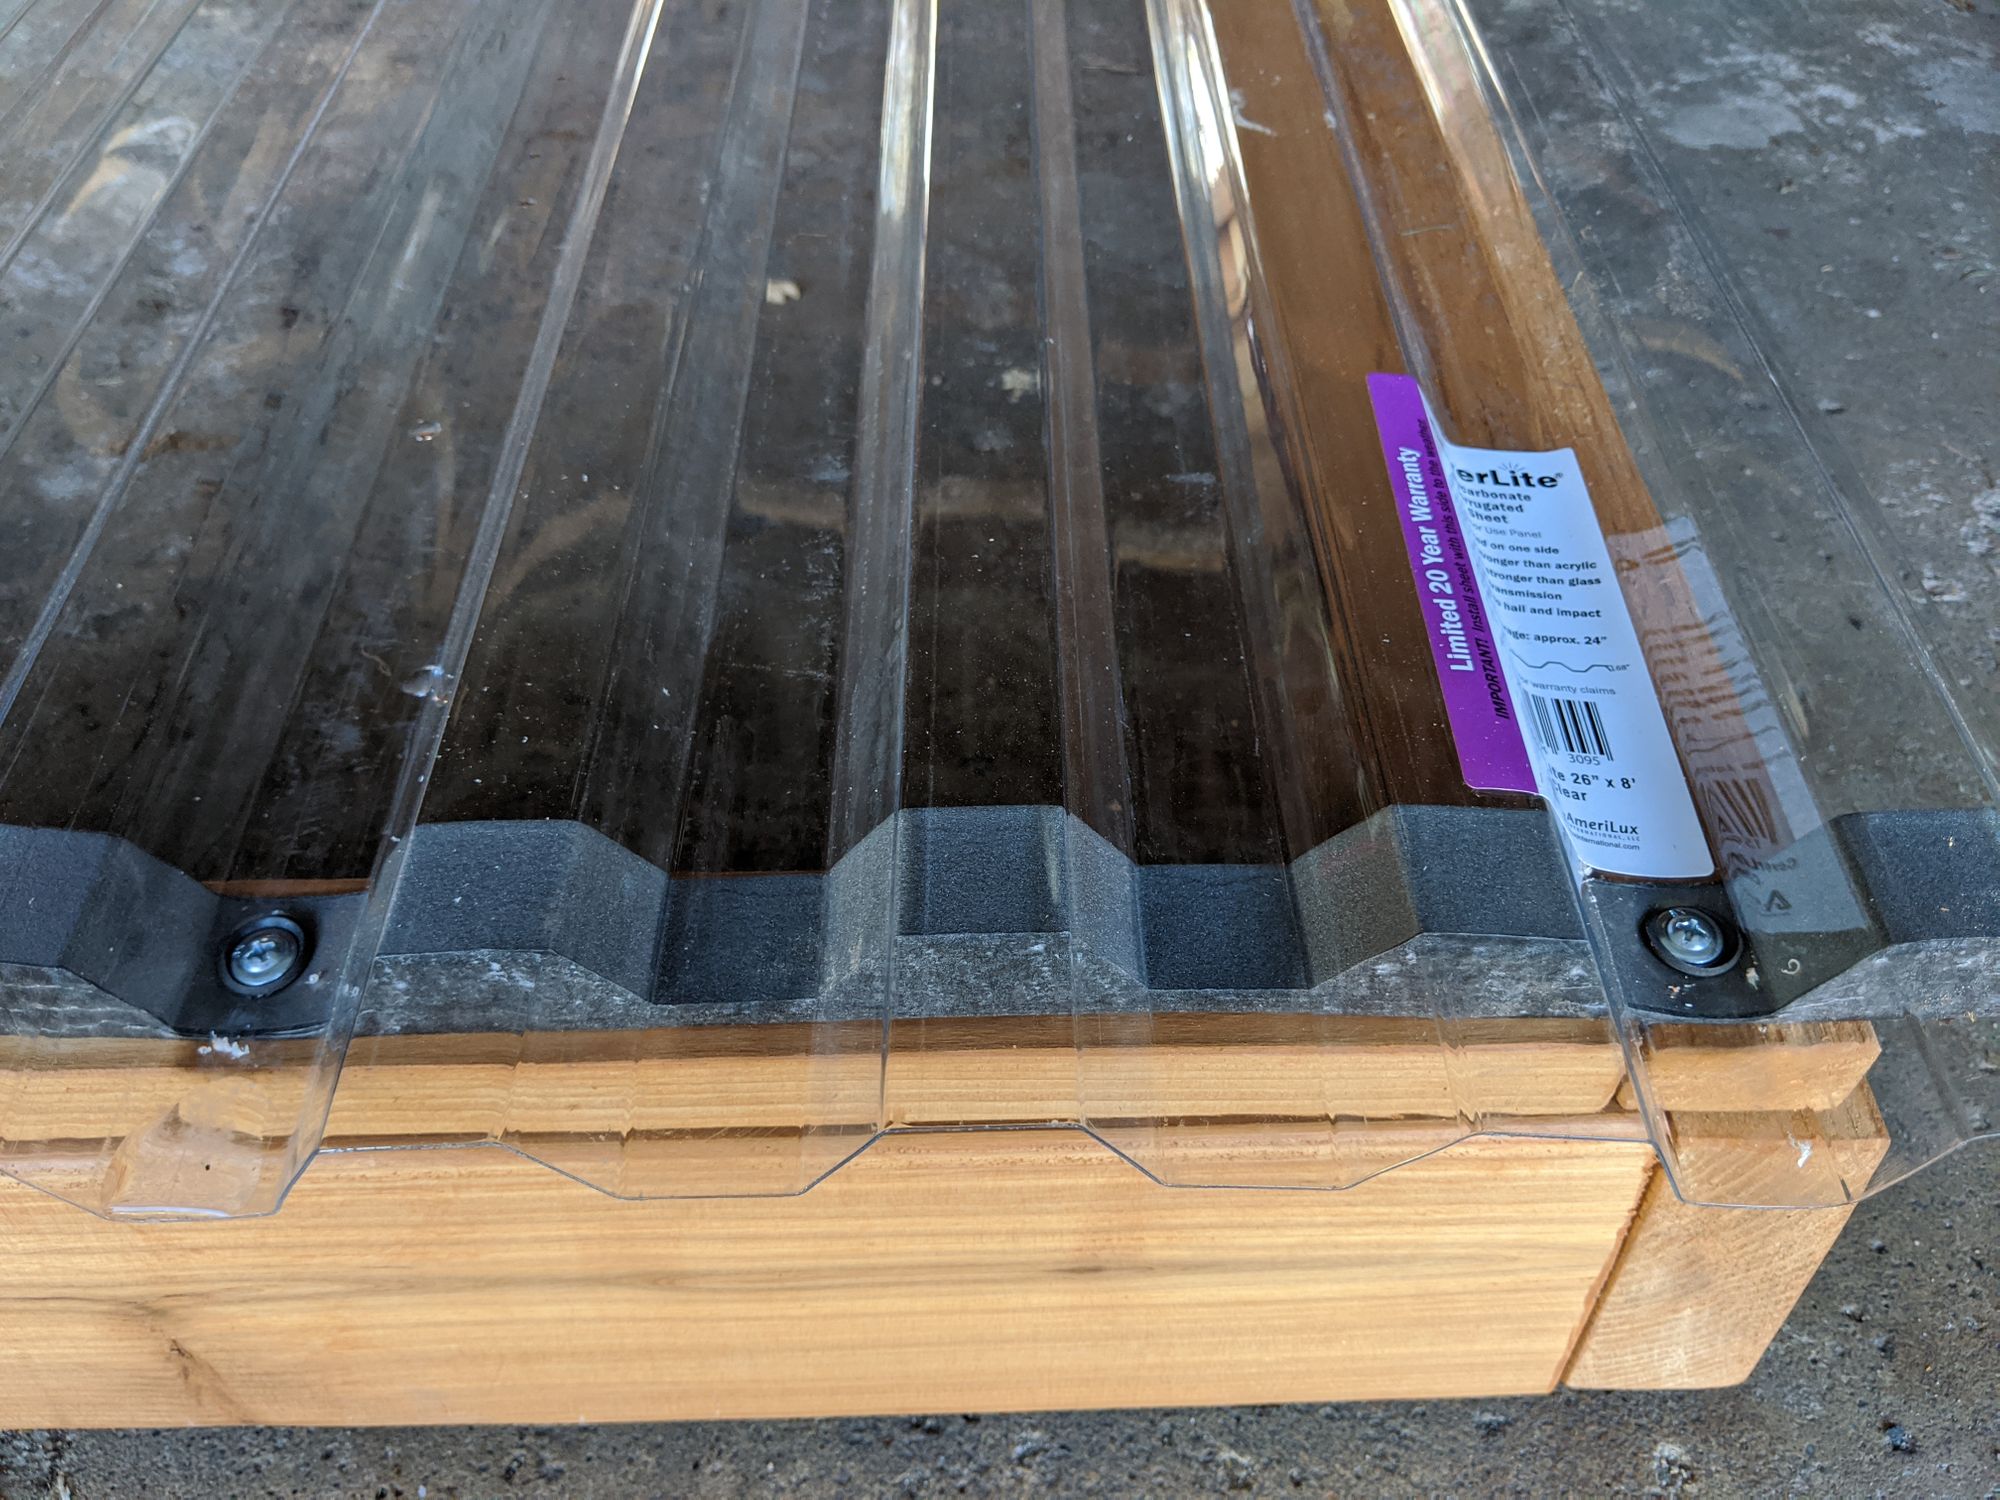
Screw down cover
Once everything is laid out with the panels aligned properly on the wood and foam closure strips situated right you can start screwing down the cover.
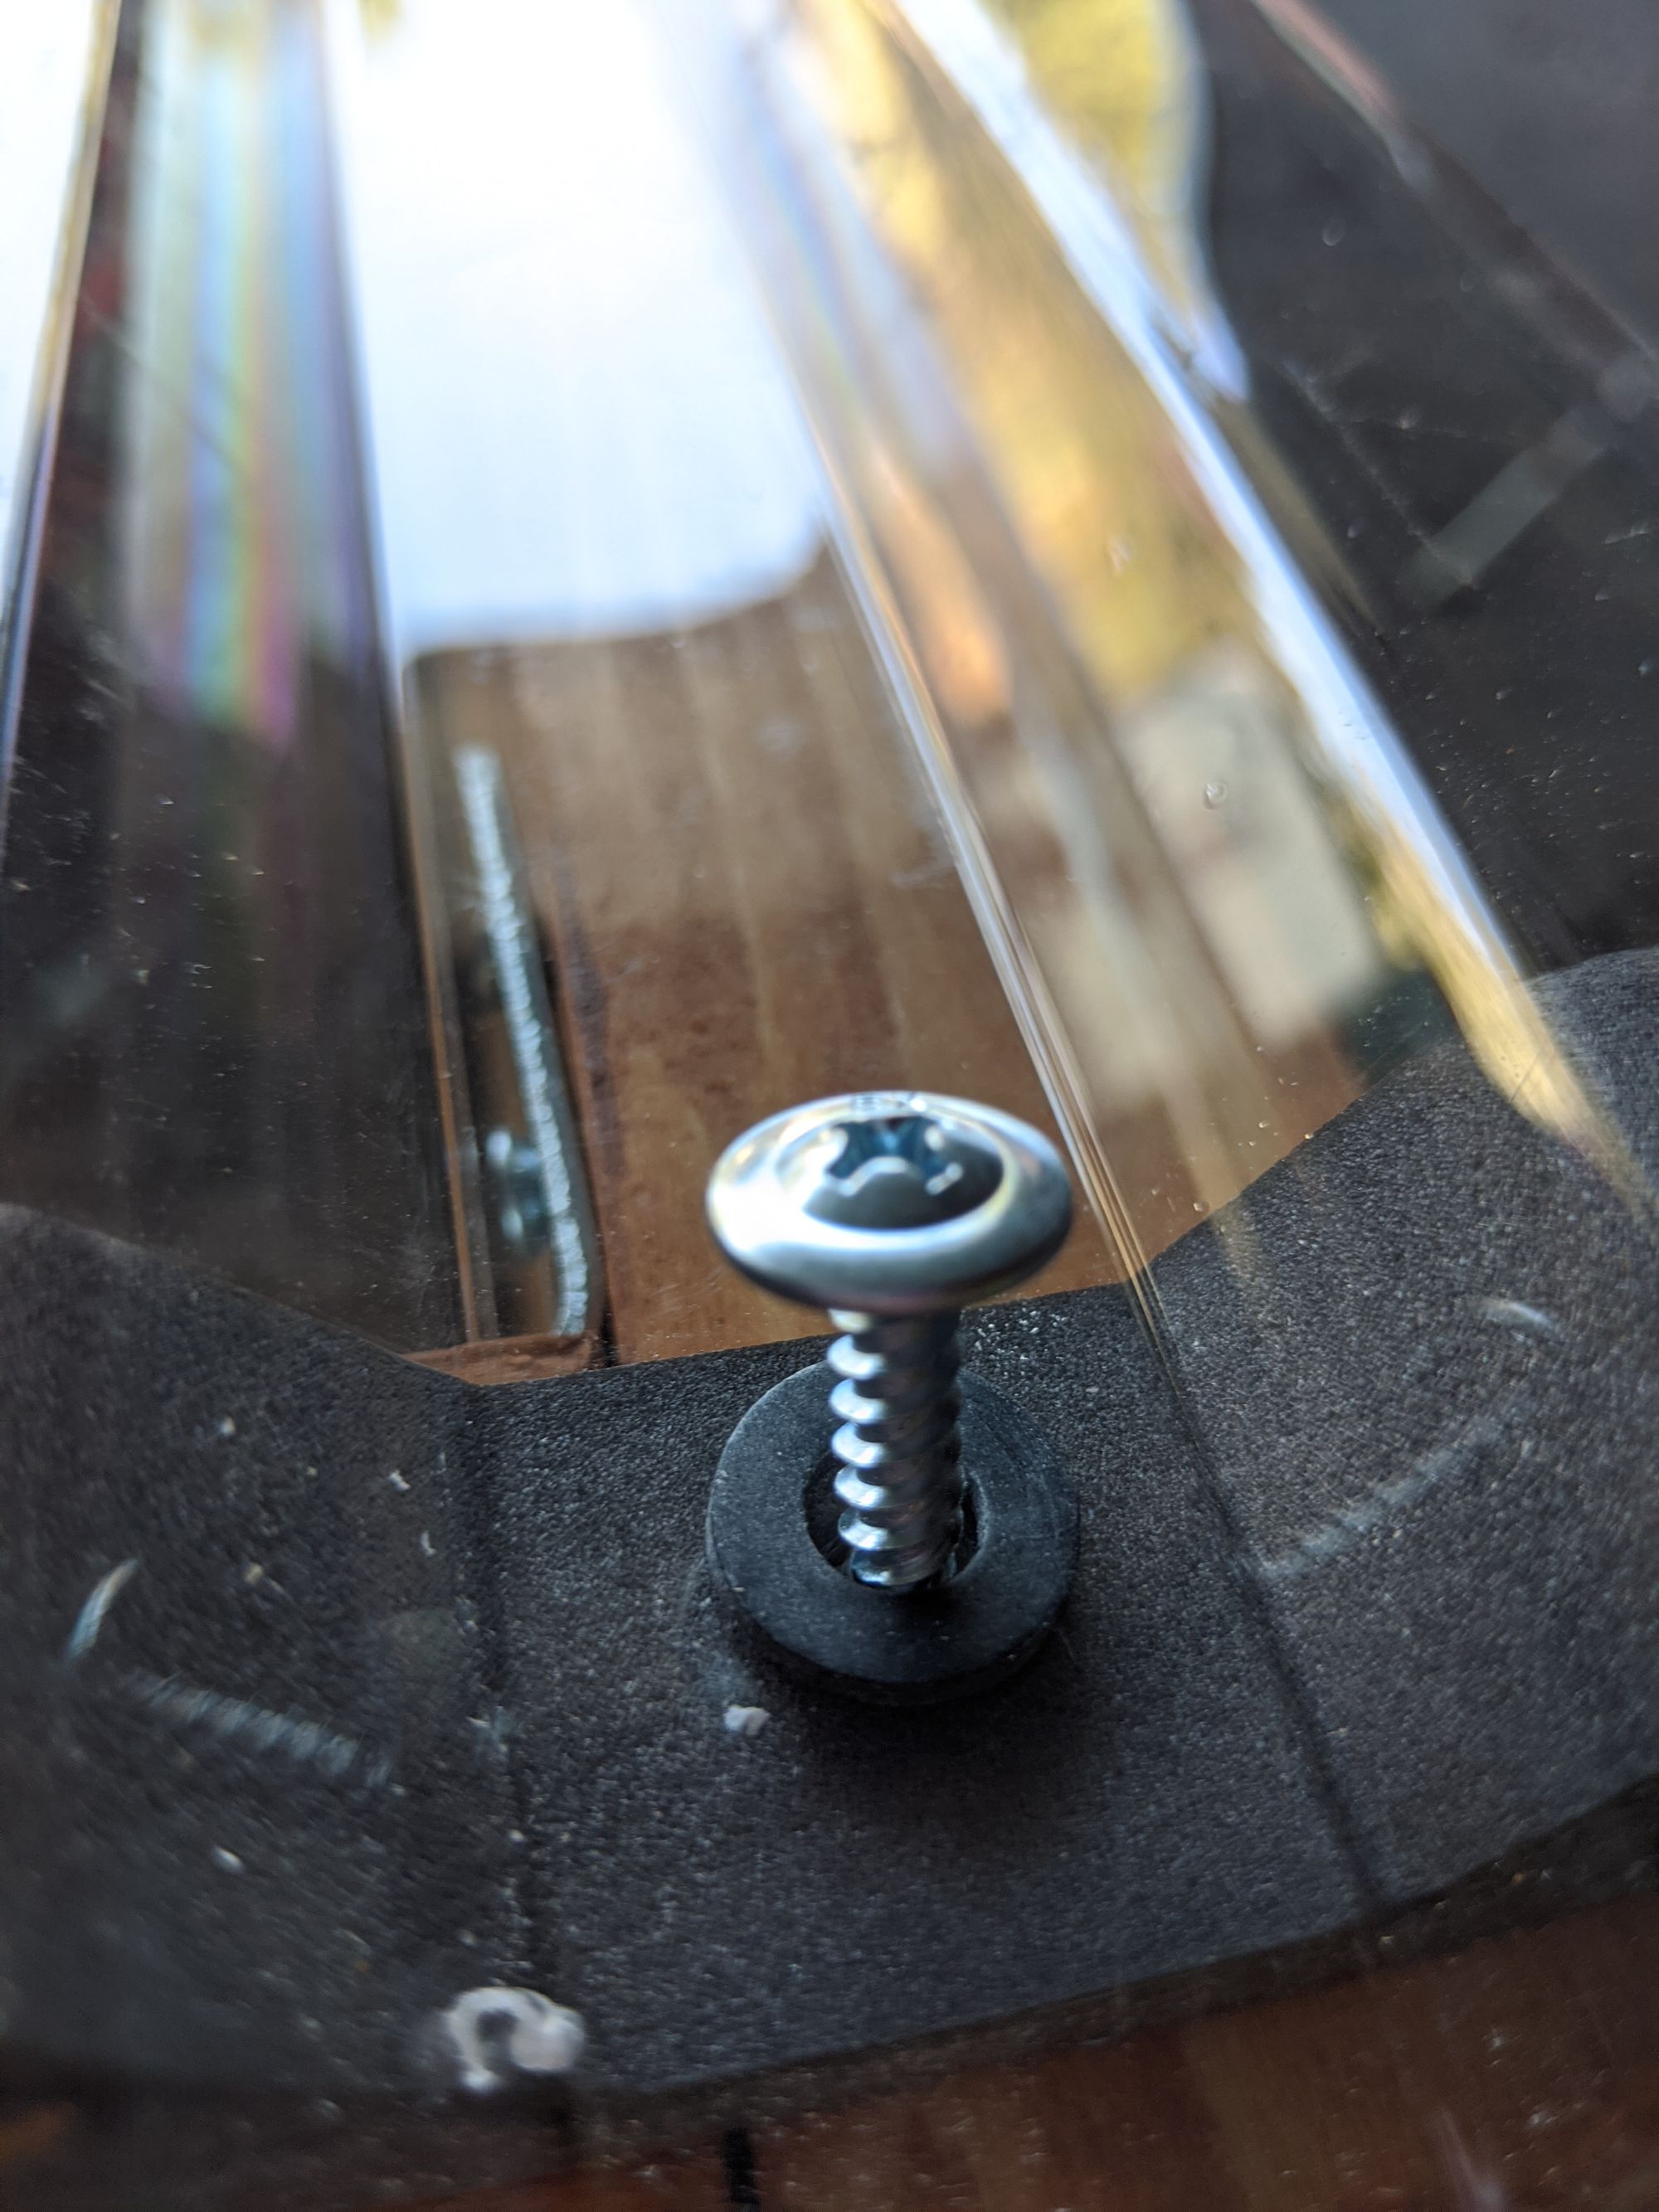
Use the lathe screws with neoprene/rubber washers to form a seal. It's fine to squish the foam a bit so things are tight.
Add the handle and locks
Finally, add the handle to the front of the cover so you can lift it easily and the locks inside the cover (if you want).
Step 6: Level ground, landscape, and place
You can now place your frame on top of your well. Clear around the well and lay down the landscape fabric to protect against weeds or grass growing within the frame. Since the Coverlite material is designed for greenhouses, it'll be nice and cozy within the well for plants.
Use the paving base and leveling sand on top of the fabric to form a nice mound around the window that keeps the frame level and flush with the sand. This should not only look nice but function as a way to keep grass and weeds from growing within the frame. After it's all done you can choose to landscape it however you want!
I'd wait a couple days to let the sand settle before moving to the next steps.
Step 7: Fasten frame to house
This is an optional step. If you don't want your frame to go anywhere or be picked up by someone, it's probably a good idea to fasten it to the house (especially if you have a lock in the frame).
If your measurements were right, the back of your frame should be flush against the wall. However, in some cases the lip of your siding may cause you to need to keep the frame a bit farther out so the cover can clear. No problem. Just get another 2x8 (or whatever you chose for the sides) and attach it to the back of the frame giving you another 1 1/2" of clearance to work with.
If you are fastening to the concrete foundation you'll probably need a masonry bit to predrill holes and masonry screws (or even lag bolts) to attach. For siding, use whatever is appropriate. The important part is that the screws/bolts need to be long enough. If using another 2x4 to anchor I'd probably go with bolts.
Step 8: Fasten roof hinge paneling
This is also an optional step but a good idea if your frame isn't flush with the foundation and water can get behind it.
Coverlite has special roof hinge panels that will let you attach one end to the house and the other to the frame. They are sold right next to the panels.
You will need to do the same exercise of measuring and cutting to fit as well as drilling holes through the hinge panel and Coverlite panels on the frame (remember to not drill into the wood!).
Attach the hinge panel to the cover the same way with lathe screws and rubber washers. Attach the other end of the panel to your siding using whatever is appropriate. I have cement fiberboard so I use masonry screws with predrilled holes.
Step 9: Admire your work
That's it, you're done! You should now have a beautiful new window cover.
Hope you enjoyed the guide and let us know if you made any improvements on the design or would change anything!
I wrote the first draft of the guide last year for the first cover I did and then used the guide to build the second cover. I am pretty sure I got all the steps so I hope this helps anyone else looking to build custom window covers!