Disclosure: Some links on this page below are affiliate links, meaning, at no additional cost to you, we will earn a commission if you click through and purchase. Read our disclosure for more info.
Again, I found myself trawling through the scraps bin at Joann's, looking for something salvageable that could be made into something interesting.
Mostly leftover fleece, clearly from winter hats or blanket projects. Not much that would inspire a new project, or spark any joy. I was ready to give up, to go find my muse in the aisles. But then I pushed aside some Green Bay Packers flannel and discovered one yard of beige fabric, with a blue pattern on it. I liked it. Then I turned it around and saw a flash of color. Blue, yellow, red, white. I knew I had to have it.
It was One Dollar. The Holy Grail. 🙏
Download the Pattern
The pattern is free to download, you just have to enter your email to subscribe and access the download page:
👉 Download Free Printable PDF of 1-Yard Loose Shirt Sewing Pattern
You can unsubscribe at any point but we hope you stay for more patterns! Visit this page to view all the patterns I've published so far:
 May we suggest an author? Cassie Kamran
I'm writing this on a Monday night, after driving 9 hours home from my mom's house, so I'm sorry for the writing style. I was pretty excited to bring home this scrap piece and see what I could do with it.
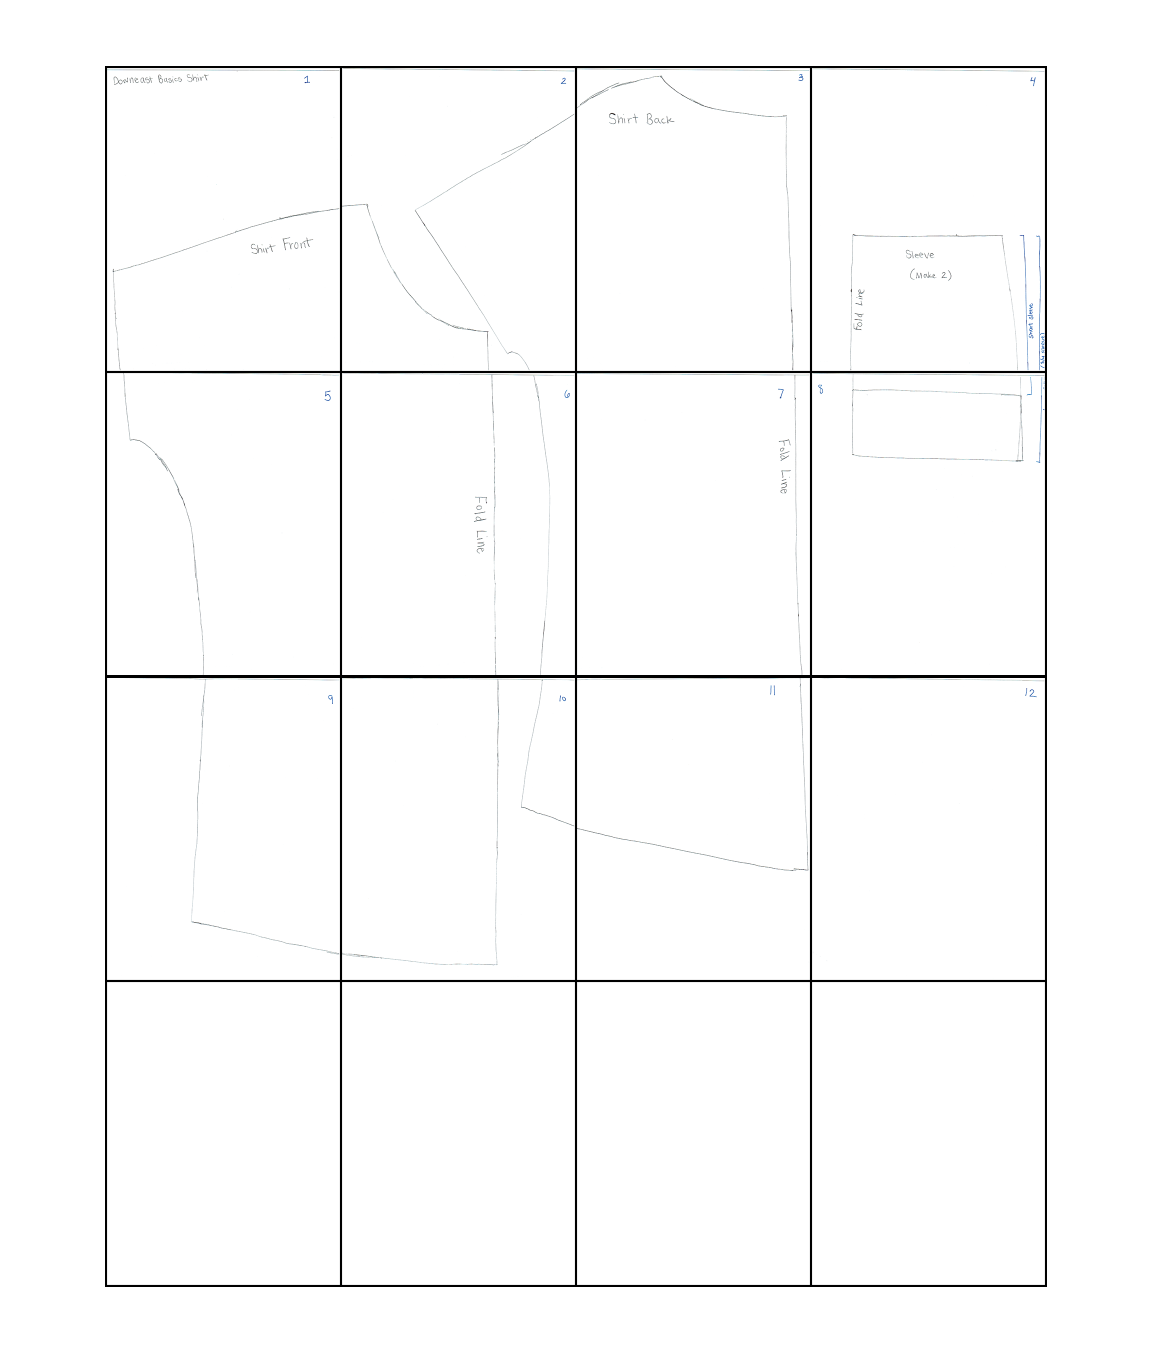
I decided I wanted a loose, flowy t-shirt similar to this one from DownEast Basics (I buy a lot of stuff from them!):
I really like this t-shirt but it's actually a little too flowy for me, and sometimes ends up giving me an unflattering silhouette and emphasizing my tummy. I wanted to keep that in mind while designing my version of the shirt. I knew that if I made it slightly shorter, I could easily fit the entire piece onto one scrap of fabric.
I started by measuring out my pieces. Simple enough. I laid the t-shirt onto my table and began to trace everything onto butcher paper. I traced the front and back pieces, as the back is slightly longer than the front. I also traced out the sleeve. I cut everything out and remeasured to make sure that everything fit (when I previously measured and designed a shirt, I ended up making the sleeves way too small, so I'm still a bit sensitive about it!)
Once I had finished my tracing, I cut out my pieces. Easy. Two sleeves, front and back pieces.
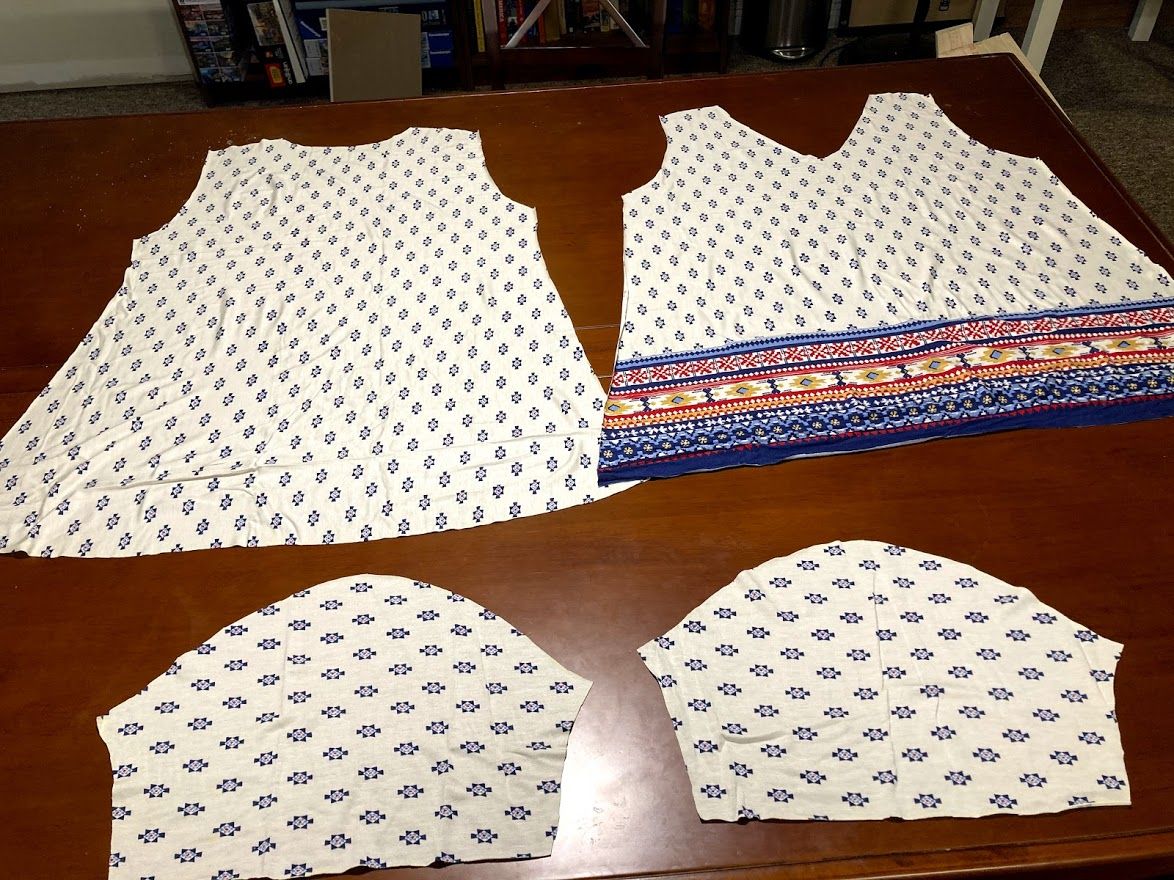
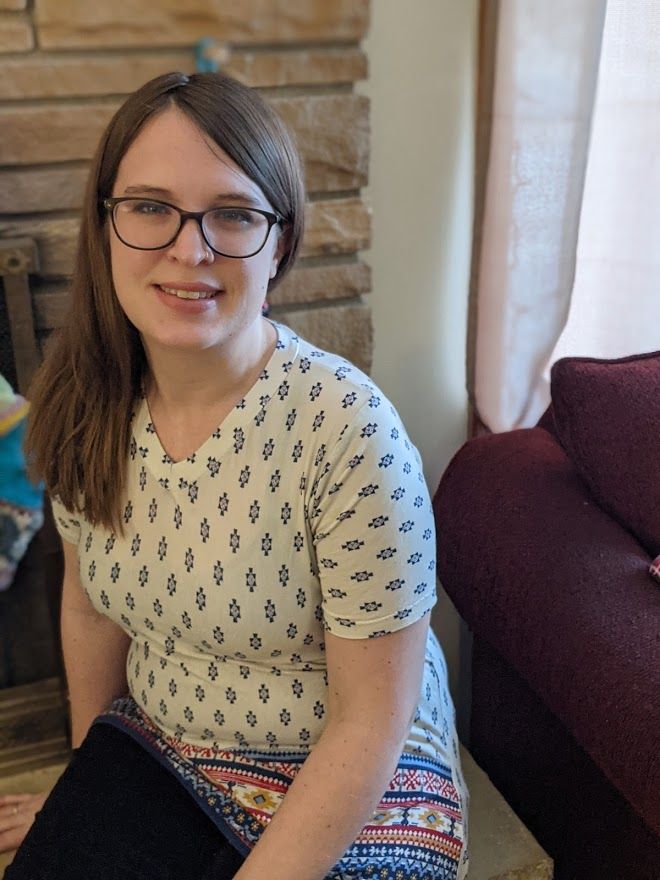
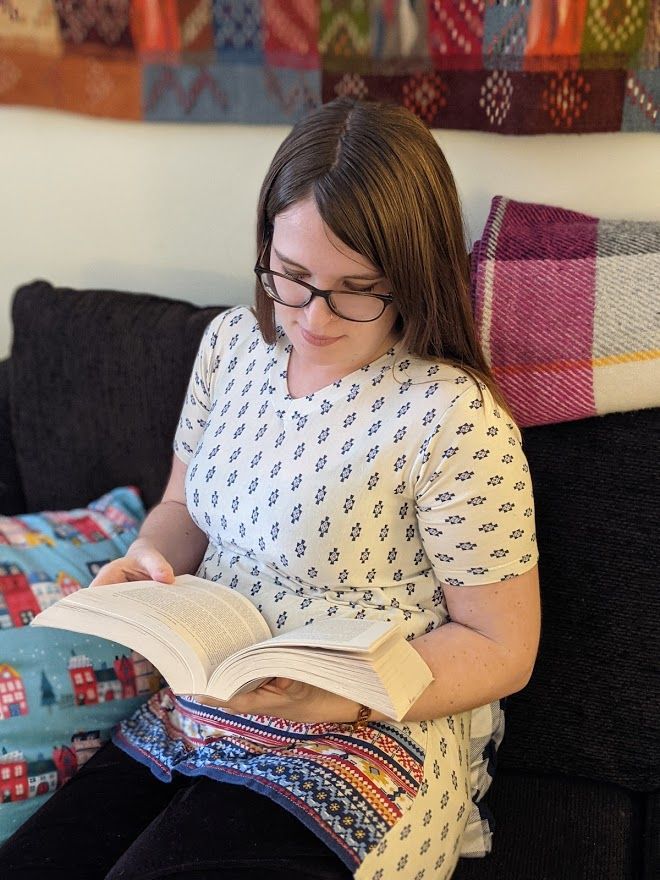
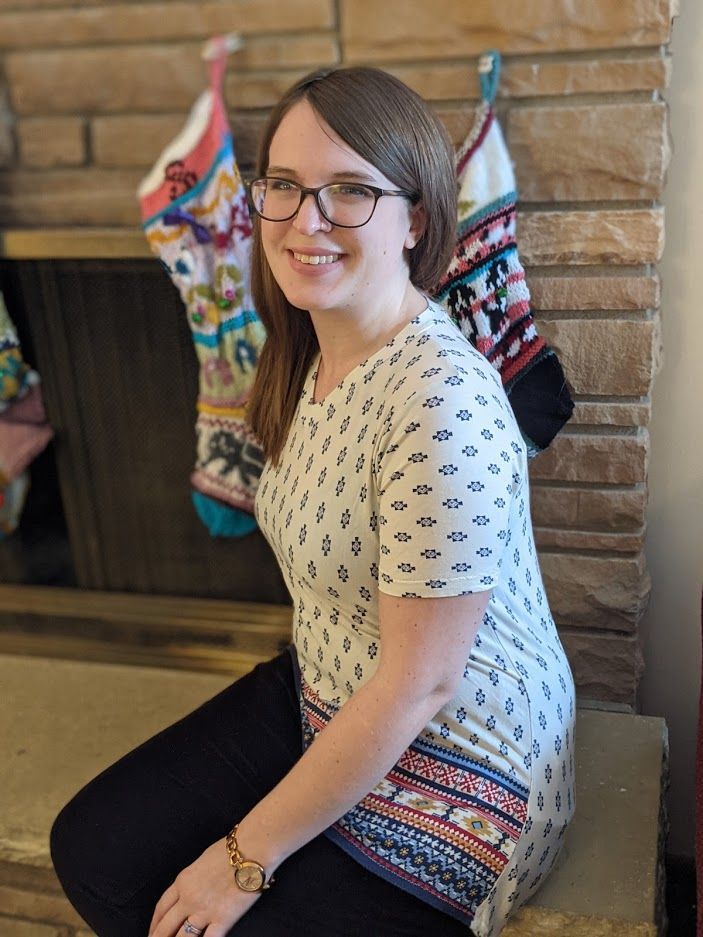
As you can see above, only one part of my shirt had that interesting stripe of color. I ended up making that the bottom edge of the front piece. I have no idea why the fabric looks like this, but I like it. If I did this shirt again, I might consider making that the bottom edge of the back piece, for something different. I actually think I cut my fabric the wrong way on the grain. But I simply cannot imagine having that stripe go vertically on the shirt. I'm not sure where I would put it, as it would have to be asymmetrical due to the stripe being on the very edge of the fabric. Oh well, I cut it out so the stripe would be horizontal, so I guess that takes care of it.
I sewed the shoulder pieces together, then sewed the open sleeves on. I folded the entire thing, right sides together, and sewed the inner edges of the sleeves down into the body piece. Easy!
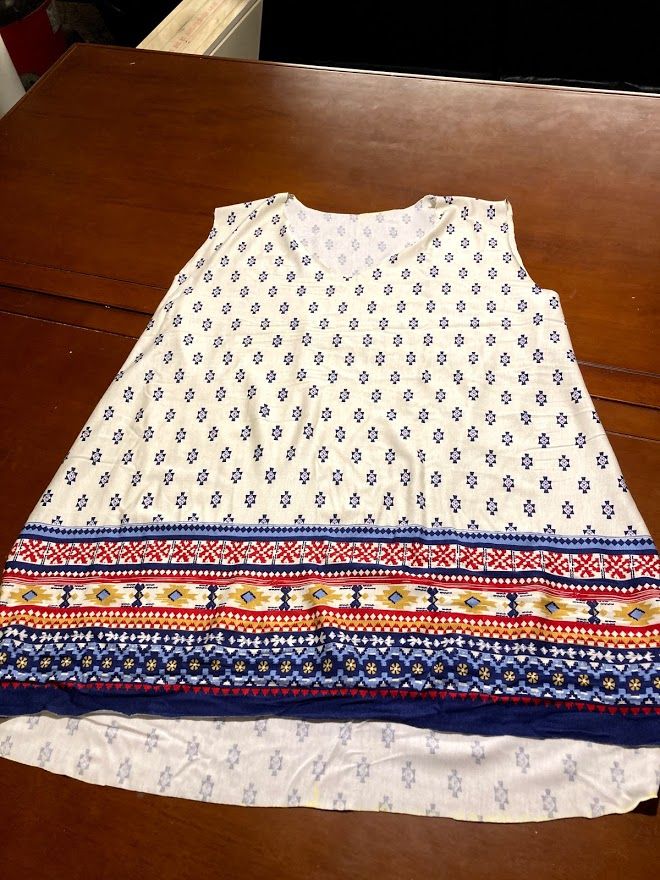
All I had left was hemming the sleeves and the bottom of the shirt. I did that quickly, then used a strip cut into a shape to make a V-neck t-shirt, and sewed that onto the top. I used my serger for every step.
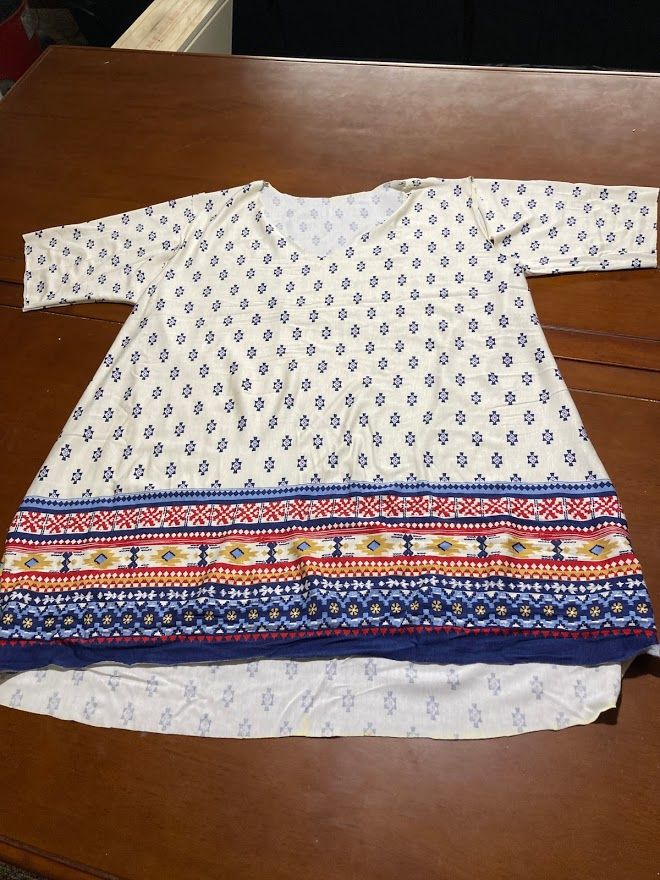
All in all, this project took maybe two hours? I really like the finished project, and have worn it to work and out and about. The only thing I would change is that the neckline ended up being a little higher than I would have preferred. It's still fine and works well. Consider folding over and just sewing the neckline, rather than adding a t-shirt neckline, if possible!