Disclosure: Some links on this page below are affiliate links, meaning, at no additional cost to you, we will earn a commission if you click through and purchase. Read our disclosure for more info.
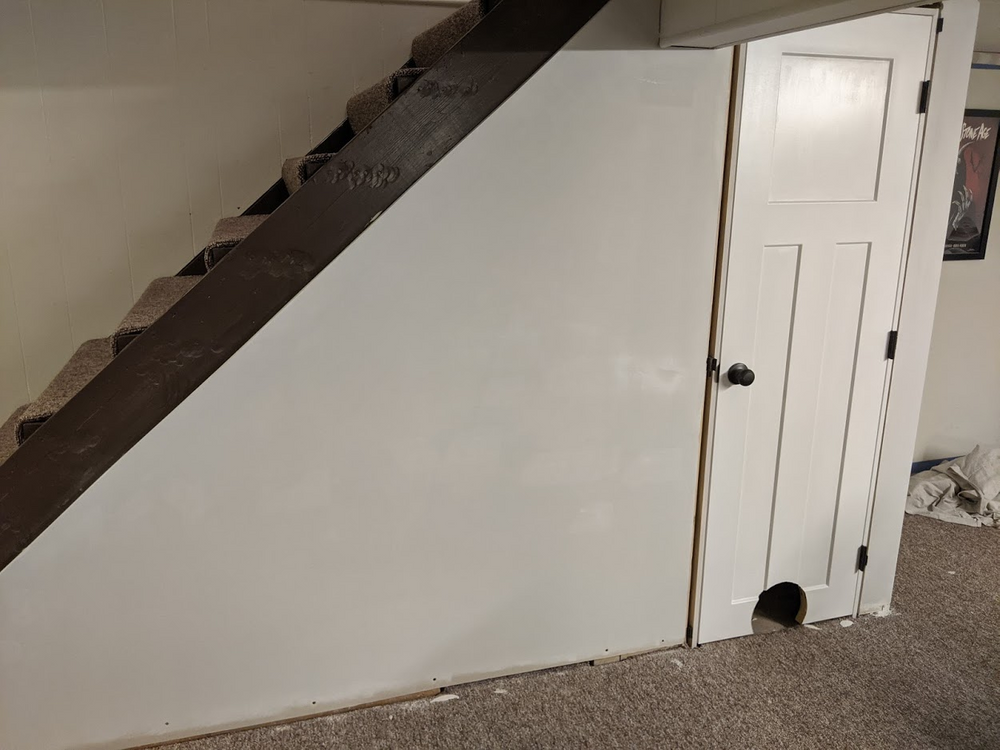
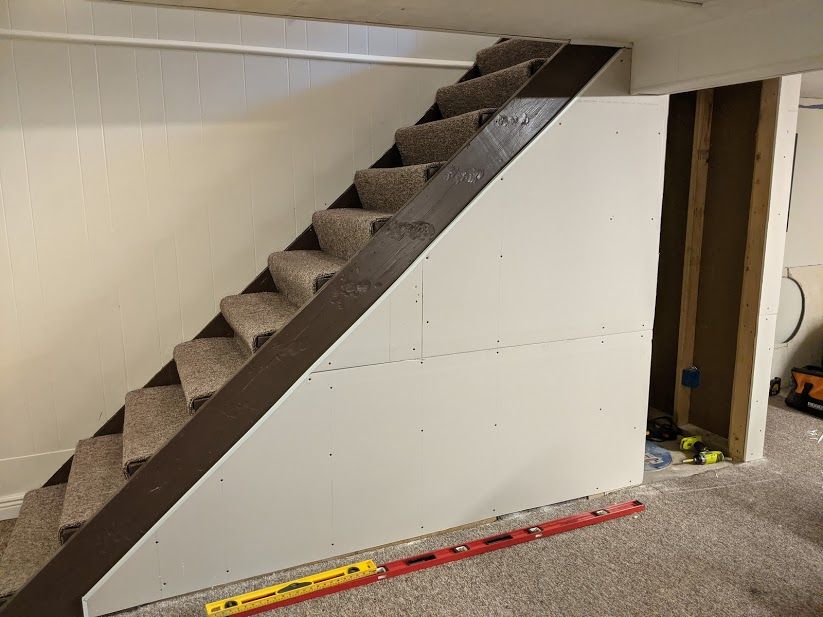
After deciding that I would not rebuild the stairs, it was time to begin finishing the prep for framing out the new closet. This was a busy week of using new tools and learning new skills so a lot of my time spent was researching and making sure to take time before fastening everything together.
I'm going to split this week into two posts so I can discuss the details of finishing the prep work which required some planning and then the actual framing I did in the next post.
Be sure to check out the rest of the series for this project that covers the initial plan, tools I'm using, and other learnings!
 Kamran 23 Sep 2020 • 10 min read
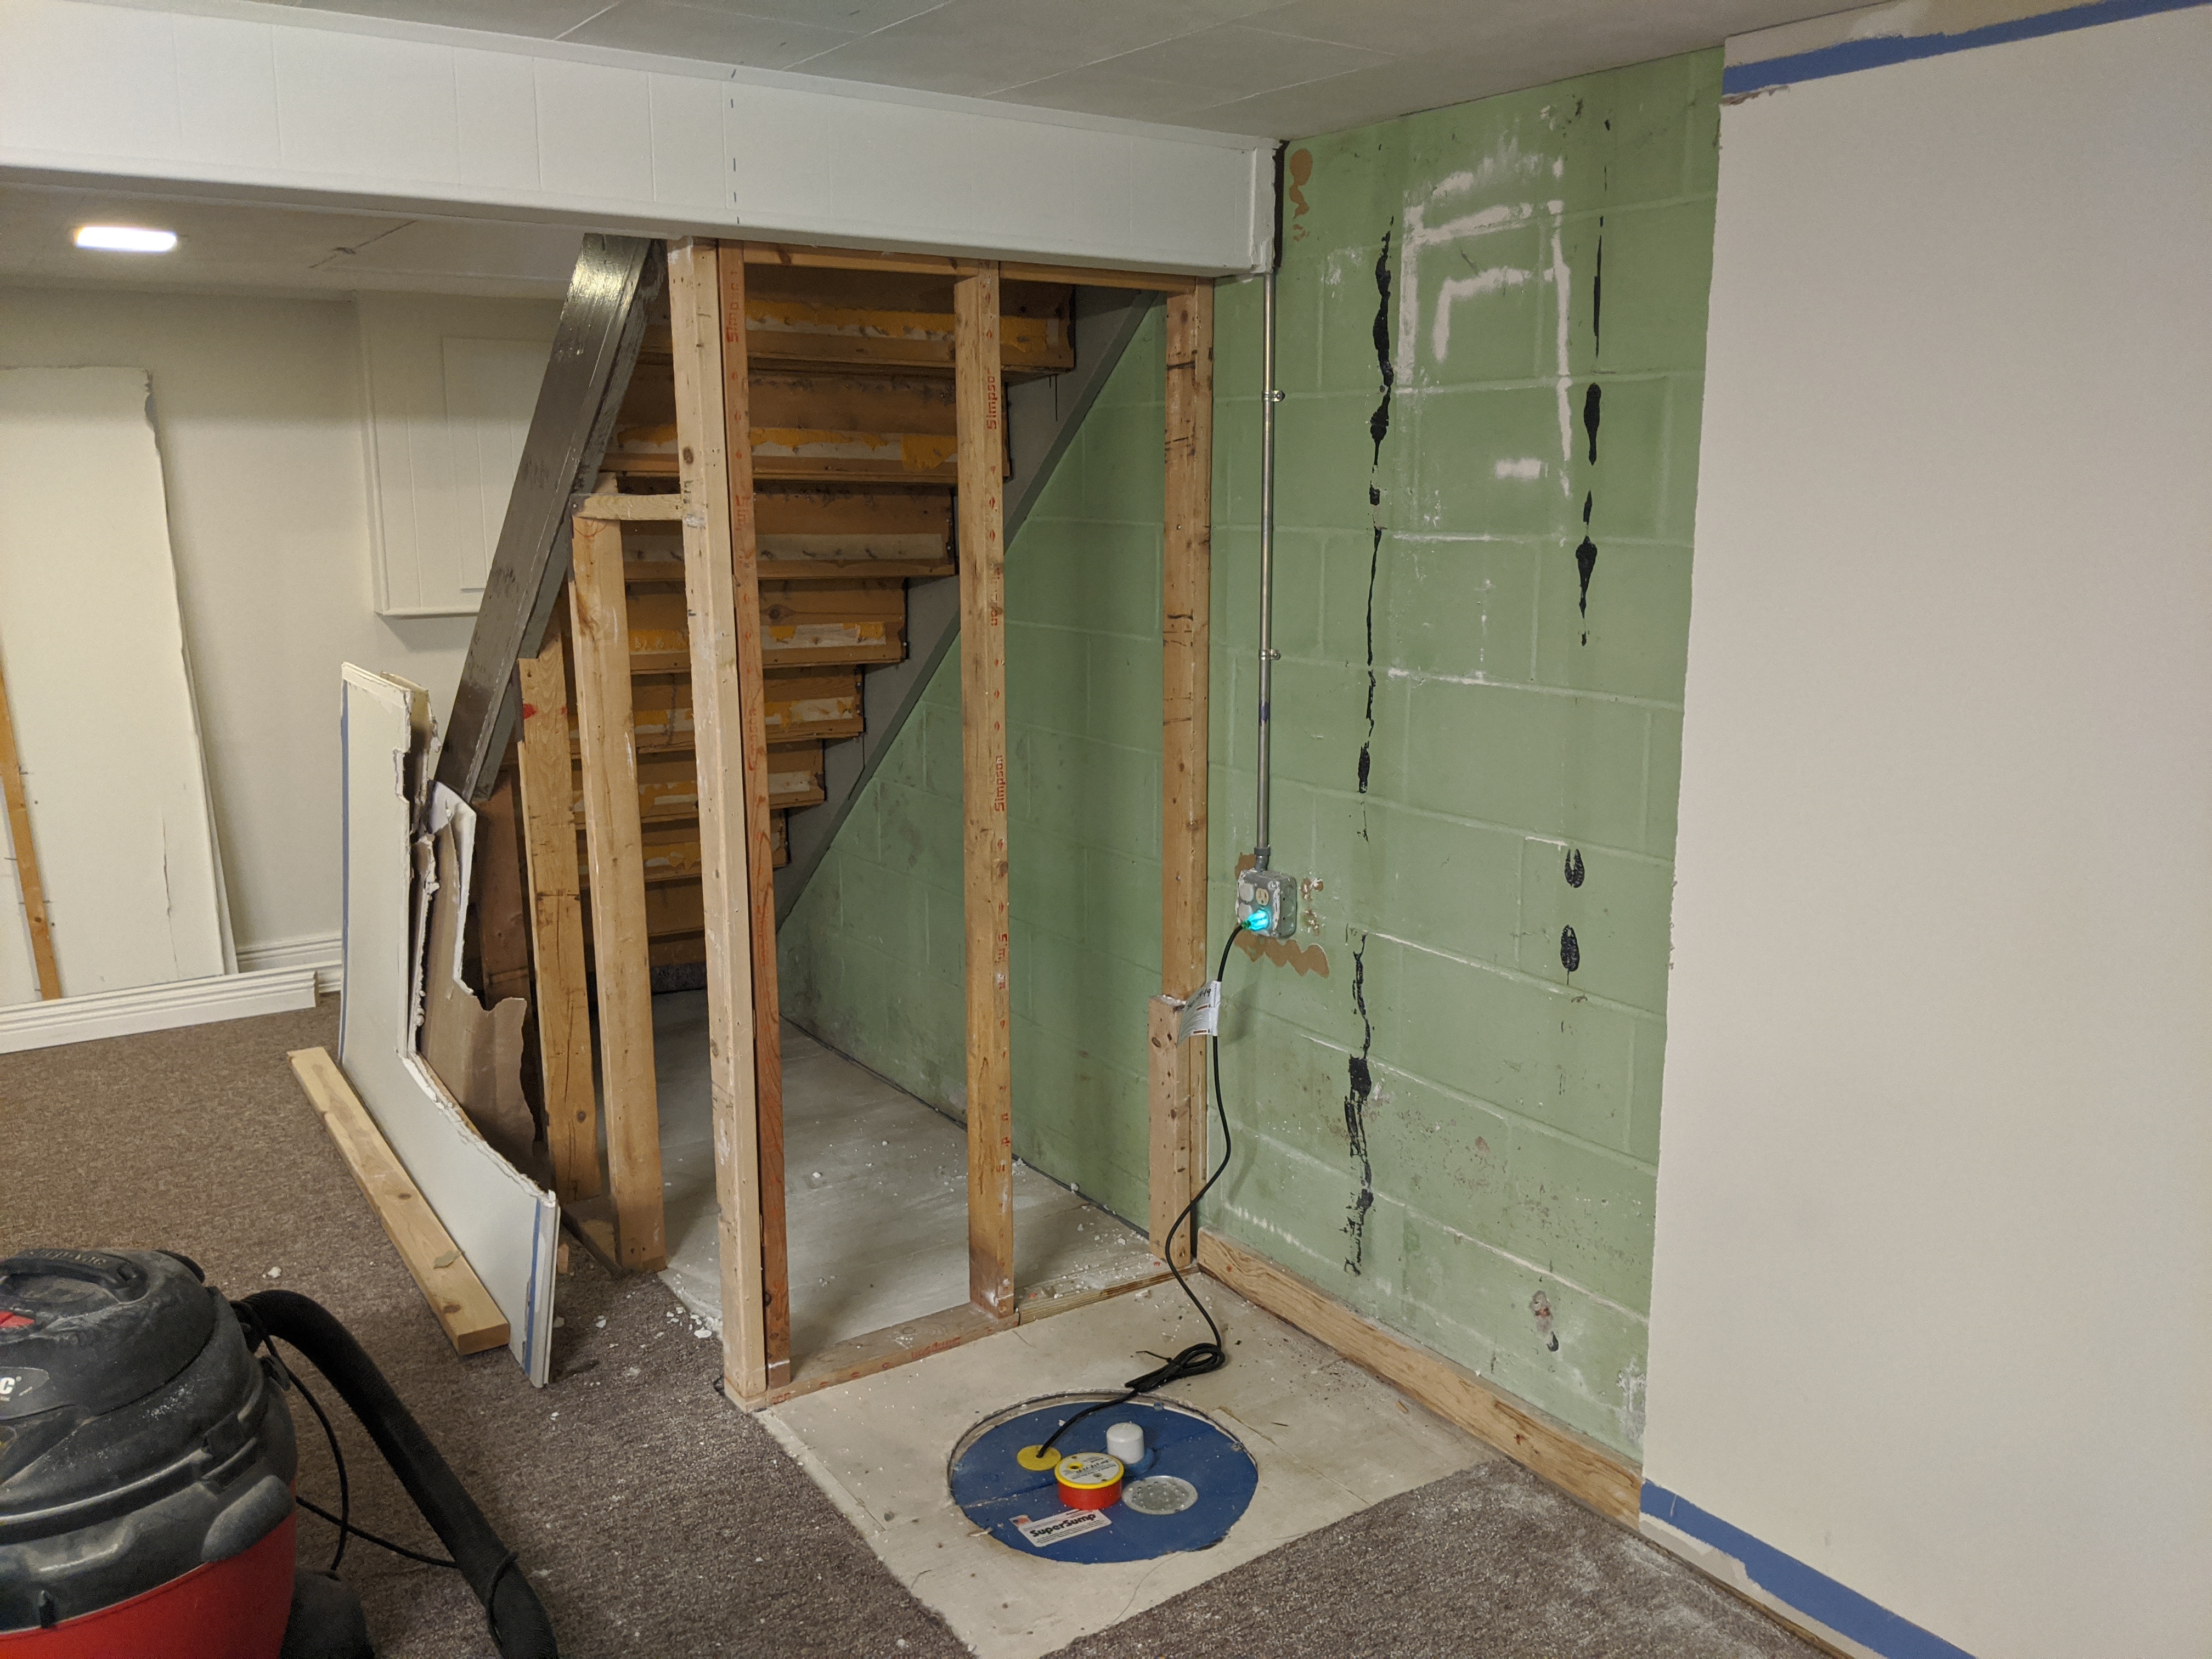
Finishing the prep work
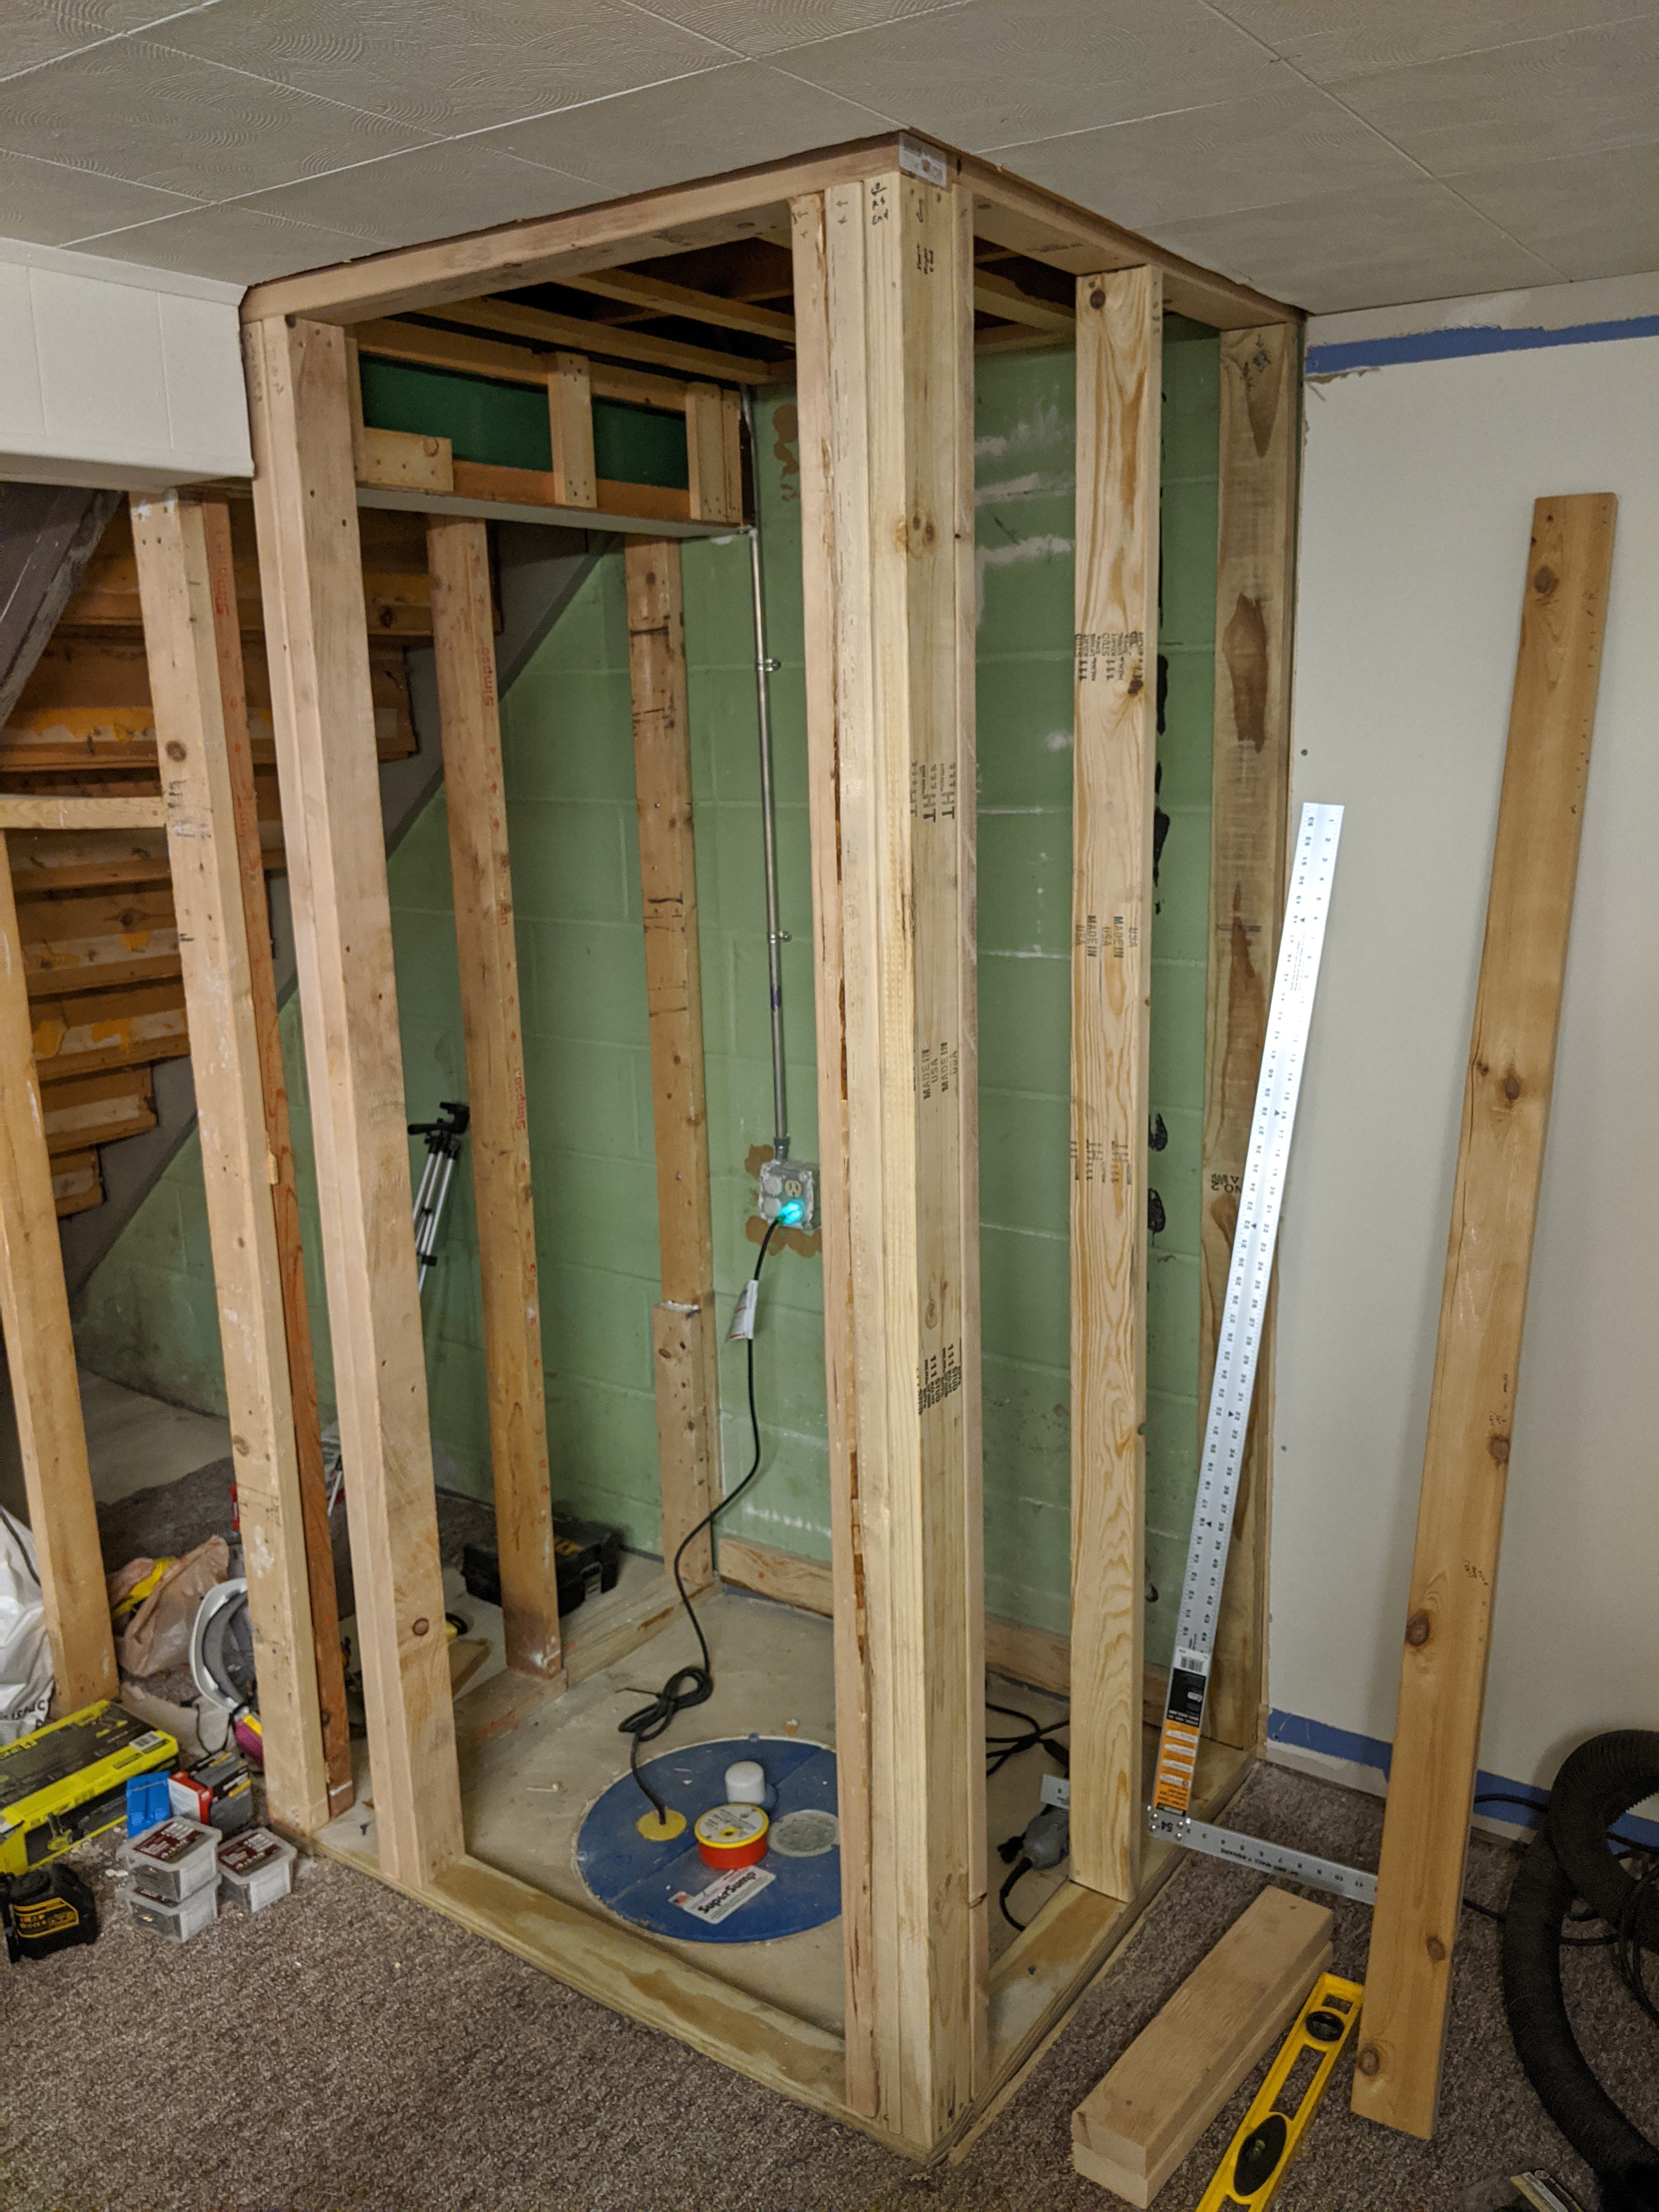
Once I had demo'd the area the first week, there was still some preparation to do. Let's get into the details a bit.
Cutting back existing finishes
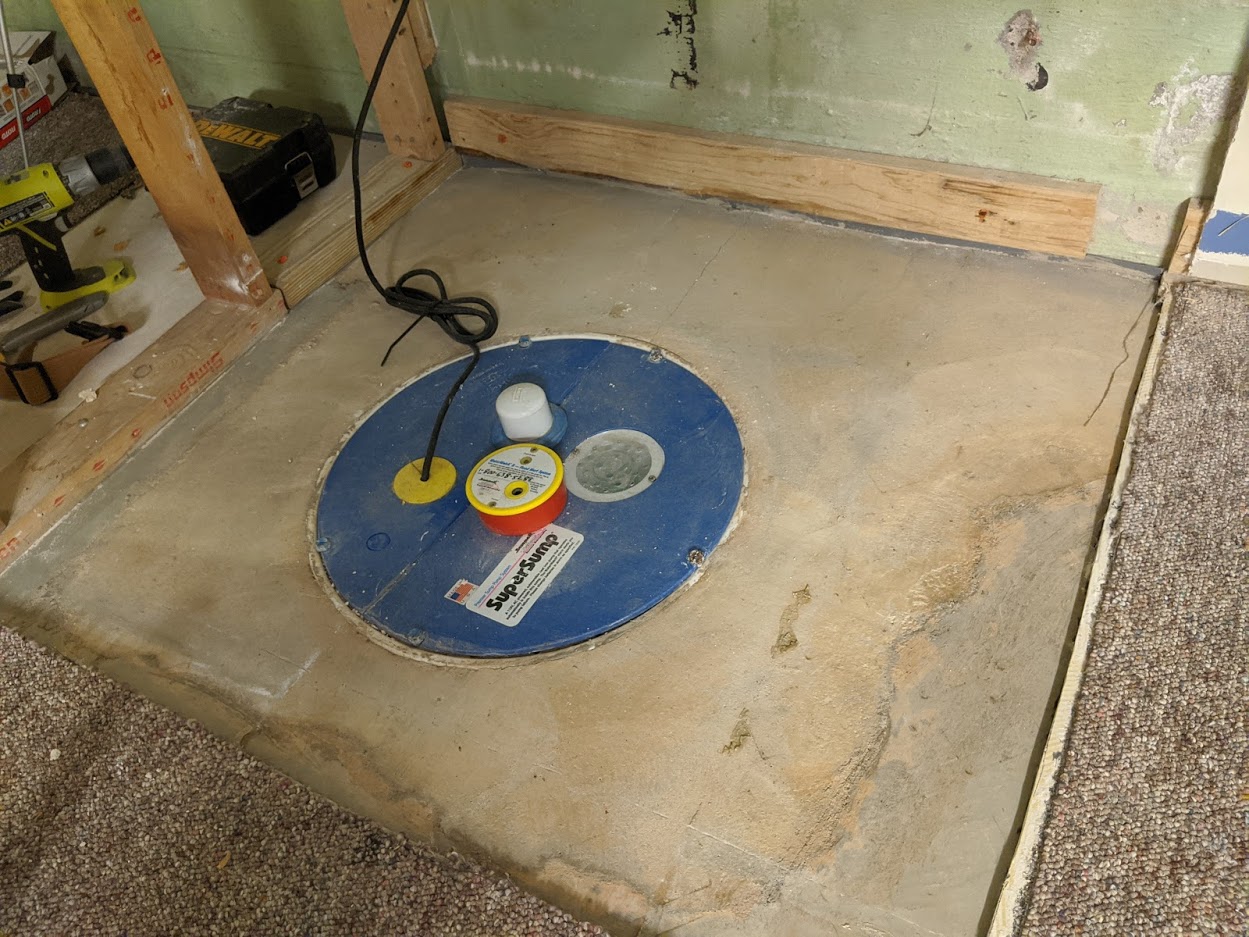
A lot of videos and guides discuss finishing a basement but there's not a ton about how to unfinish a basement. The sump pump was installed in a finished area, beside the carpet.
That meant I had to remove the existing finishes around the pump to make way for extending the framing:
- Drywall
- Baseboard
- Crown moulding
- Ceiling tile
- Subfloor
- Box around steel beam
The catch is they could only be removed up to a certain measurement and then had to look fairly clean so I could re-finish over the cuts once I was in the final stage of the project.
These measurements were taken before and I had marked all the lines where I needed to cut (making sure to account for the finishes – 1/2" drywall + mud, any trim/etc as best I could).
I highly recommend the self-leveling laser because otherwise you're probably going to be off on your measurements.
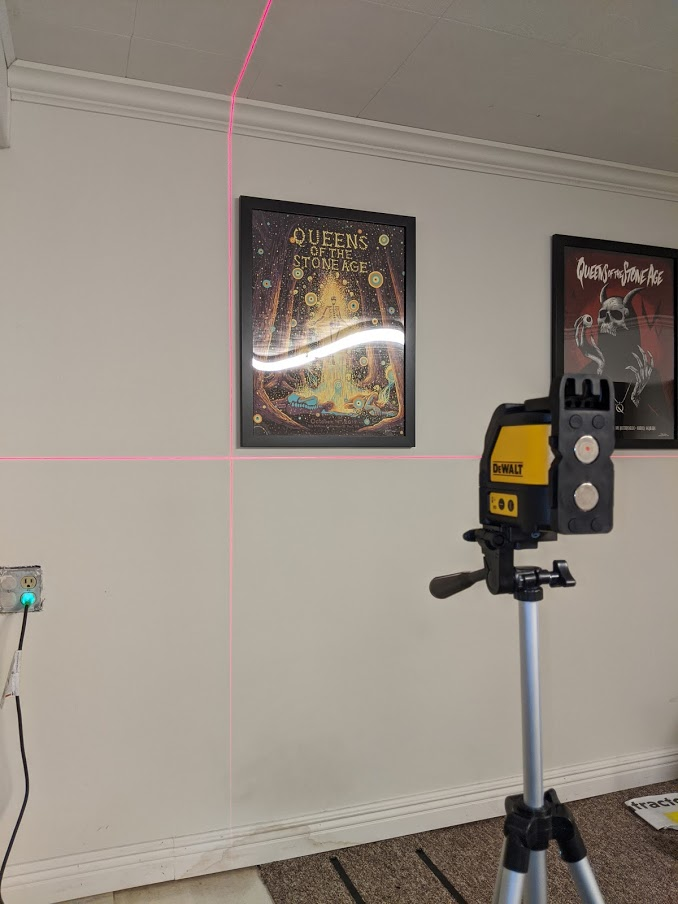
This is the one I have which is what Jeff at Home Renovision recommended:
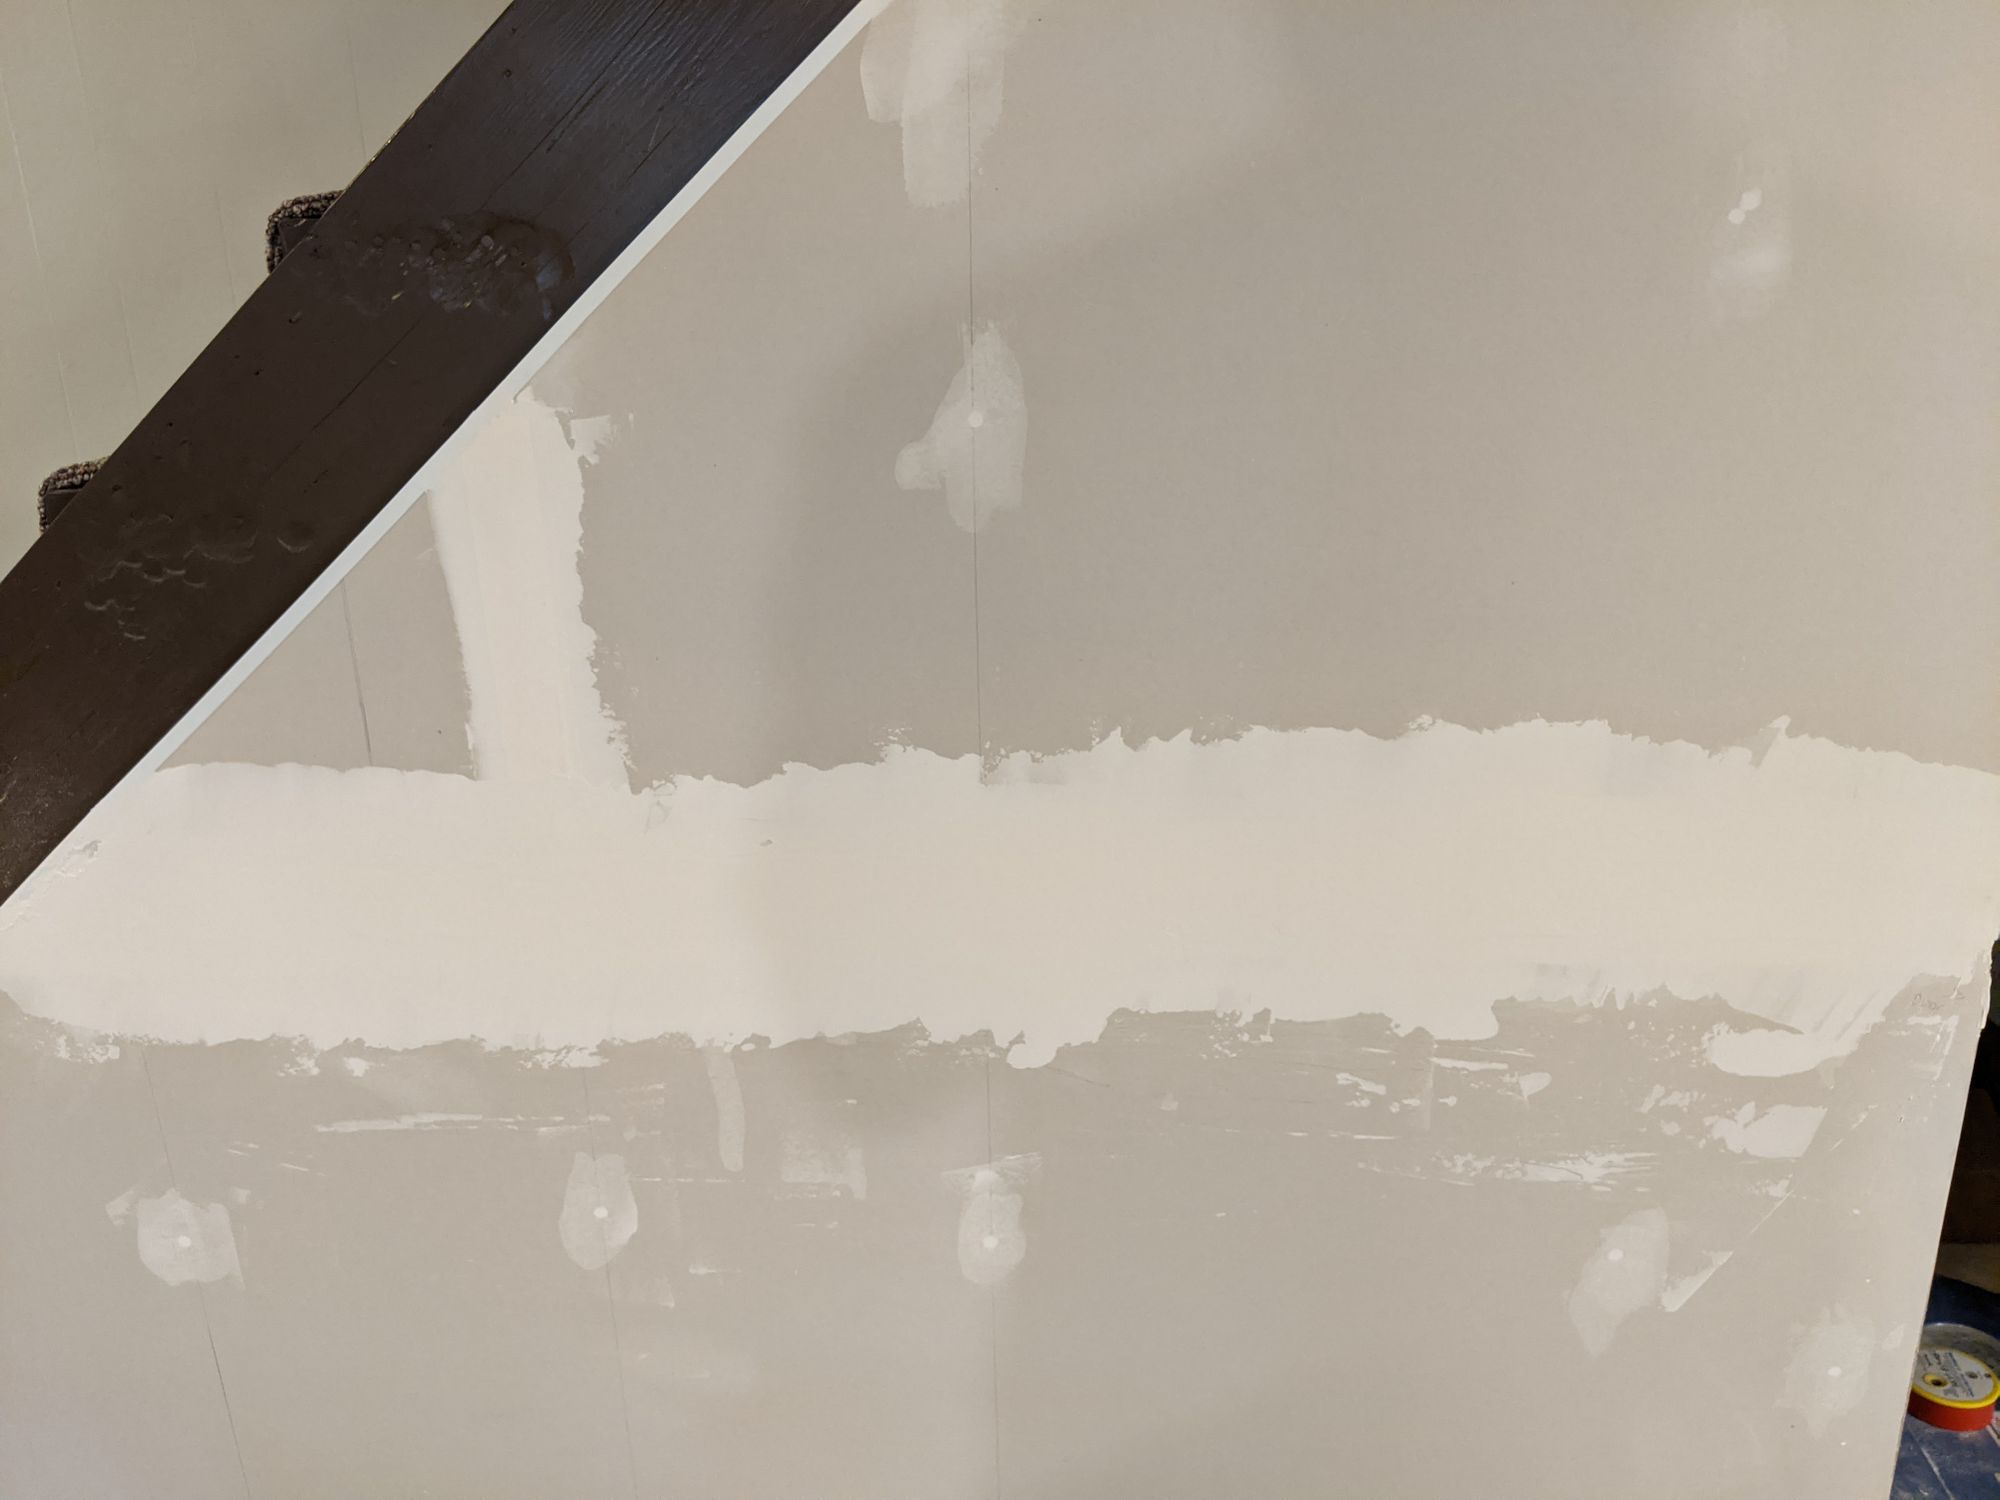
Cutting drywall
For cutting the drywall, in retrospect I would recommend the drywall blade with the oscillating multi tool. When I cut, I didn't own the multi tool yet so I actually used the drywall jab saw. That worked okay and the cut is mostly clean but it's definitely not as smooth as it would have been with the multi tool.
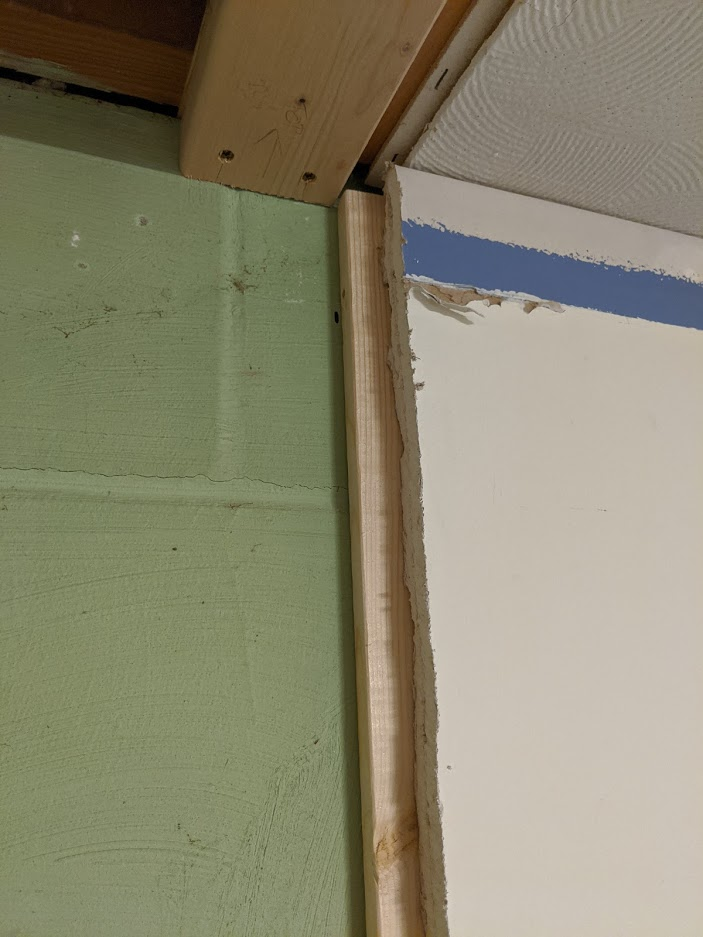
By the way, yes, that is two layers of drywall which is how they finished this basement. The 1x3 stripping you see in the photo is backframing I added after I cut, so the drywall could be fastened. I used tapcon screws into the wall to secure it.
Removing trim, baseboard, and crown moulding
These were pretty straightforward. I took the full pieces (intact) off the wall using my crowbar and hammer to jiggle them far enough away from the wall to pull off cleanly. I did not cut them!
I kept them since I expected to use them again when re-finishing. Once I'm ready to finish, I will clean them up and cut them to fit.
There was also some backframing for the drywall I had to cut through to make way for the end stud of the wall. I used the multi-tool to cut that nice and straight after marking it up!
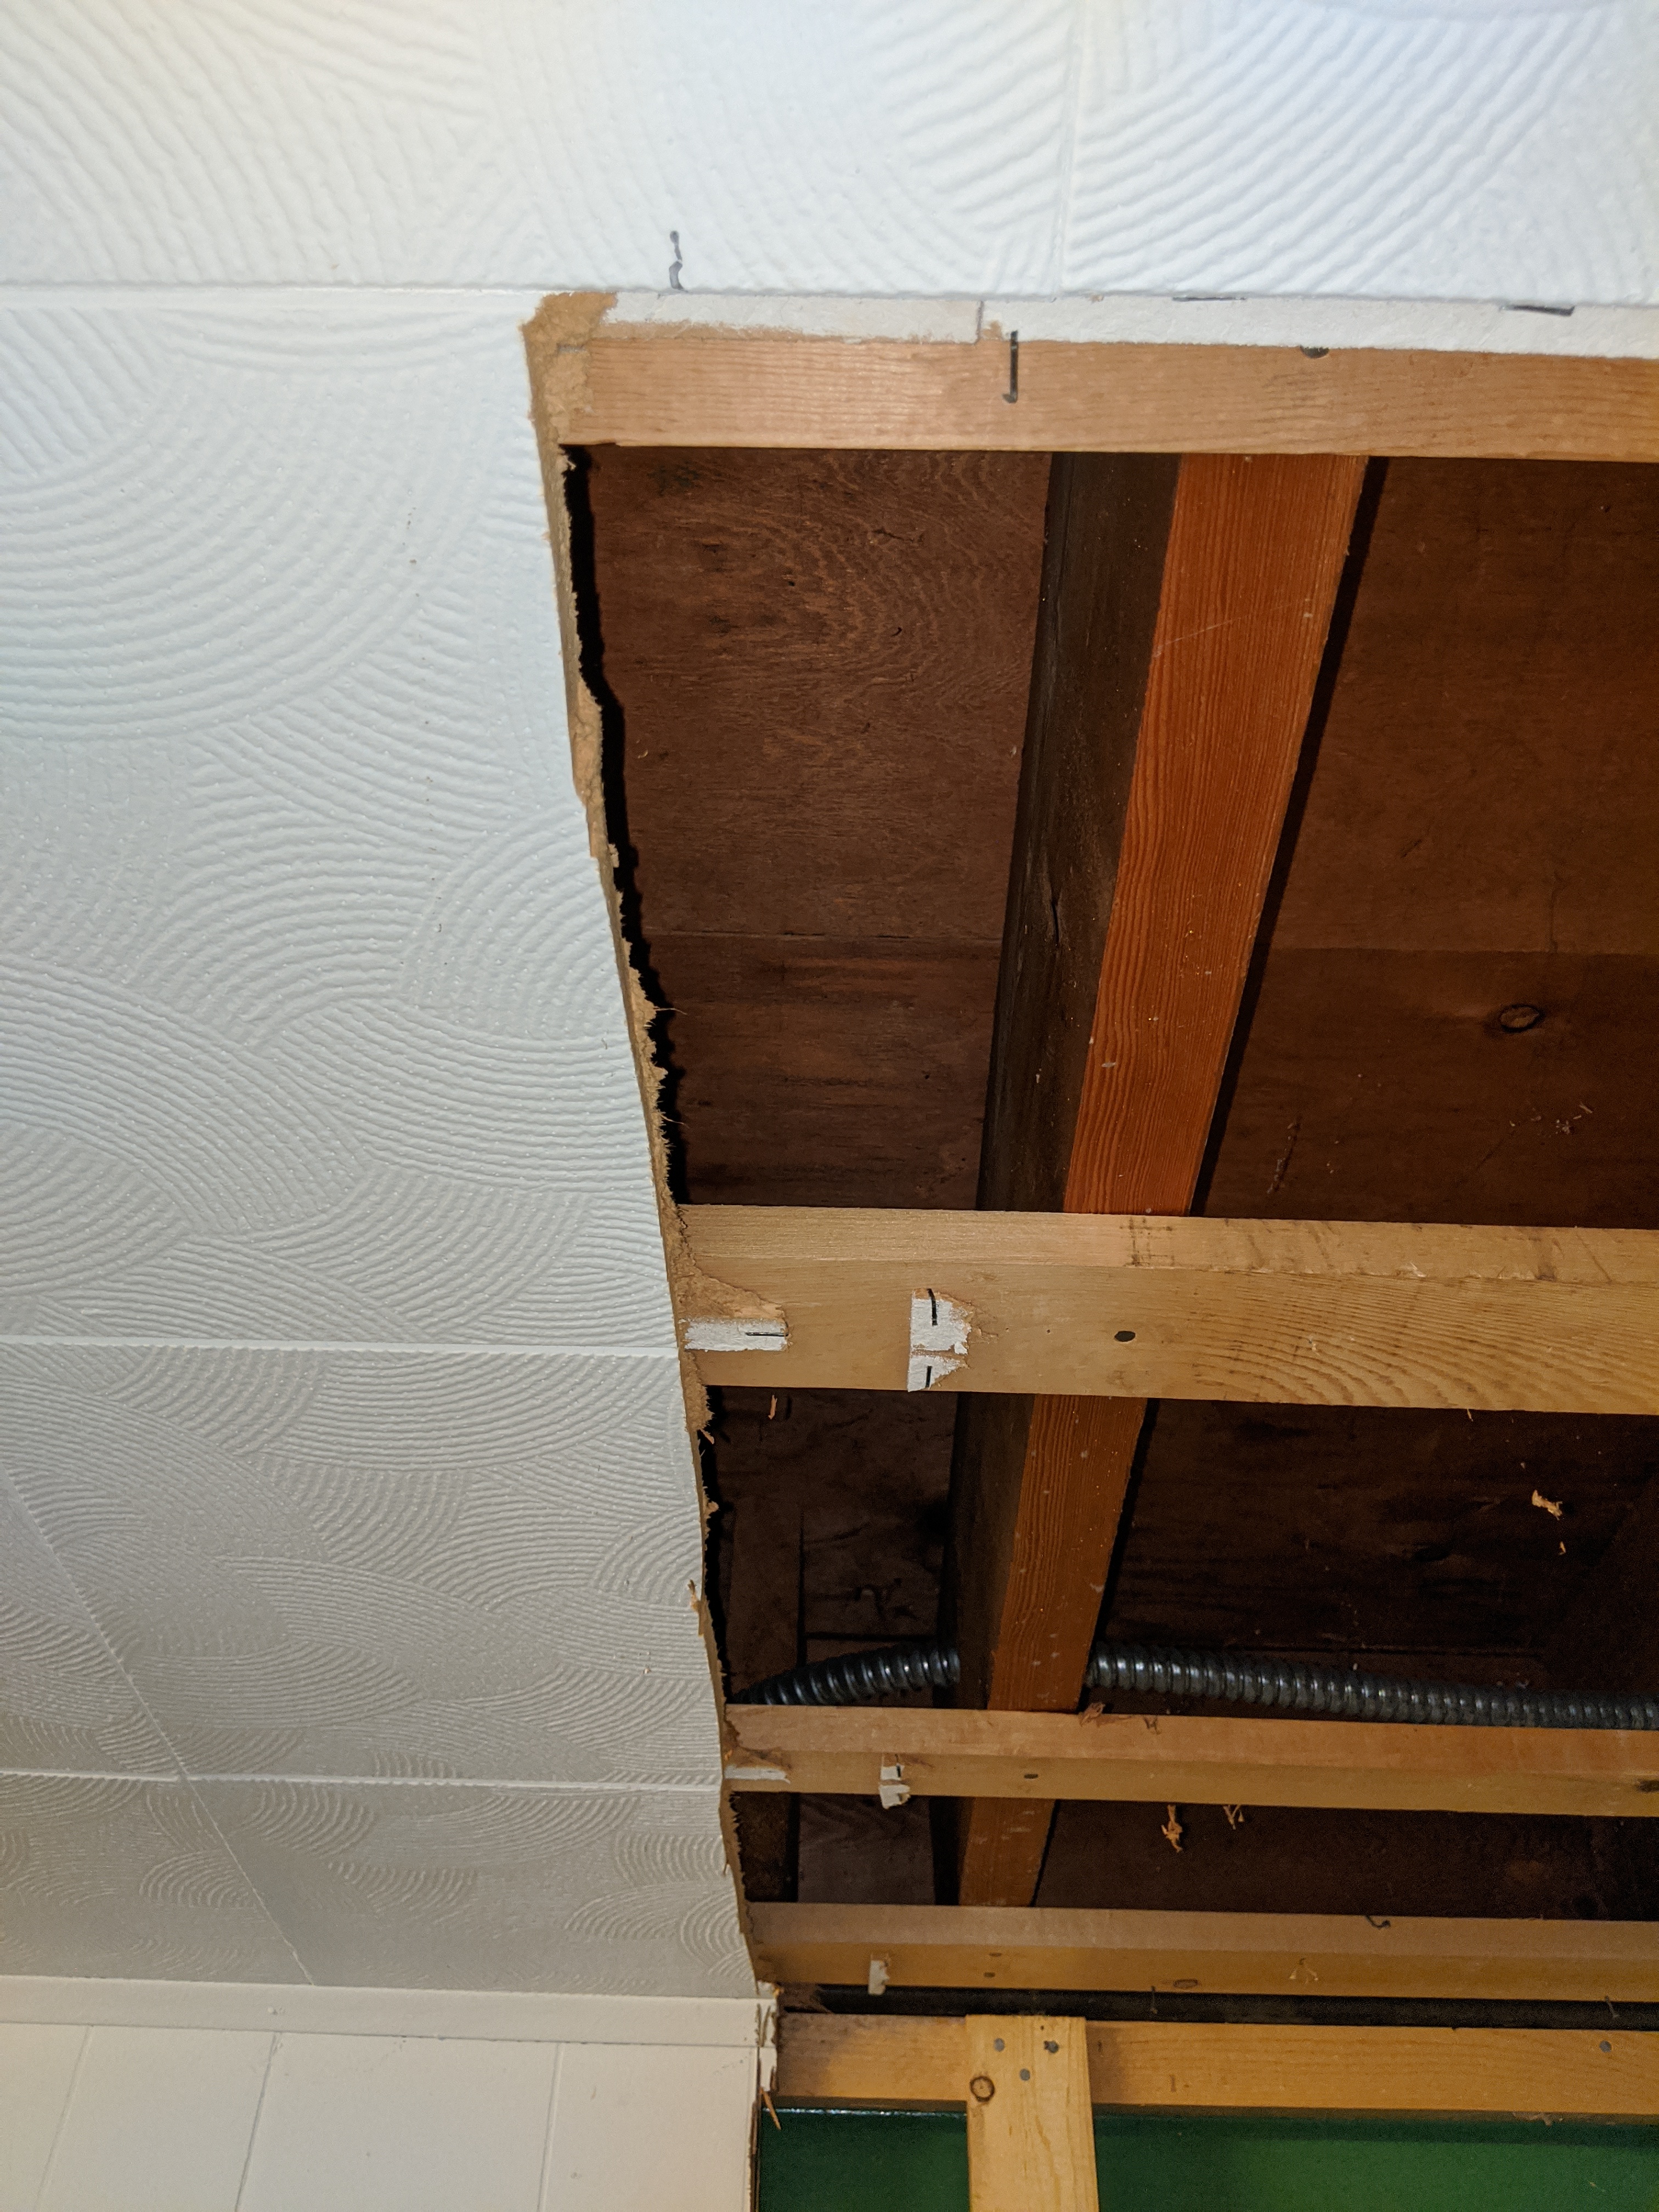
Removing acoustic ceiling tiles
For the ceiling, it was acoustic tile and because I couldn't know what was above it, I didn't use a saw or blade right away – instead I just punctured a middle tile with my hammer and used gloves to tear away the tile. They are held in place with staples so it wasn't much work to remove it.
Tip: When removing old finishes that may be hard to get back, keep them and try not to destroy them when removing. I kept some full tiles intact so I could use them to finish later. Same with the trim, crown moulding, and baseboard.
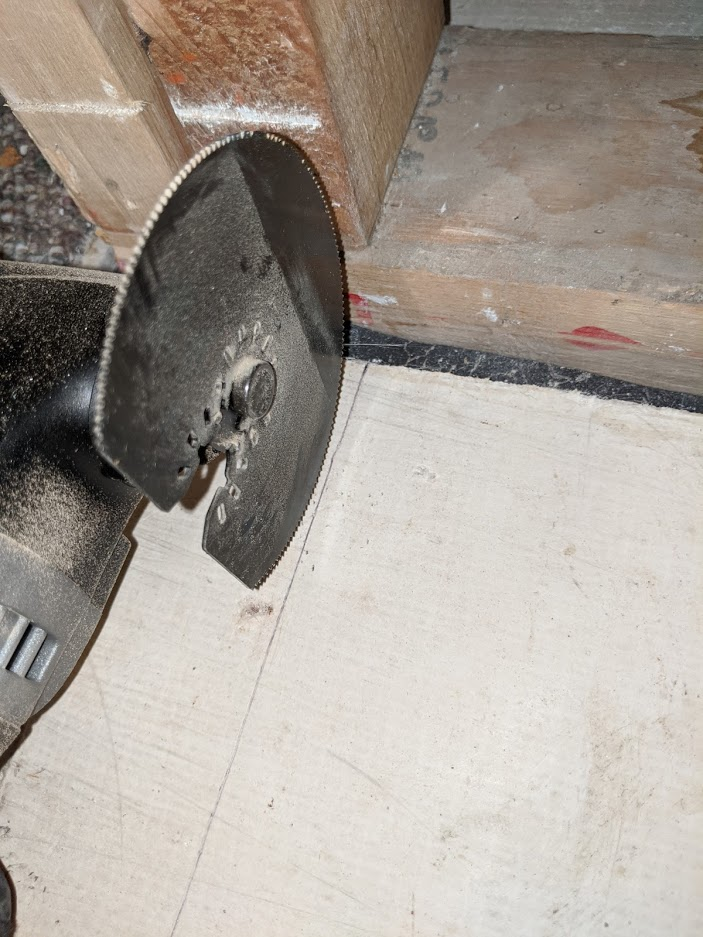
When I got to the tiles that would have to be cut on a line (marked using laser level), I used the multi tool to make a cleaner cut. I think I should have used the semi-circle blade, though, not the flat one, to make it even cleaner.
It was helpful to see where the stripping was so I didn't accidentally saw through it!
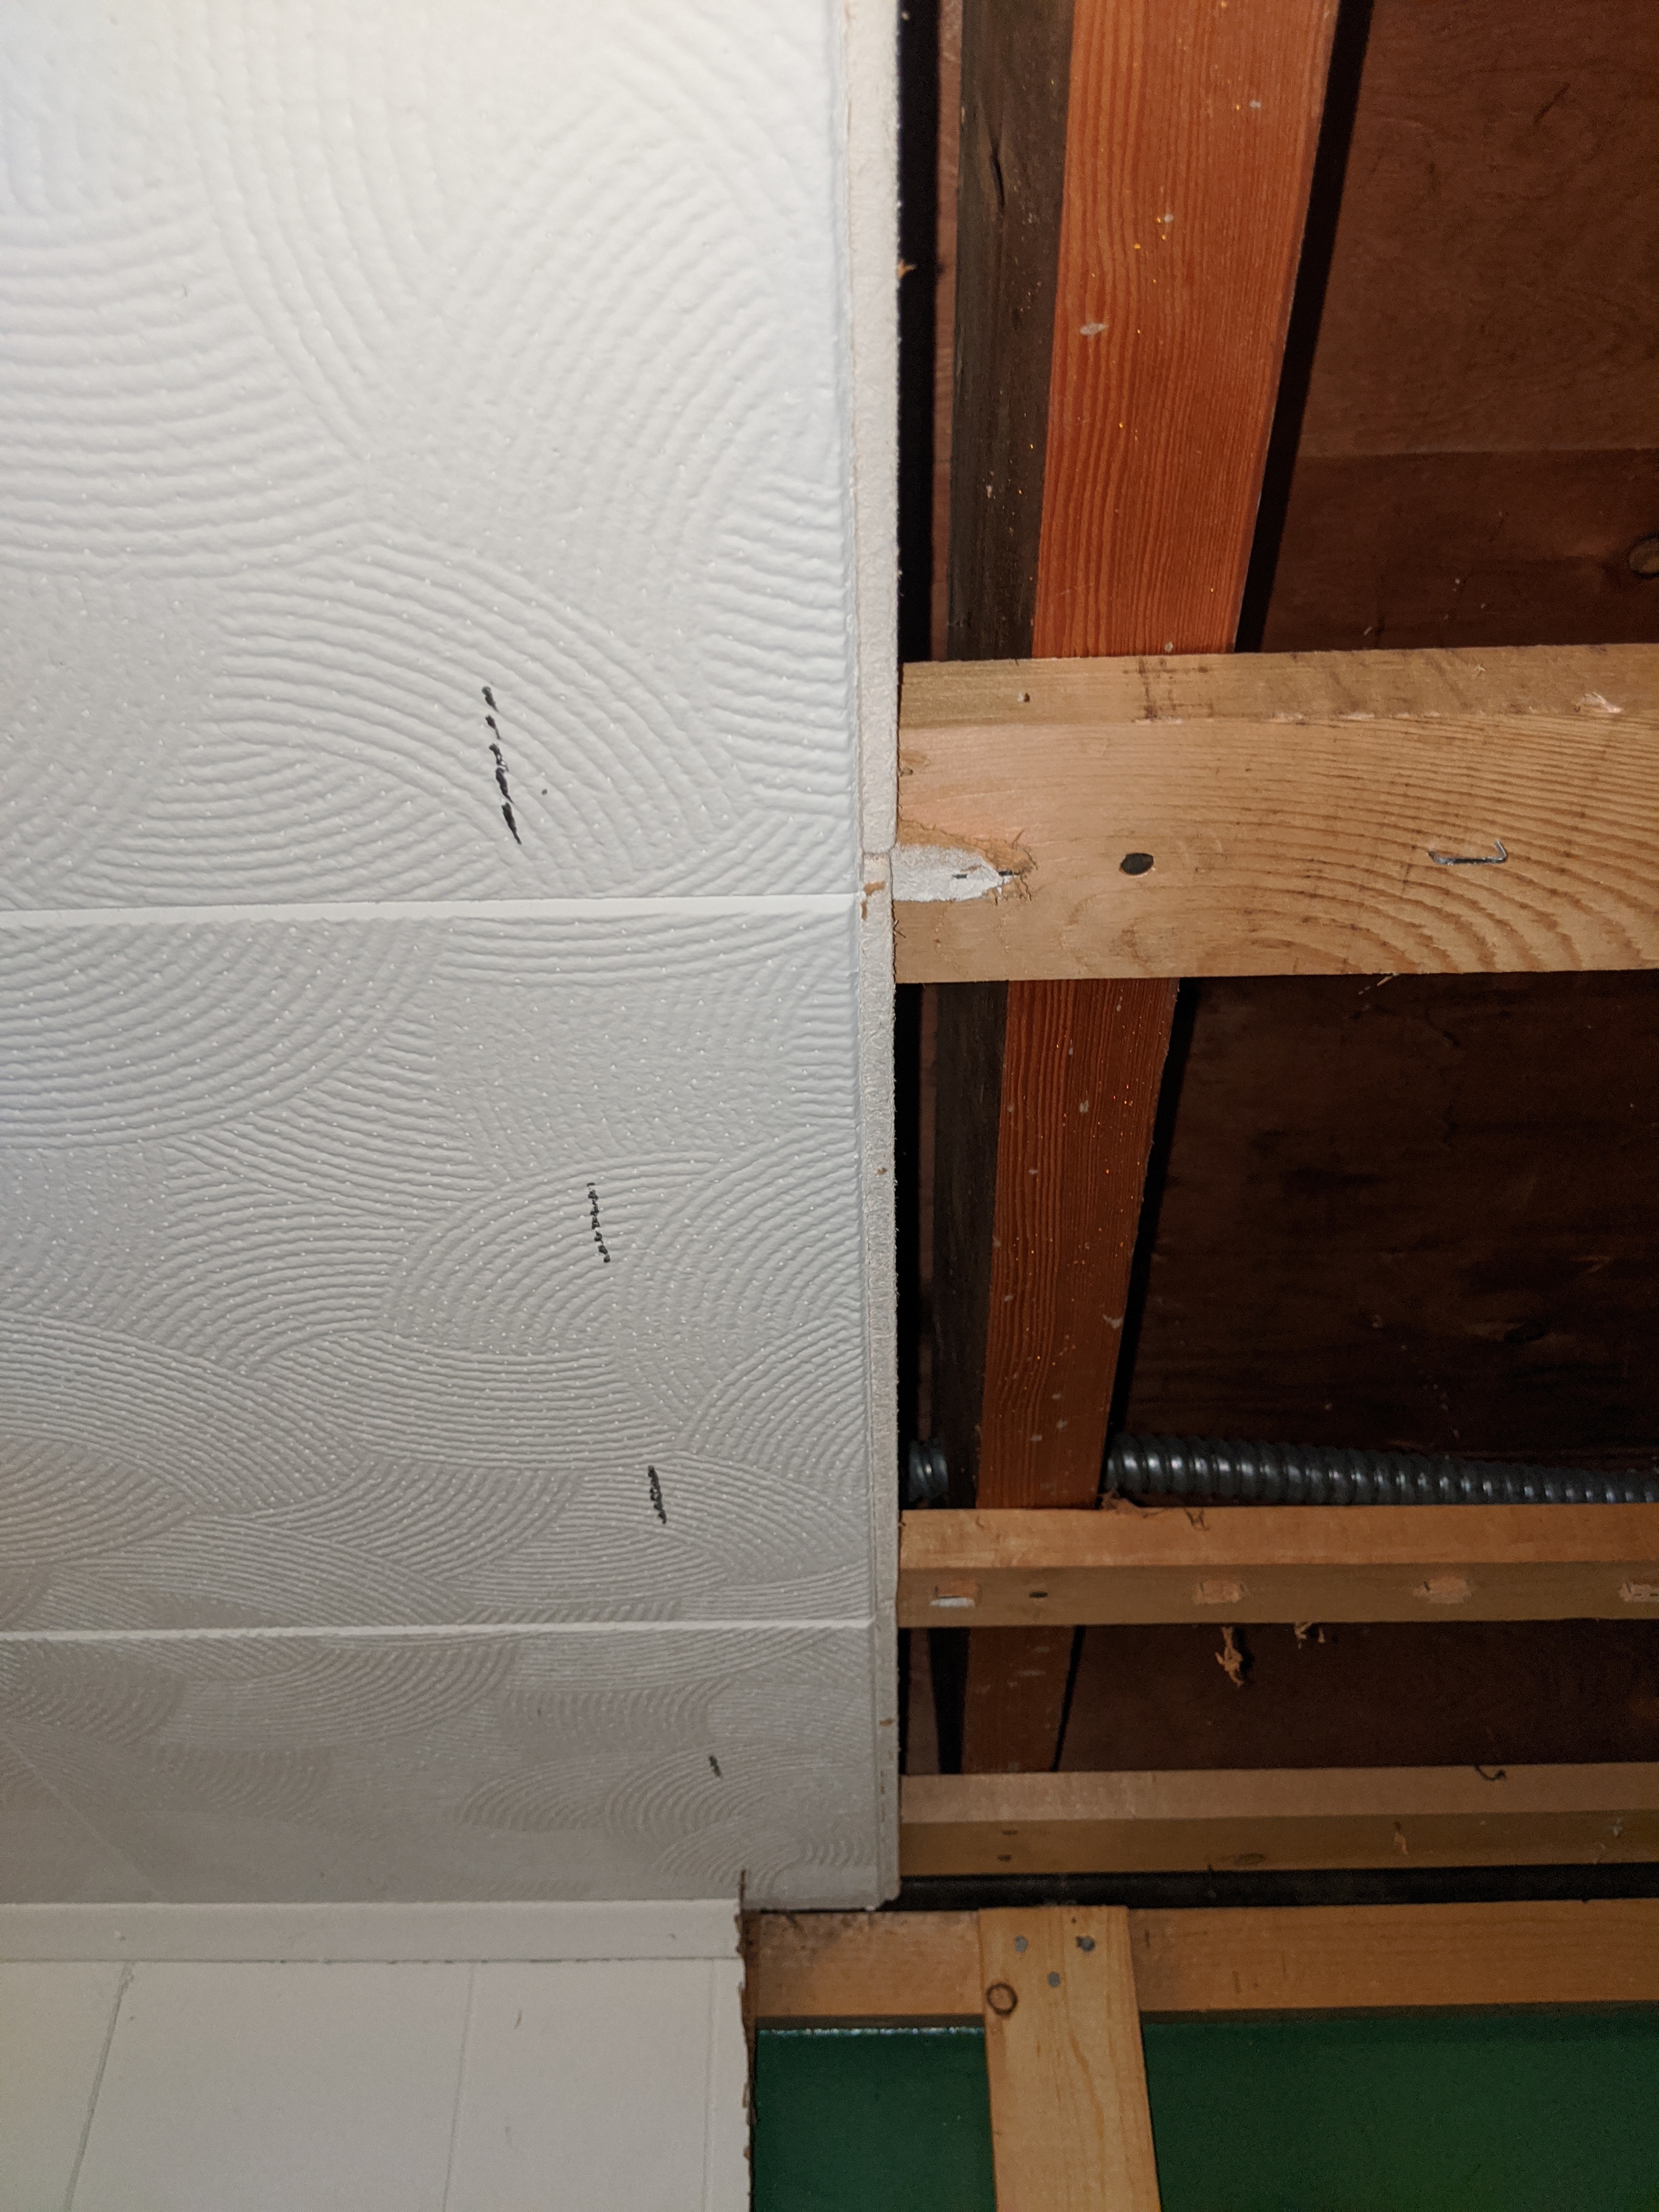
I lucked out on the right side of the closet – the plan was to make it 41" long because it lined up neatly with the tiles. When I removed those tiles, the stripping allowed me to measure exactly how long the closet would end up being (about 40 1/4" or so).
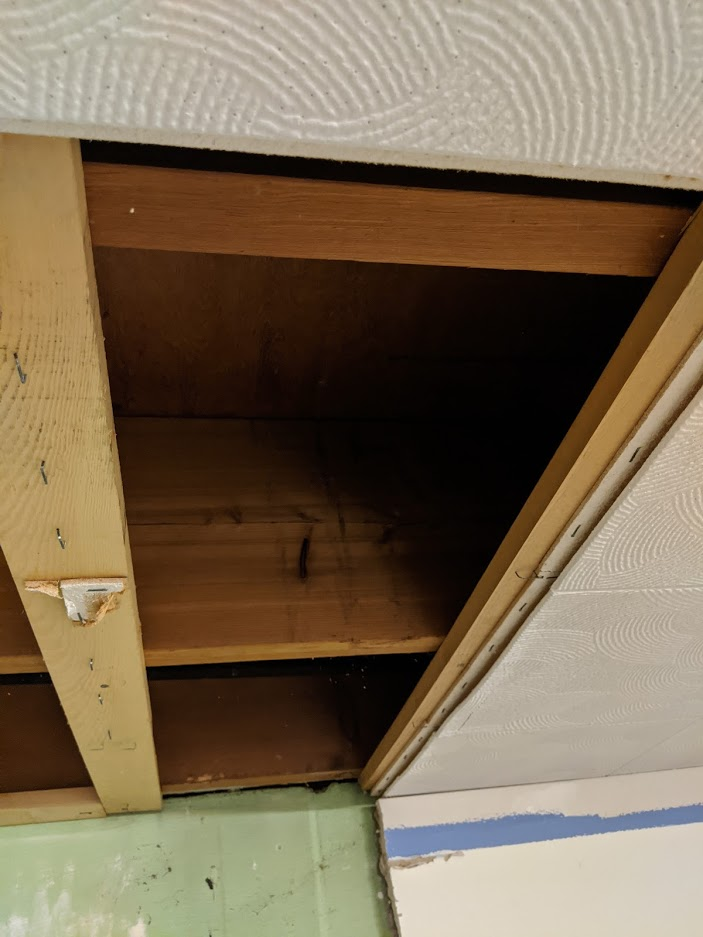
At this point, I double checked my measurements to ensure I still had room for the door I planned and I did, it only reduced the rough opening by about 5/8" which was plenty since I had used 3" initially.
The beauty of this is that I didn't have to mess with the edge of that tile! I knew I could tie in the top plate next to the stripping.
The only issue I hadn't anticipated here is that I cut the drywall at 41" and when the top plate goes in, it will leave a gap slightly larger than the 1/2" drywall. So we will need to deal with that when it comes time to close and finish that inside corner (hint: I'll be trying the sheetrock 45 hardening mud!).
Cutting underlayment on basement floor
To cut through the underlayment I highly recommend the multi tool with the carbon blades. It was slow but accurate, getting a pretty clean and straight cut through the Tyroc and underlayment down to the concrete slab.


Once I cut the right side of the subfloor, I could remove the whole panel from the closet-to-be and set it aside to put back later after I was done.
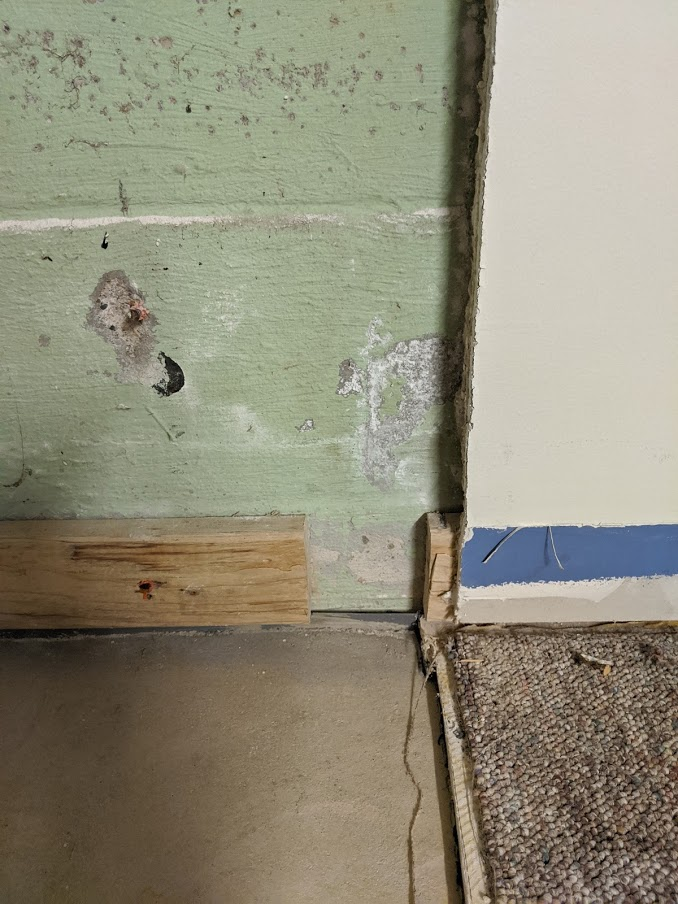
Grinding the concrete slab
Okay, here was something I kinda anticipating but was hoping not to do – the sump pump installers did a poor finishing job and did not smooth the concrete they poured to be flush with the existing slab. And due to the footprint of this closet, I couldn't avoid those rough patches which made for an uneven footing for the bottom plates.
After reading some articles I landed on using an angle grinder with a diamond cup that can grind concrete. There are a few key ingredients here:
- Angle grinder (a corded 7-8amp one seems best)
- Diamond cup grinding wheel (5in)
- Dust extracting shroud (5in)
- Vacuum (and optional adapters if your vac doesn't match the size of the shroud)
This is what the setup looks like:
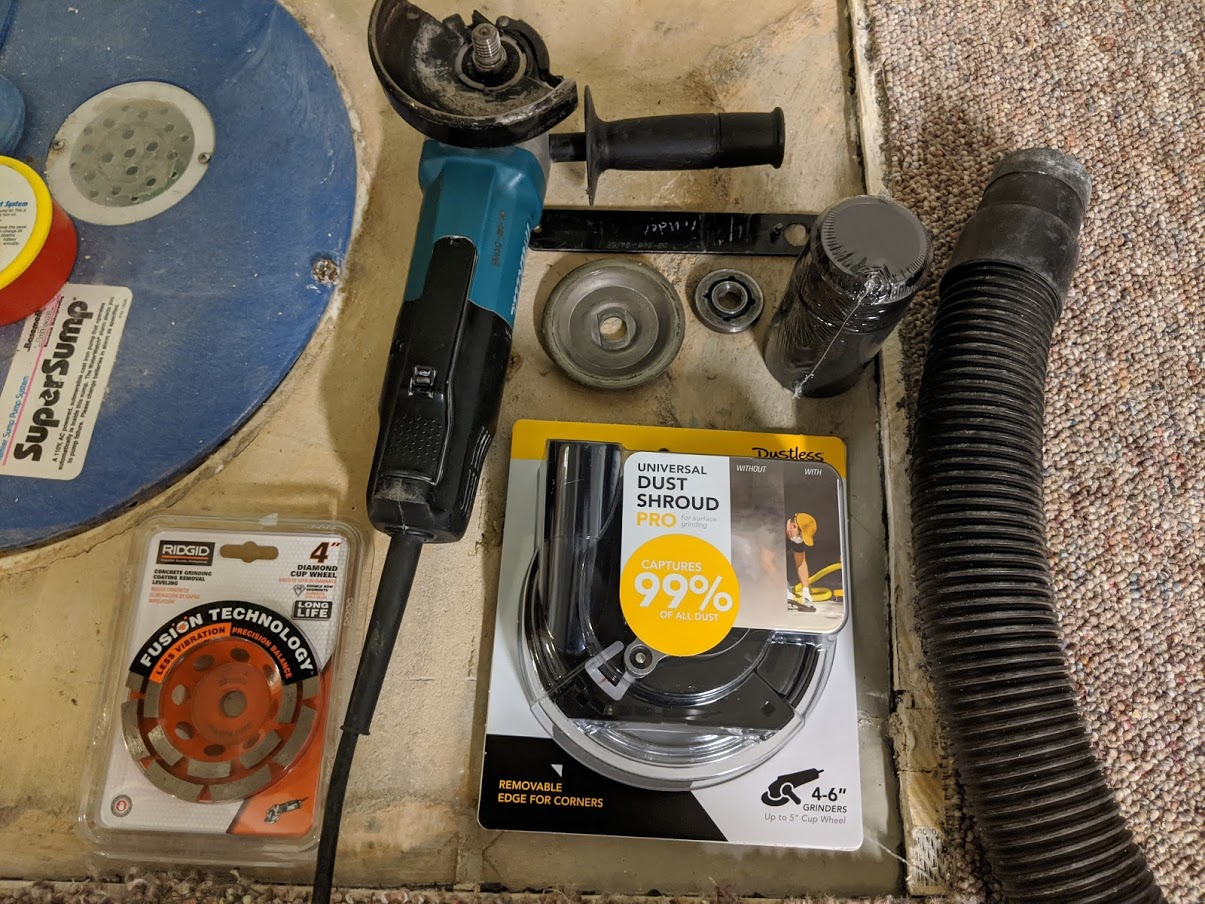
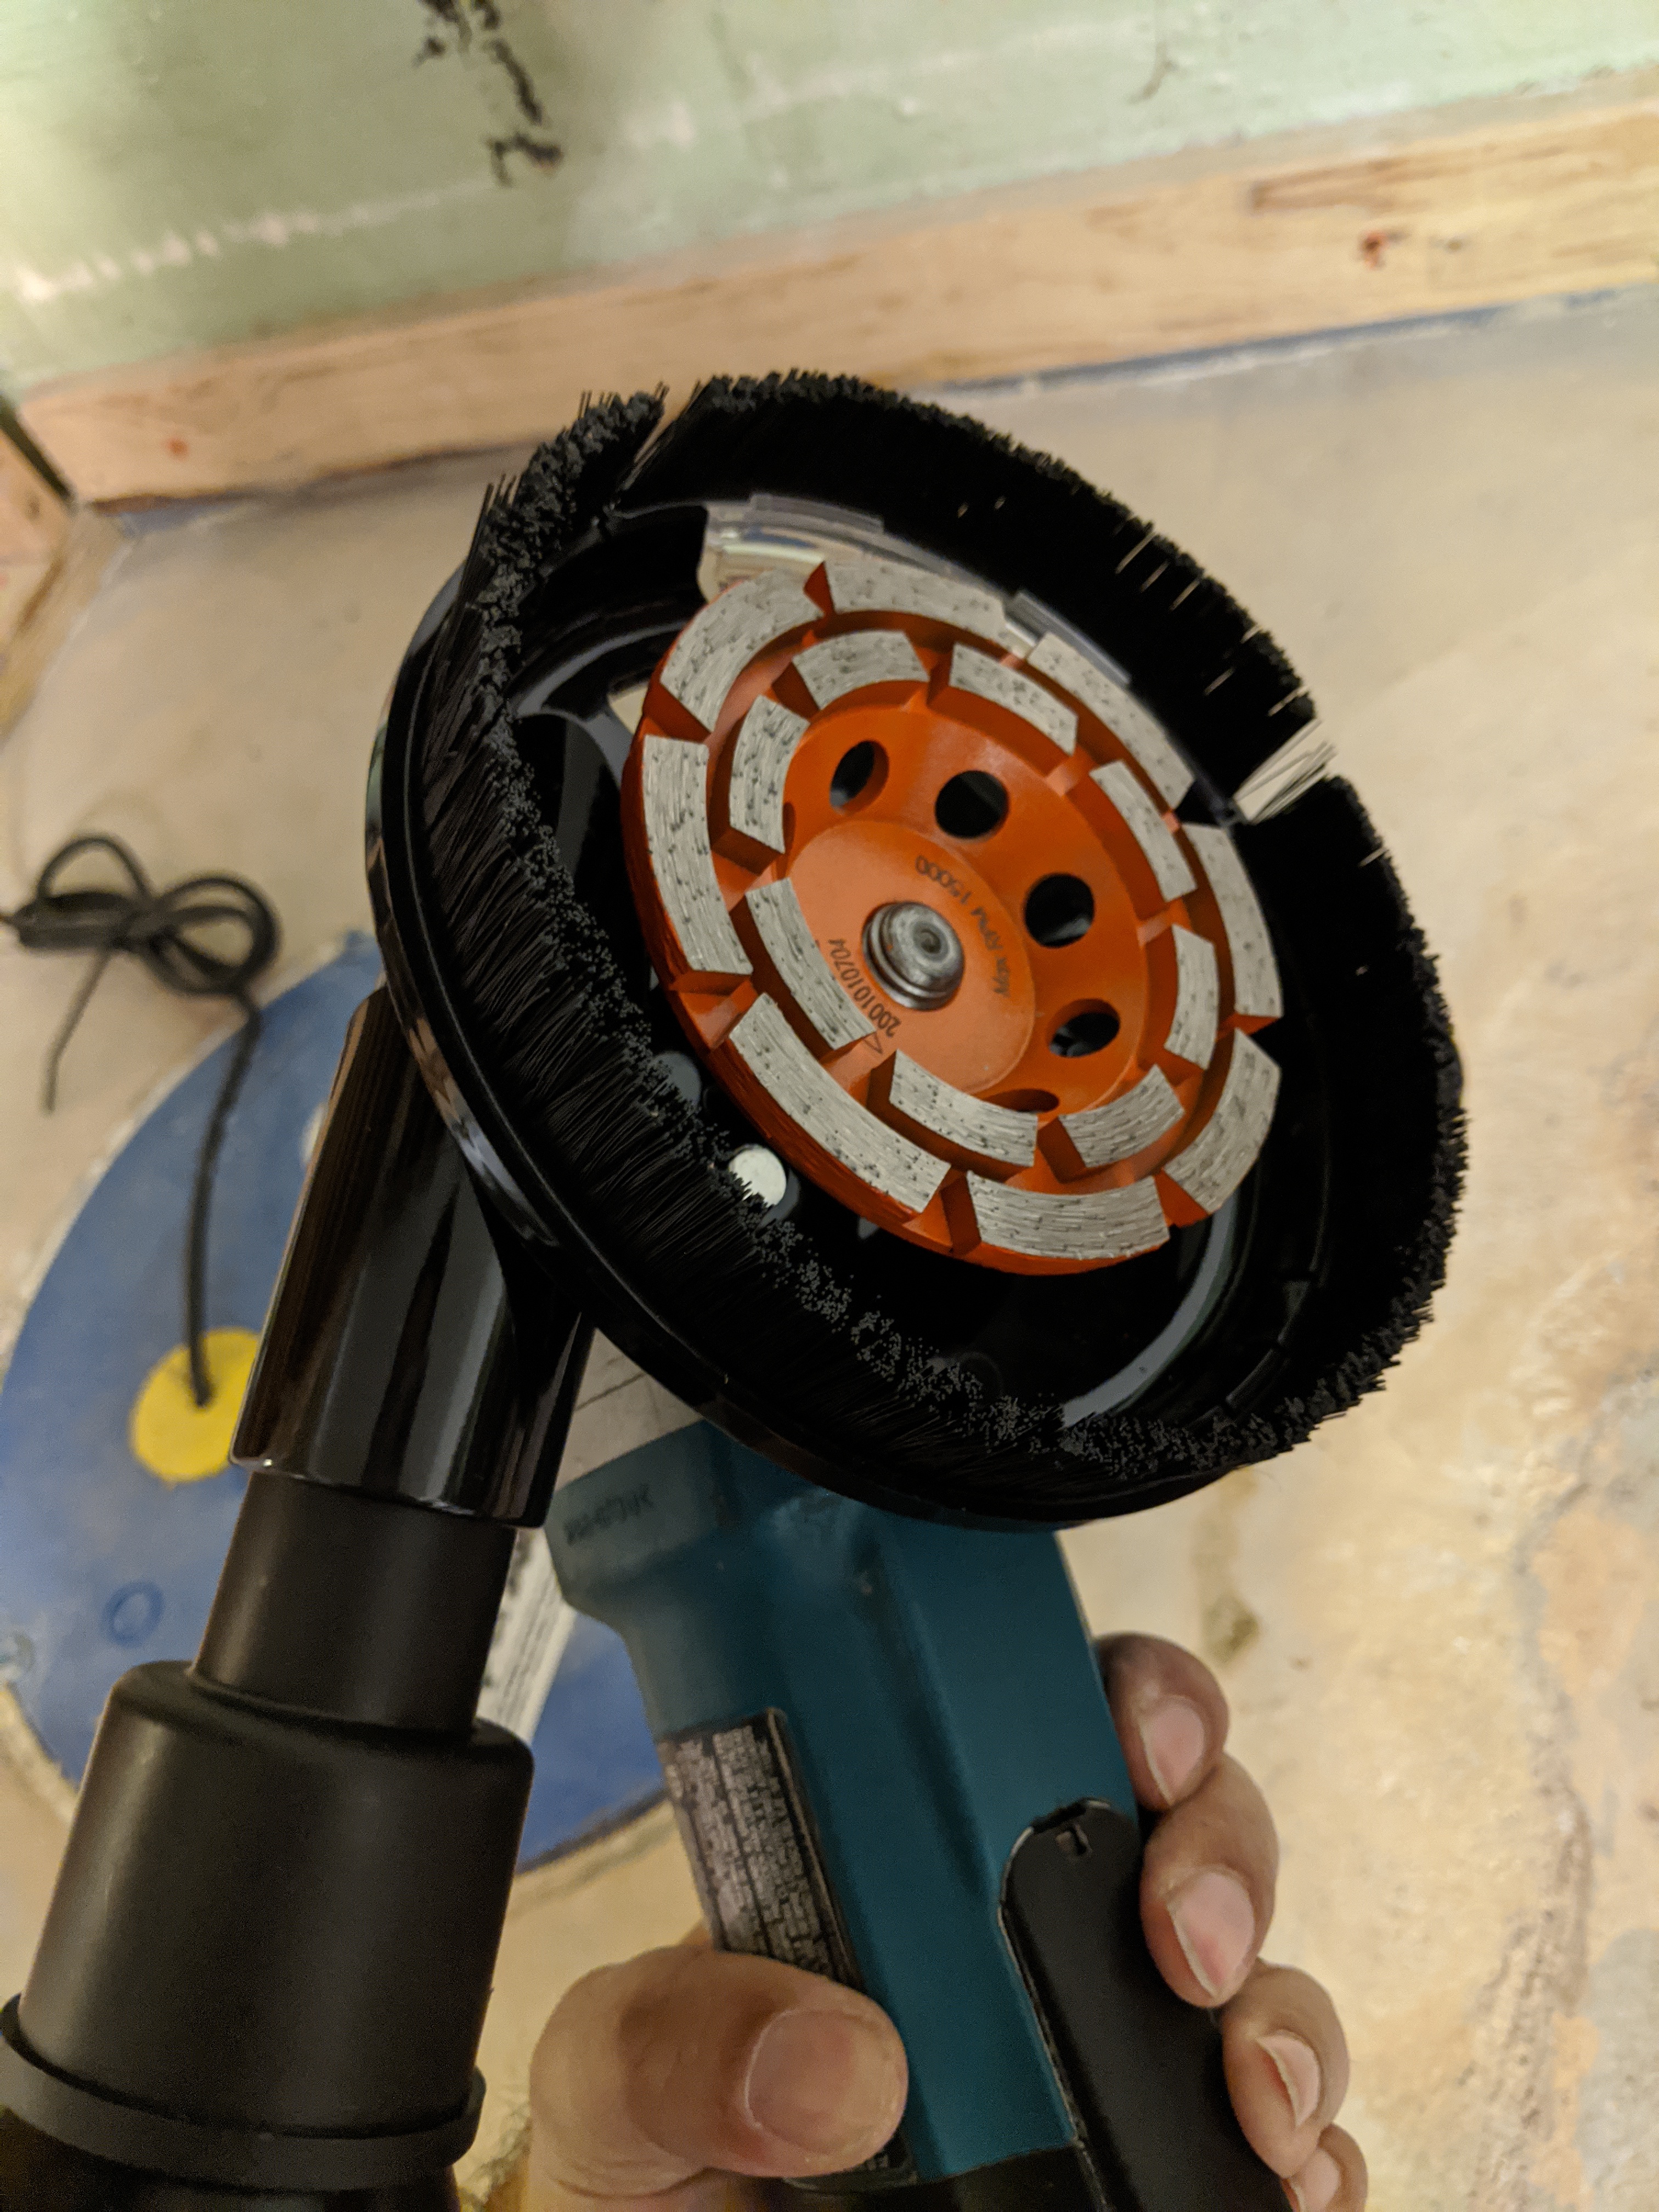
Here's a tip to avoid the mistake I made: buy the same size cup as the shroud! I mistakenly was going to quickly and didn't realize the 5" shroud will fit... a 5" cup! And the 4" left a lot of room that made it tough to get nice and neat edges against the walls/floor.
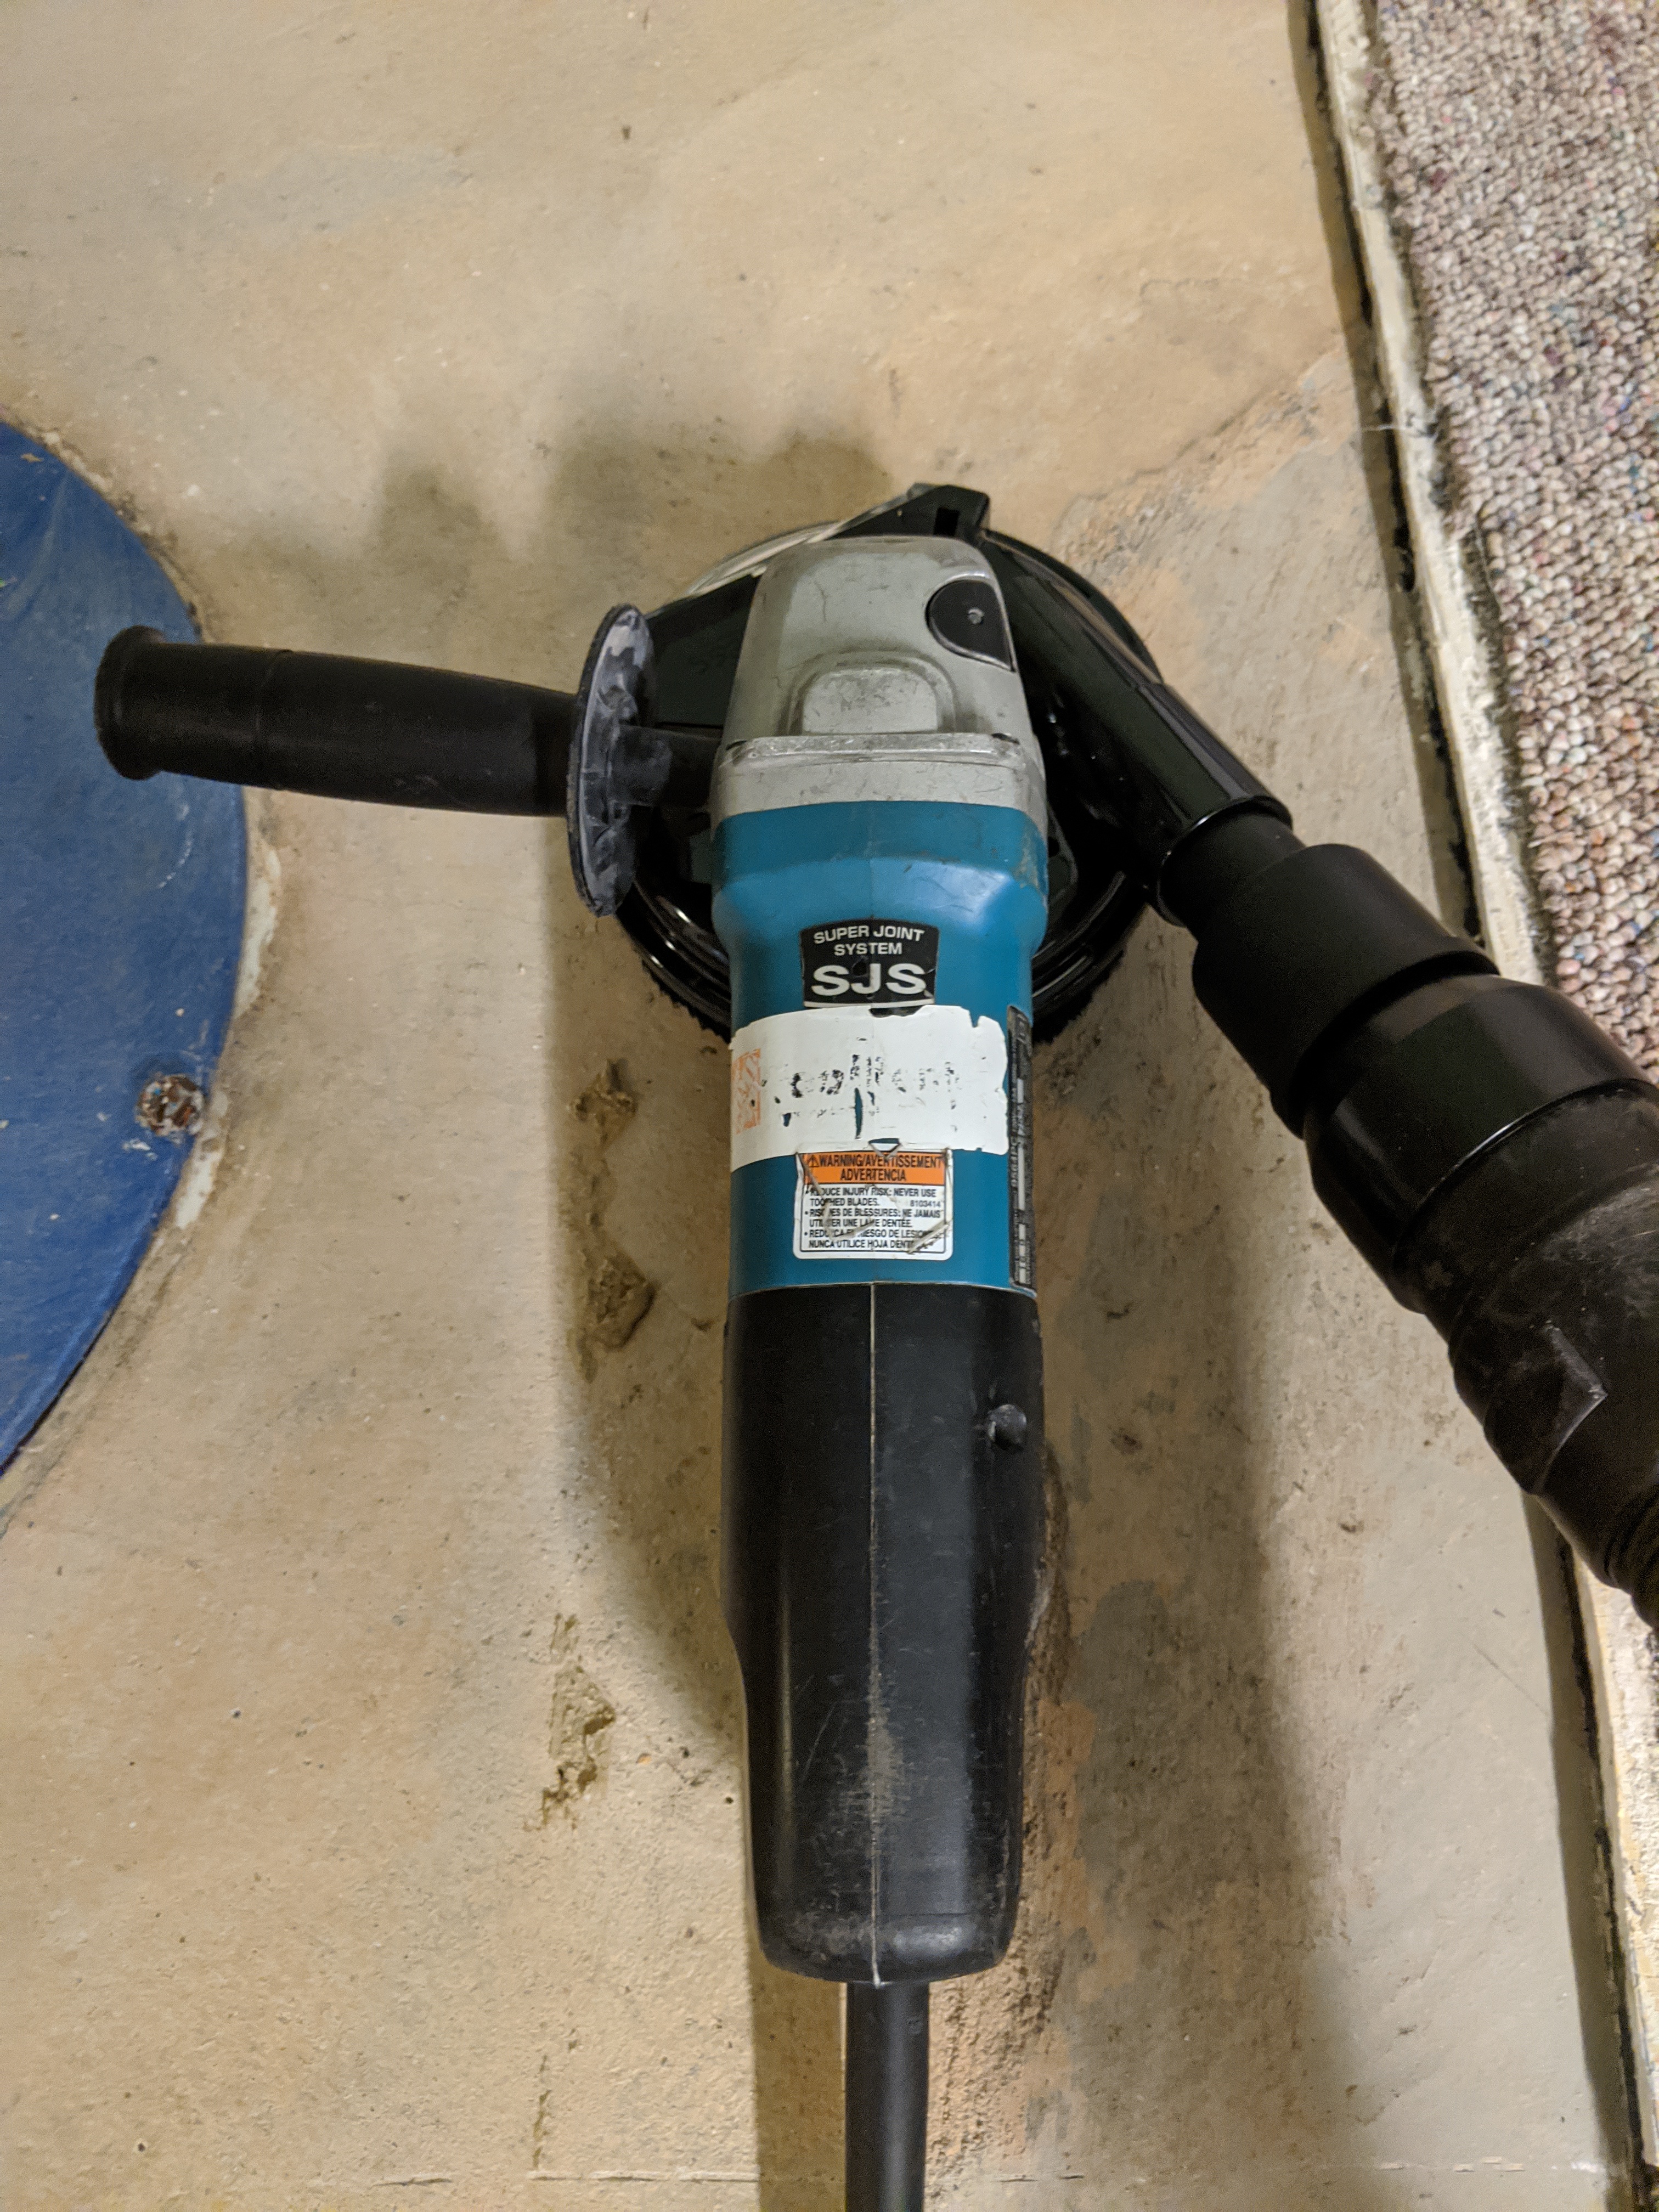
But it did do the job and smoothed out the areas I needed to try and make it more level so the bottom plates sat (reasonably) flush.
The grinder is super powerful and will easily bite into the concrete so I tried to move in circular motions and just kinda "grazed" the floor rather than pushing downwards (don't do that). The shroud comes with little spacers so you can position the cup at the right depth where you could ensure a level surface.
In my case I didn't purchase the grinder, I actually used Home Depot's tool rental which was about $22 for the day. An angle grinder isn't crazy expensive so I'm not convinced I saved money in the long run as I suspect having one will be useful and will eventually just buy one anyway 🤷♂️ But if you're not planning to DIY that much, maybe it's a good choice! They definitely have expensive tools you can rent, like a real concrete floor grinder.
Tool shout-outs
In the first post I laid out what tools I got ahead of time to prepare to frame and this week I got to use some of them. So what worked and what didn't?
MVP: Dremel Multi Max Oscillating Tool
The star of the show during my time framing was definitely the oscilatting multi tool I picked up, which happened to be the Dremel Multi Max. I was trying hard to get the Ryobi wireless one except it was sold out everywhere (it's popular!).
I used the multi tool to:
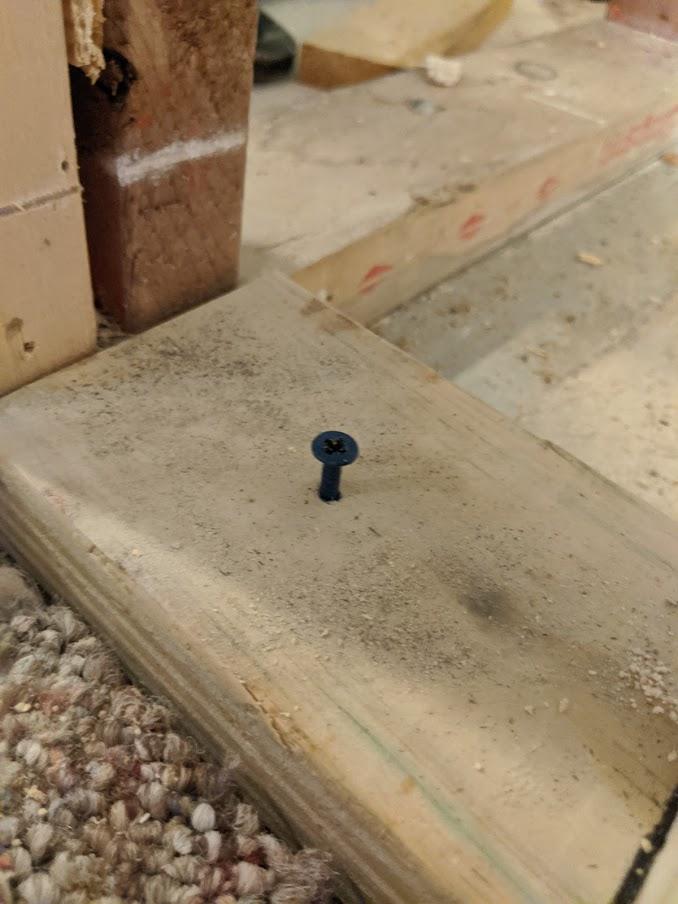
- Cut nail heads off
- Cut studs and stripping
- Cut wood paneling
- Cut the subfloor (Tyroc)
- Cut drywall
It was versatile and super useful, I highly recommend having one handy because it can fit in all the small spaces (like by the ceiling next to the steel beam) and the accessories can rotate or be swapped out depending on the job.
The blade I ended up using for nearly everything was the Carbide Blade because the Tyroc subfloor was a bit of a bear to cut through – but once I used the carbide blade, it worked pretty well and I just had to take my time to follow the line.
How does it compare to an angle grinder?
I think an angle grinder can do a lot of these jobs as well but from what I've seen, you are limited to a 4 1/2" circular blade. That works fine until you run up against a corner or edge. The beautiful thing about the oscillating tool is that you can use flat square blades to make super clean straight or plunge cuts. I imagine with an angle grinder, you'll need to touch it up with a multi tool anyway or similar tool to finish any flush cuts.
The angle grinder is more of a workhorse though – cutting pipe, grinding bolts, and where it really shined for me was in grinding concrete.
How does it compare to a sawzall?
A sawzall (or more formerly "reciprocating saw") is one of these bad boys which I luckily didn't have to purchase since my dad passed his down to me.
The sawzall is what you'd use to chew through studs or big metal pipes or anything real thick. It doesn't do so well with fine cuts like the oscillating tool.
I did use the sawzall to cut the bottom plate for the door after I laid down and fastened it which is the recommended approach.
So did I use the gun?
I mentioned my dad passed his old nail shot gun (aka powder-actuated tool) to me so I went ahead and got the #4 yellow .22 caliber shot for it as well as the impact nails. Well, I didn't use it 😱
How come? I ended up just using the hammer driver I purchased to drive tapcon screws for the plates into the concrete. I was a little more comfortable with that even though it's a bit more work.
Buy a brushless drill!
Here is a nugget I learned a bit too late (though I guess I have time to return the tools?) but when buying an impact or hammer driver, it's best to buy a brushless version. This is because non-brushless (um, brushed?) drivers will overheat when used for an extended amount of time. I noticed this when I was drilling through the concrete. I had to stop and pause a couple times in order to drill deep enough.
I think I have time to return what I purchased but in hindsight I recommend just buying the combo kit and score Ryobi has a brushless version! The kit comes with both the impact driver and hammer drill with batteries. That's a killer deal vs. buying separately. A battery alone costs about $60 if you just need one (which I did).

Up next: framing out the closet
After finishing all the prep work on all the surfaces, it was time to lay out and template the framing in place. When finishing an unfinished basement, you can frame on the ground and raise it up. However, in a finished space, it was much easier to frame in place. I also think it was easier for an amateur like me.
Kamran