Disclosure: Some links on this page below are affiliate links, meaning, at no additional cost to you, we will earn a commission if you click through and purchase. Read our disclosure for more info.
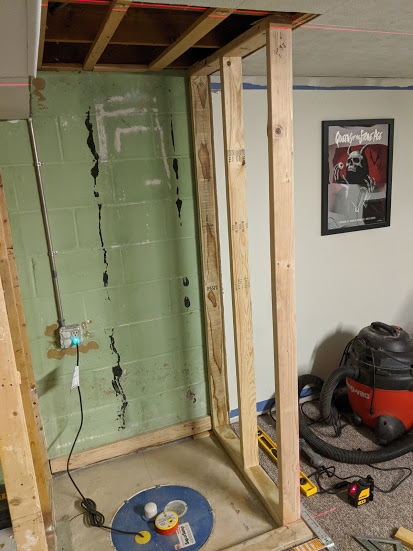
After finishing the prep work it was time to begin framing. I'll share some tips that I ended up putting into practice to get things level, plumb, and square.
Be sure to check out this project from the beginning with tool and material lists as well as links to the videos I referred to while learning.
 Kamran 16 Dec 2020 • 16 min read
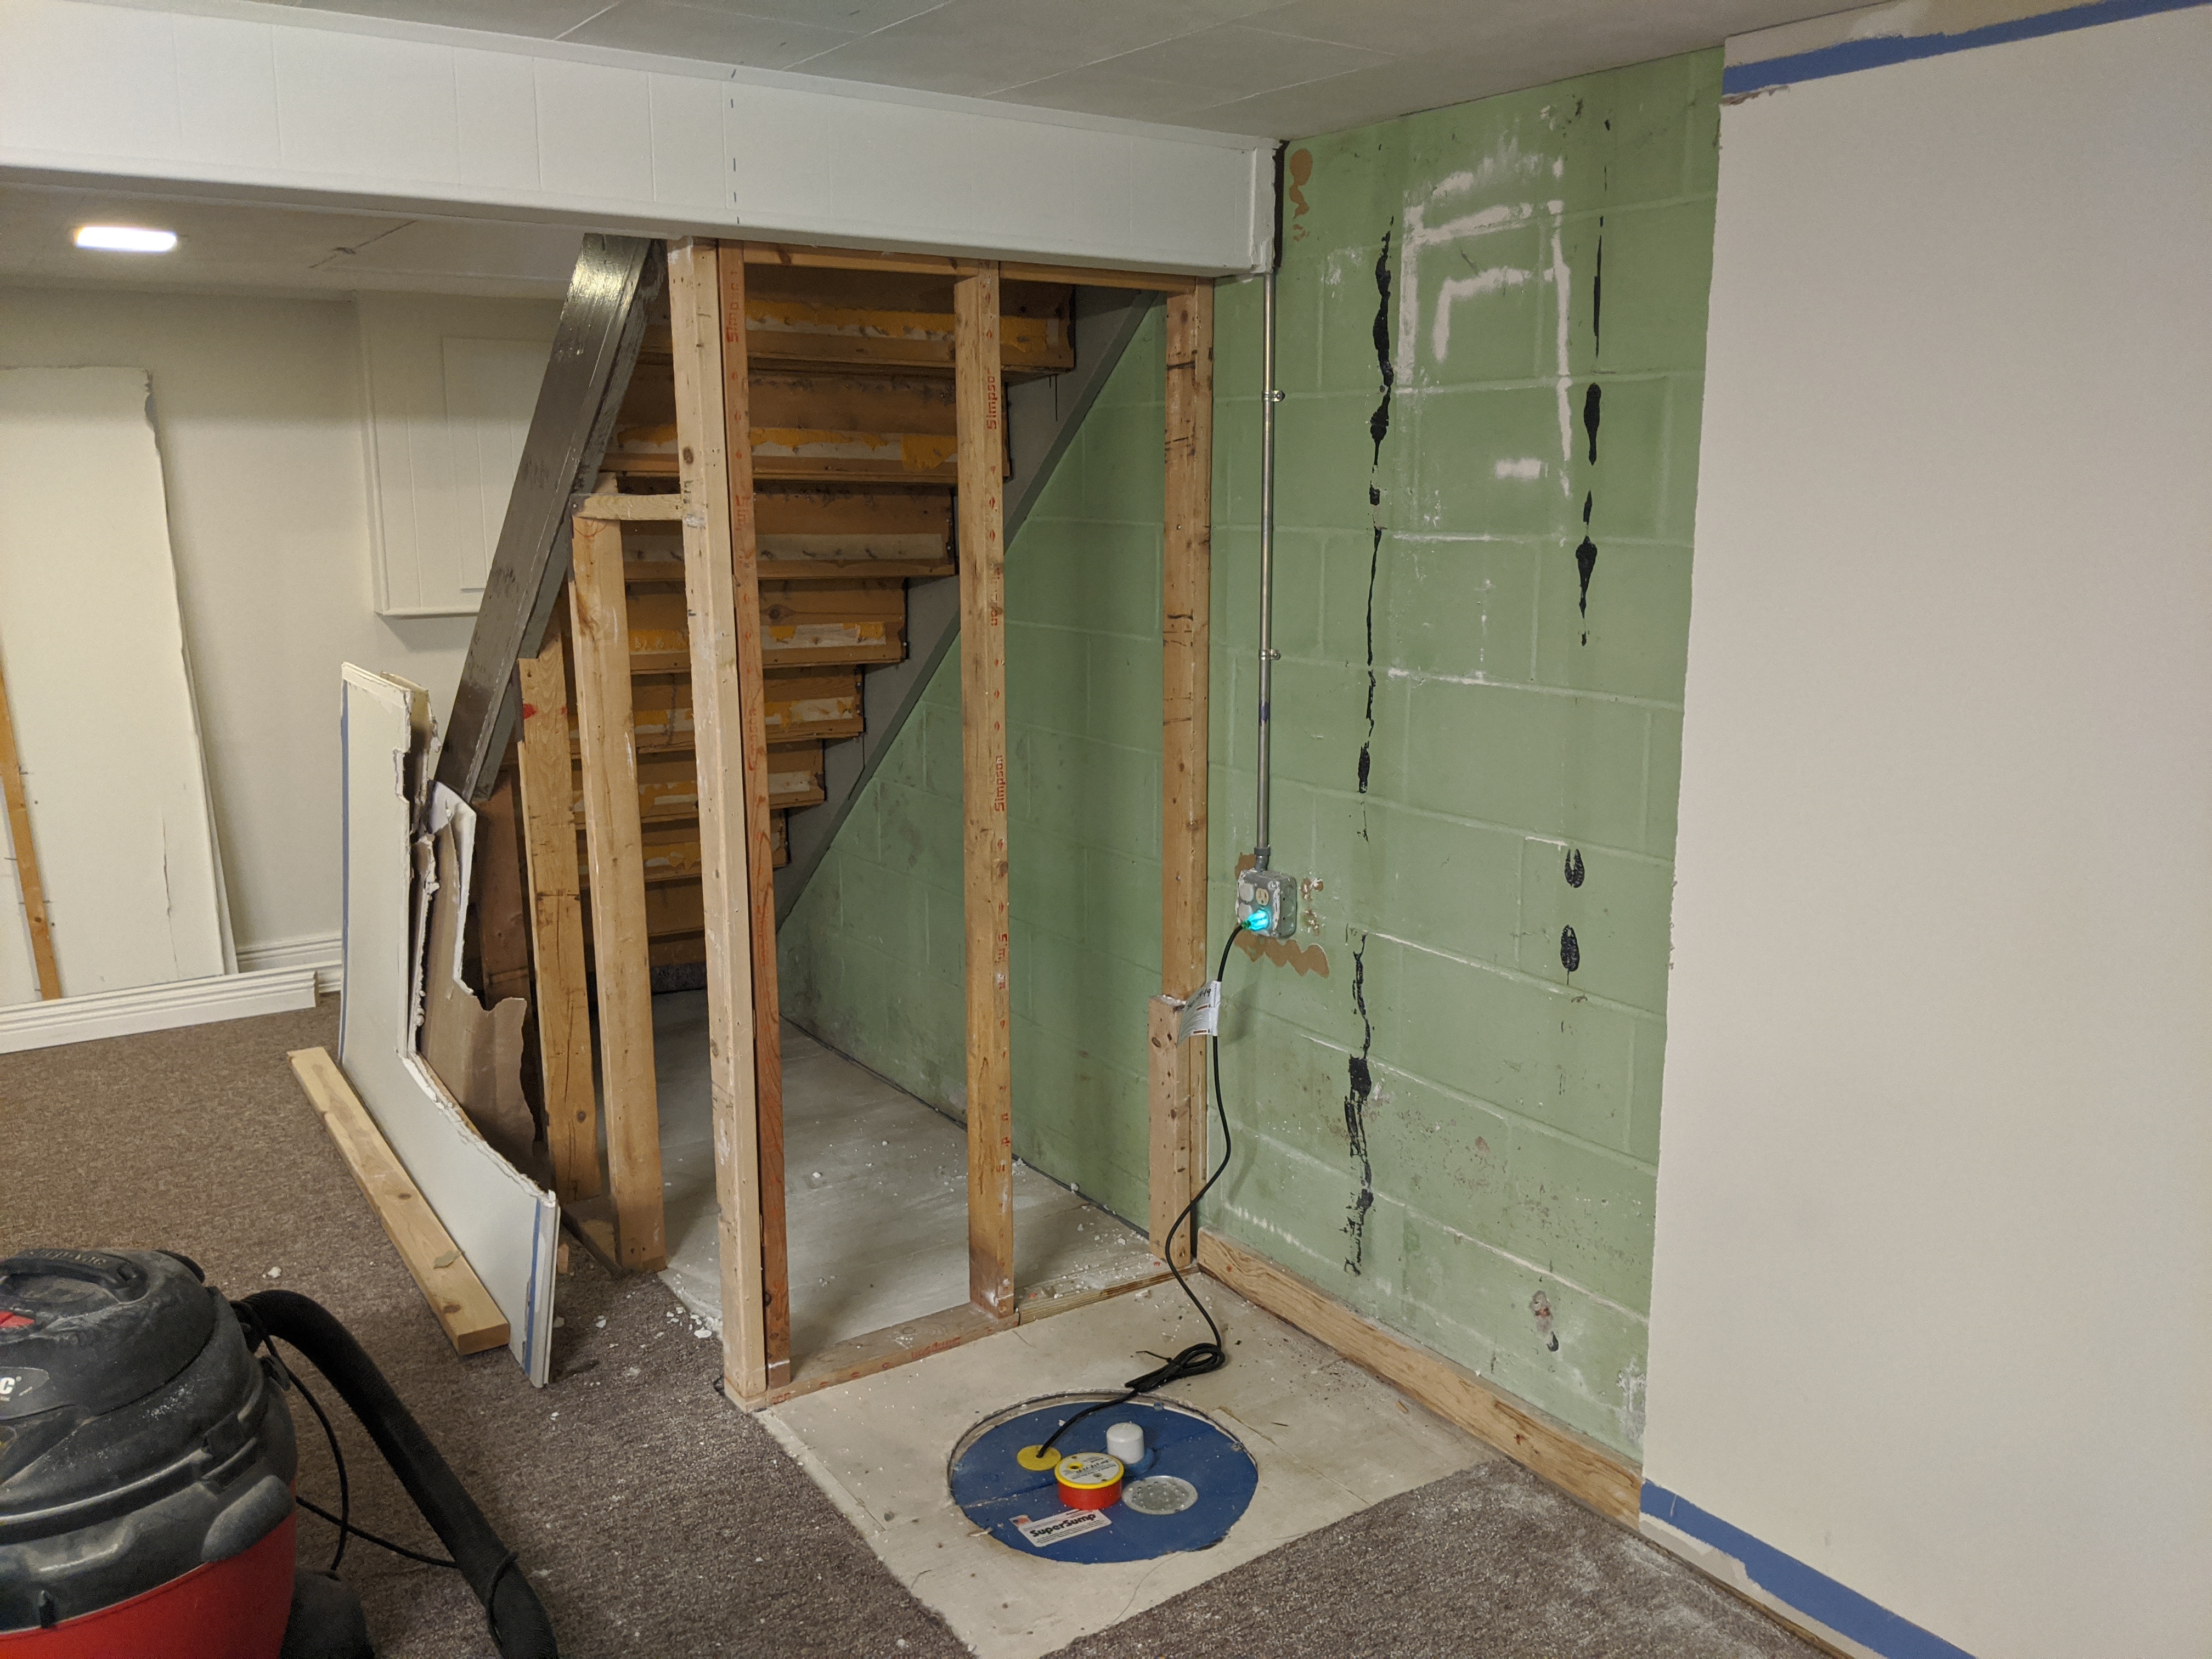
Planning the framing
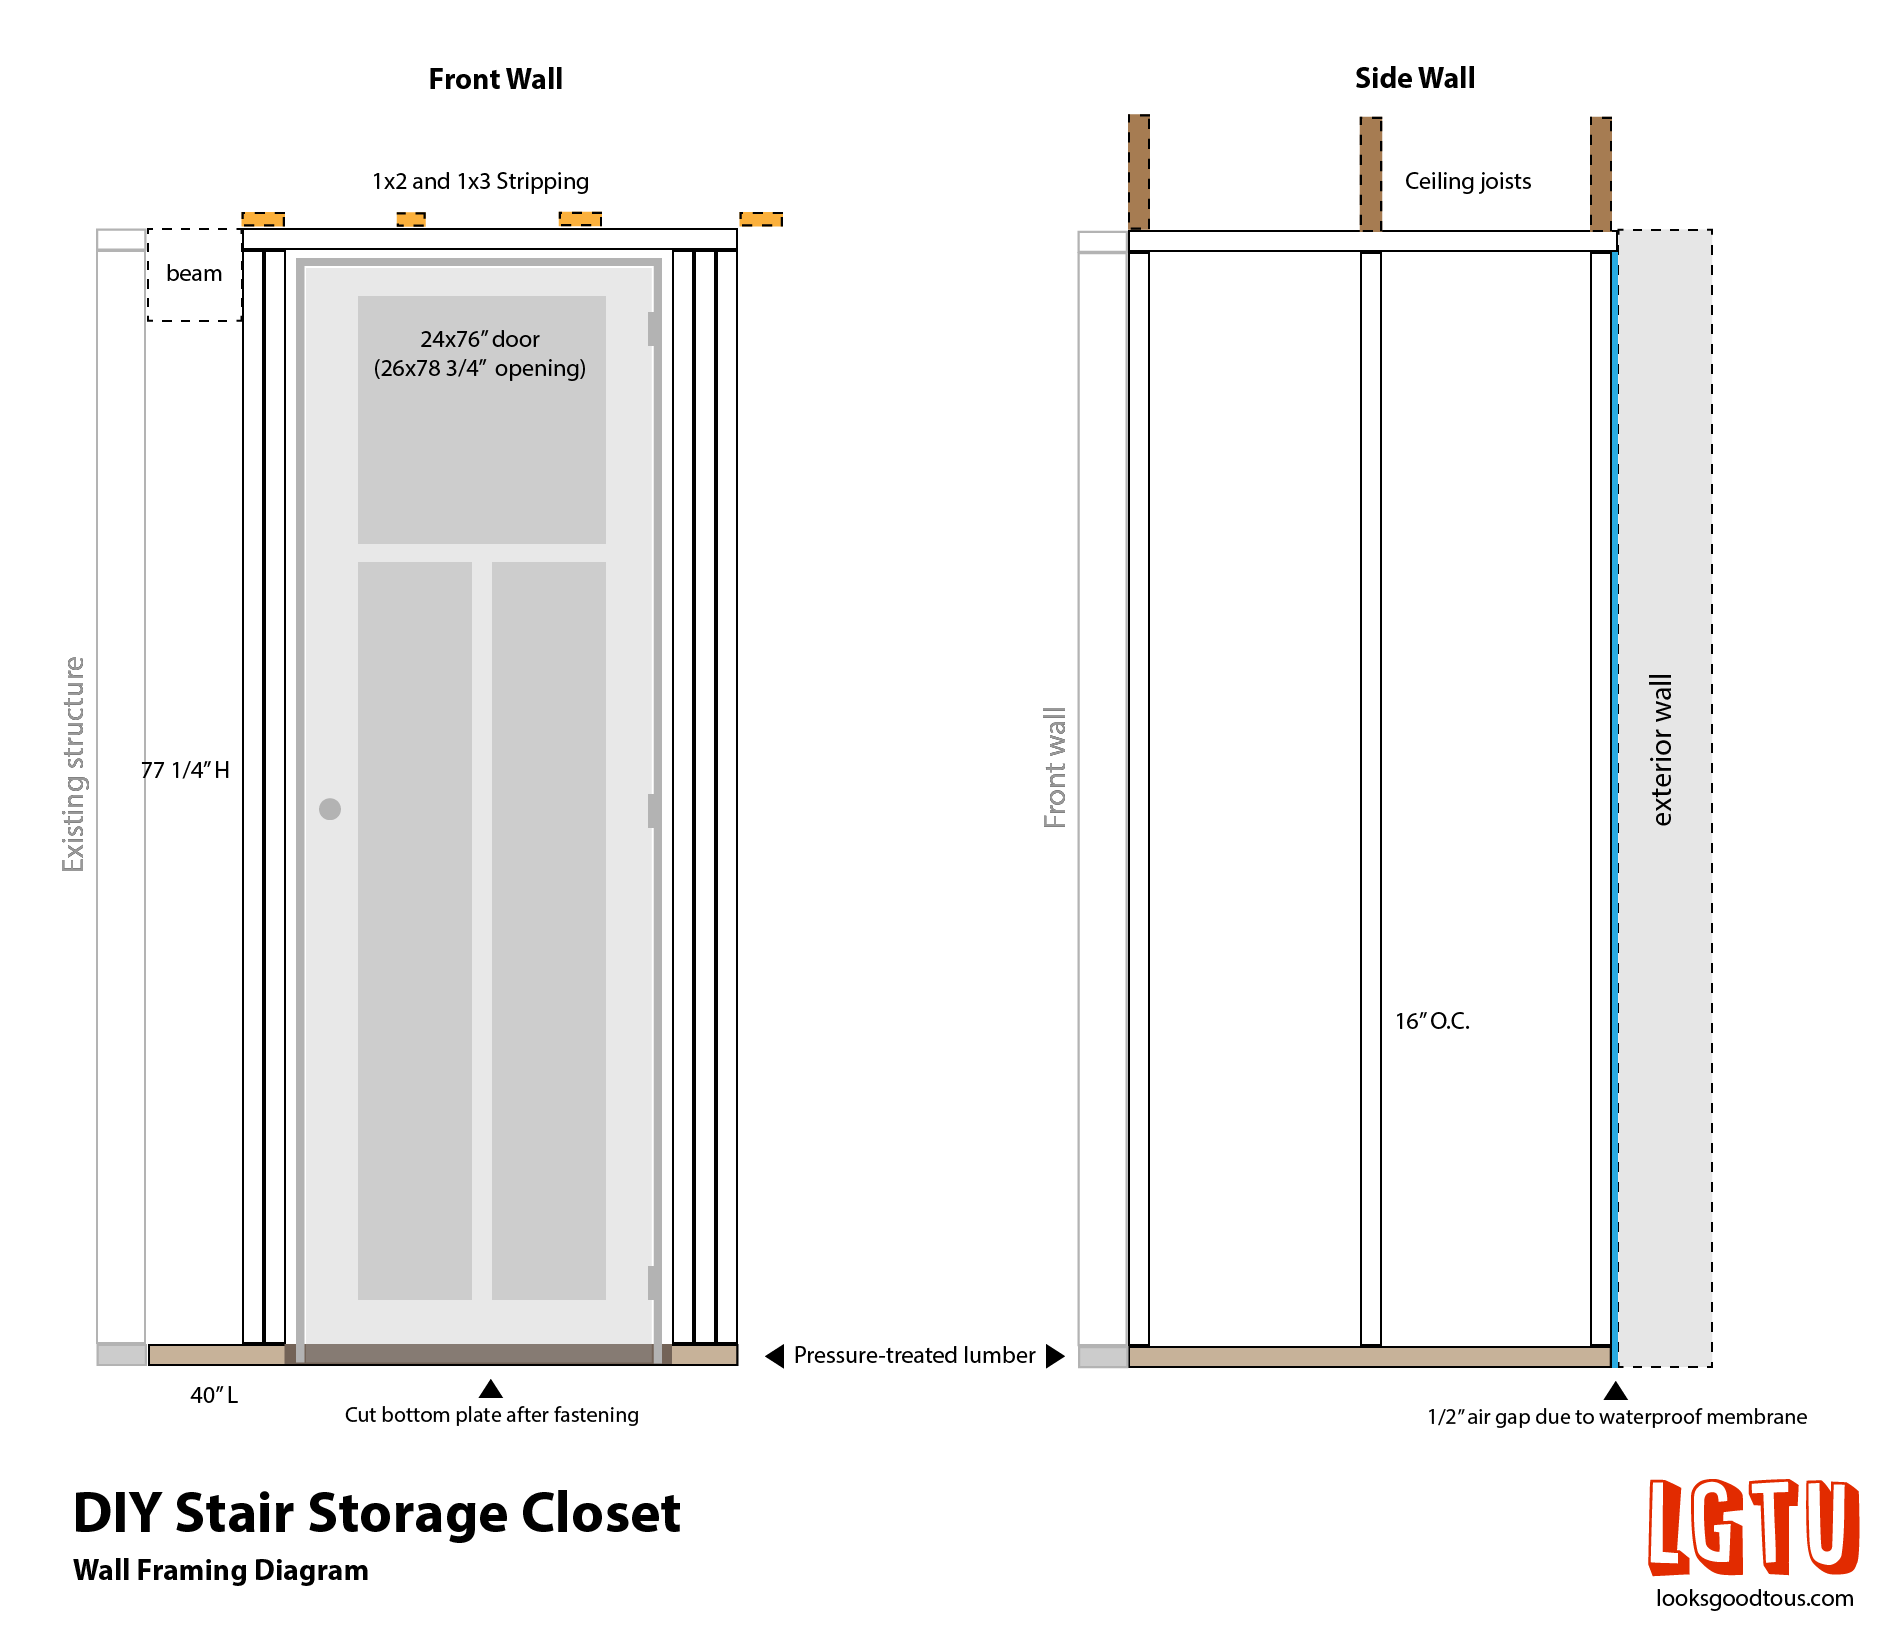
I'm a visual person and I had to see what I was building before starting so I put pen to paper and drew out the rough design in my DIY notebook. Rather than show you my chicken scratch I've made a proper visual diagram of what the framing ends up looking like in a more precise way. The measurements are not exact but they are within 1" or so of the final design.
Since I now had the appropriate space cut out of all the finishes, I could take more final measurements (and yes, my original planned ones were off but "good enough" to rough it in).
👉 Here's the first pro tip on framing: don't fasten the bottom in until all your walls are in place, plumb, and level. I took copious amounts of notes on the framing videos I linked to in the first post and that was one tip I filed away.
Even before I cut back the finishes in the previous post, I made a "template" on a scrap stud I had lying around. This helped me ensure the rough measurements were correct before making any final decisions.
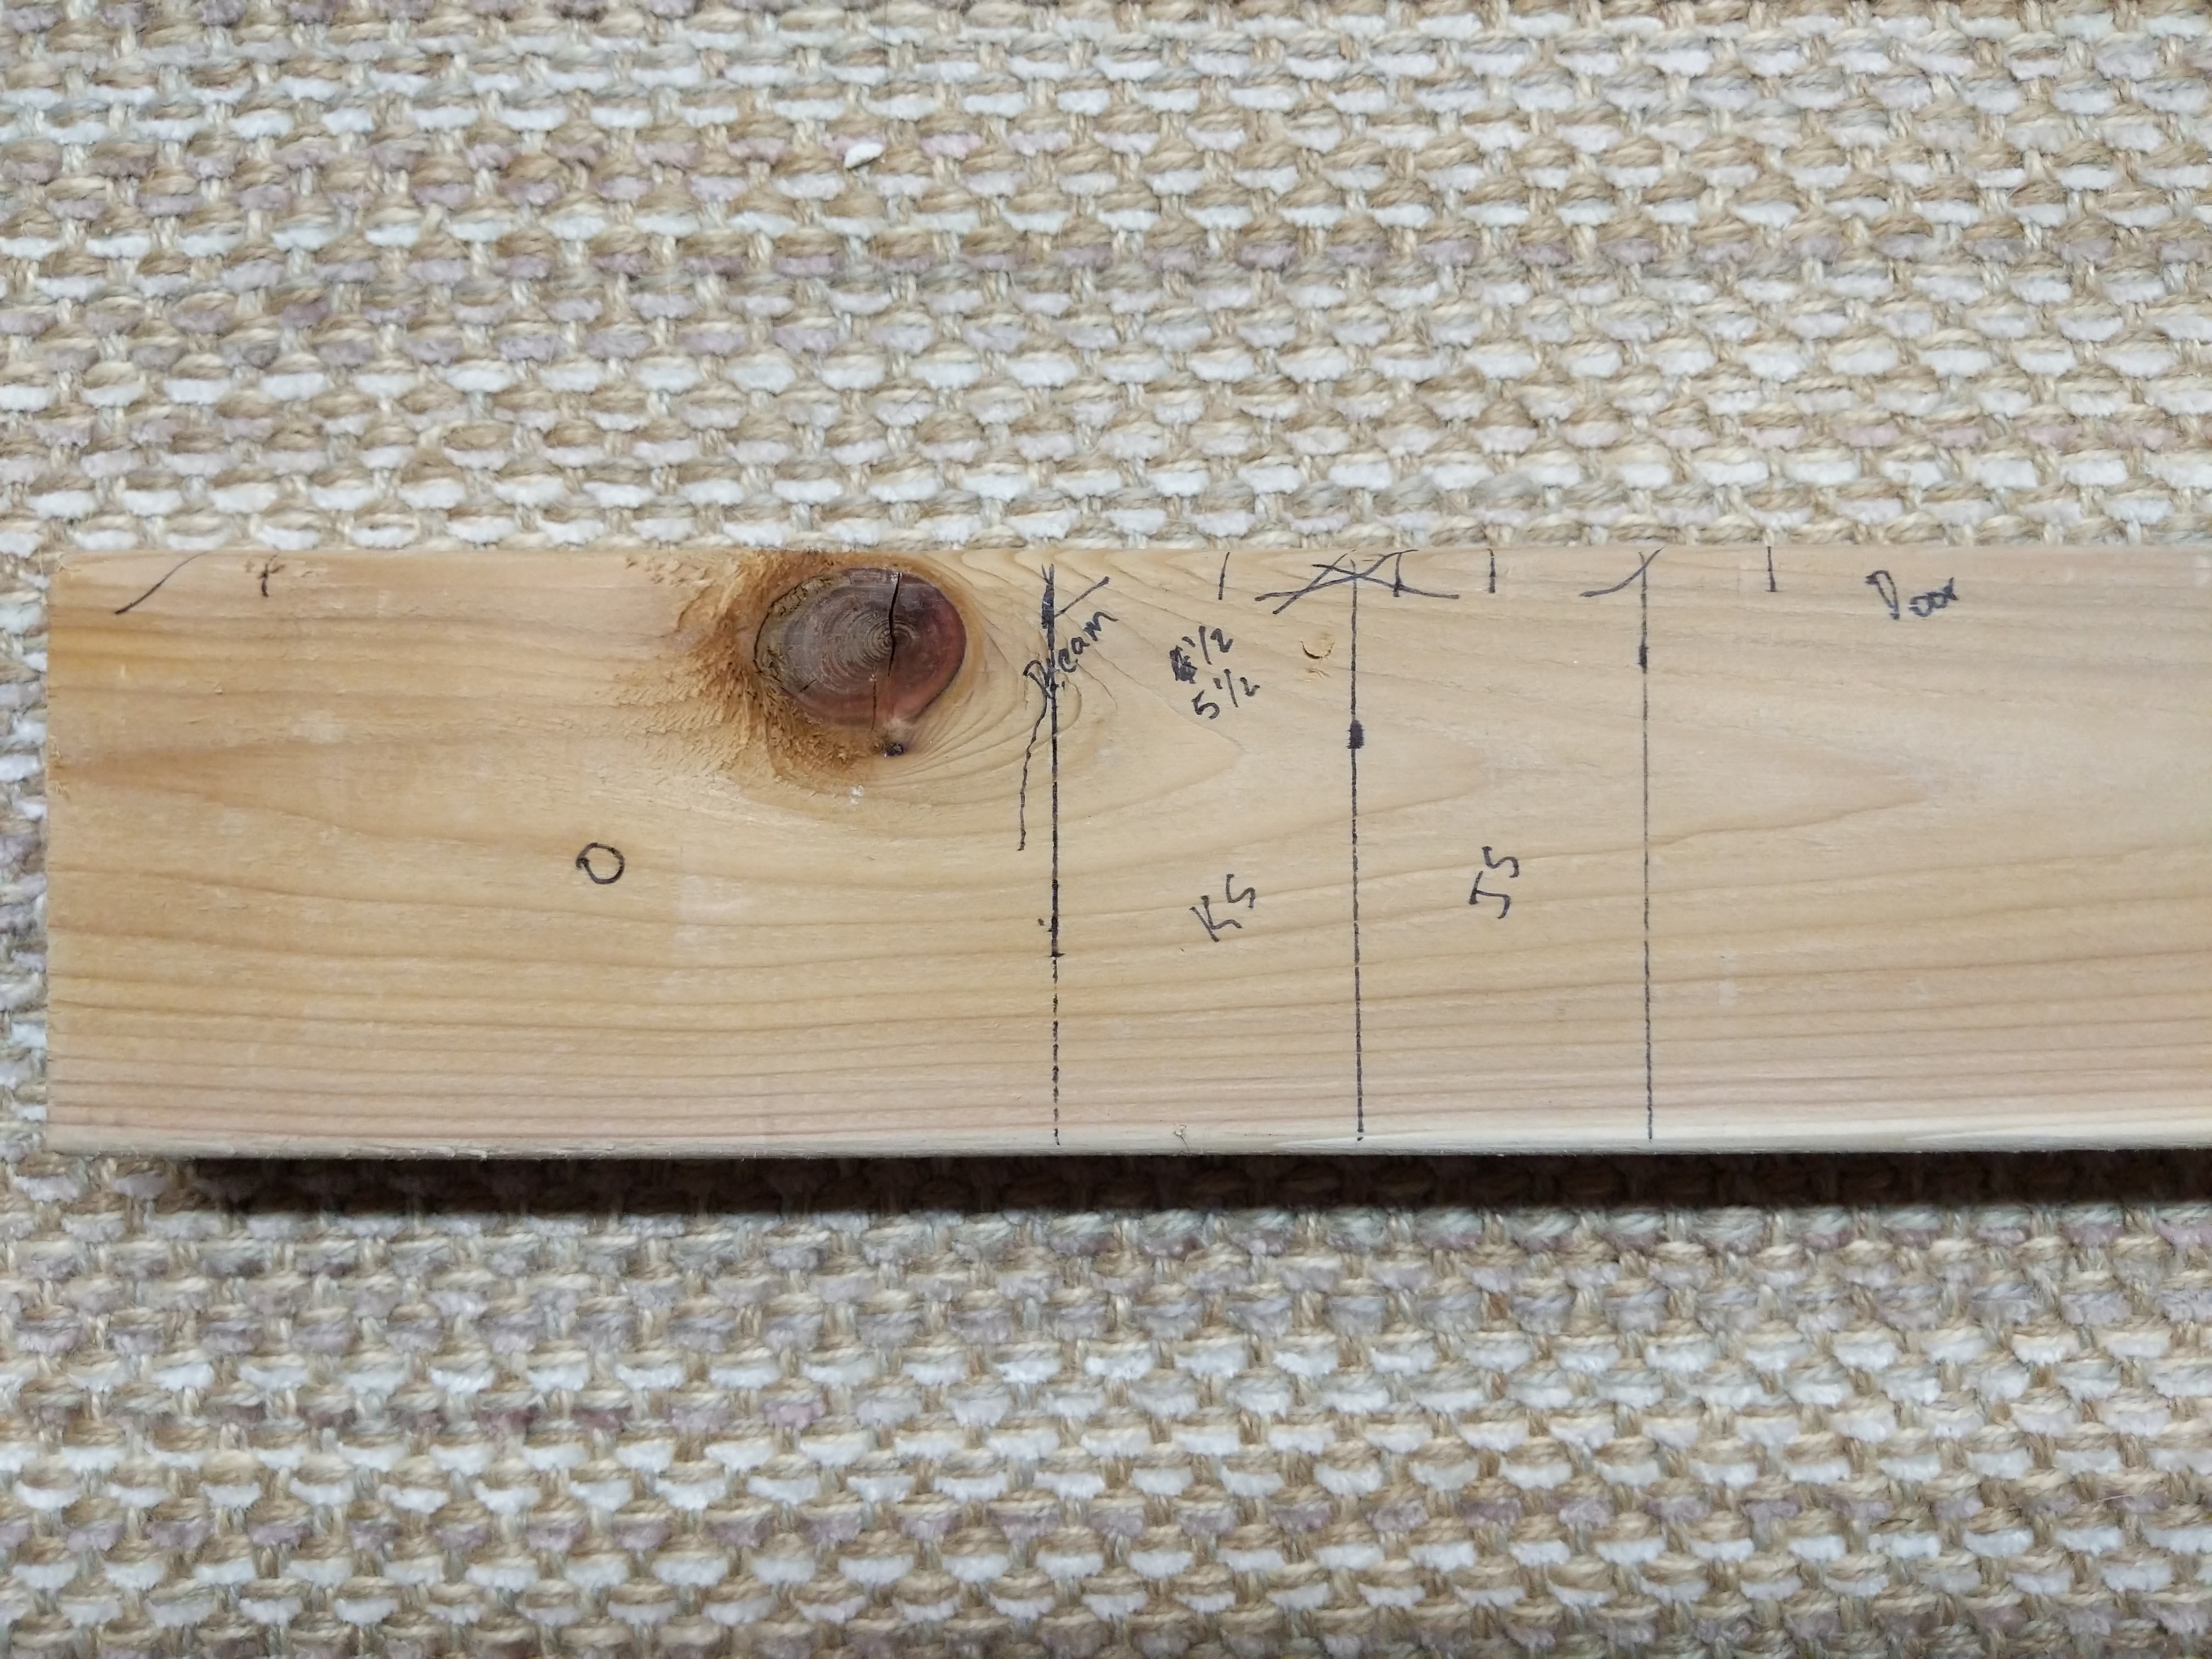
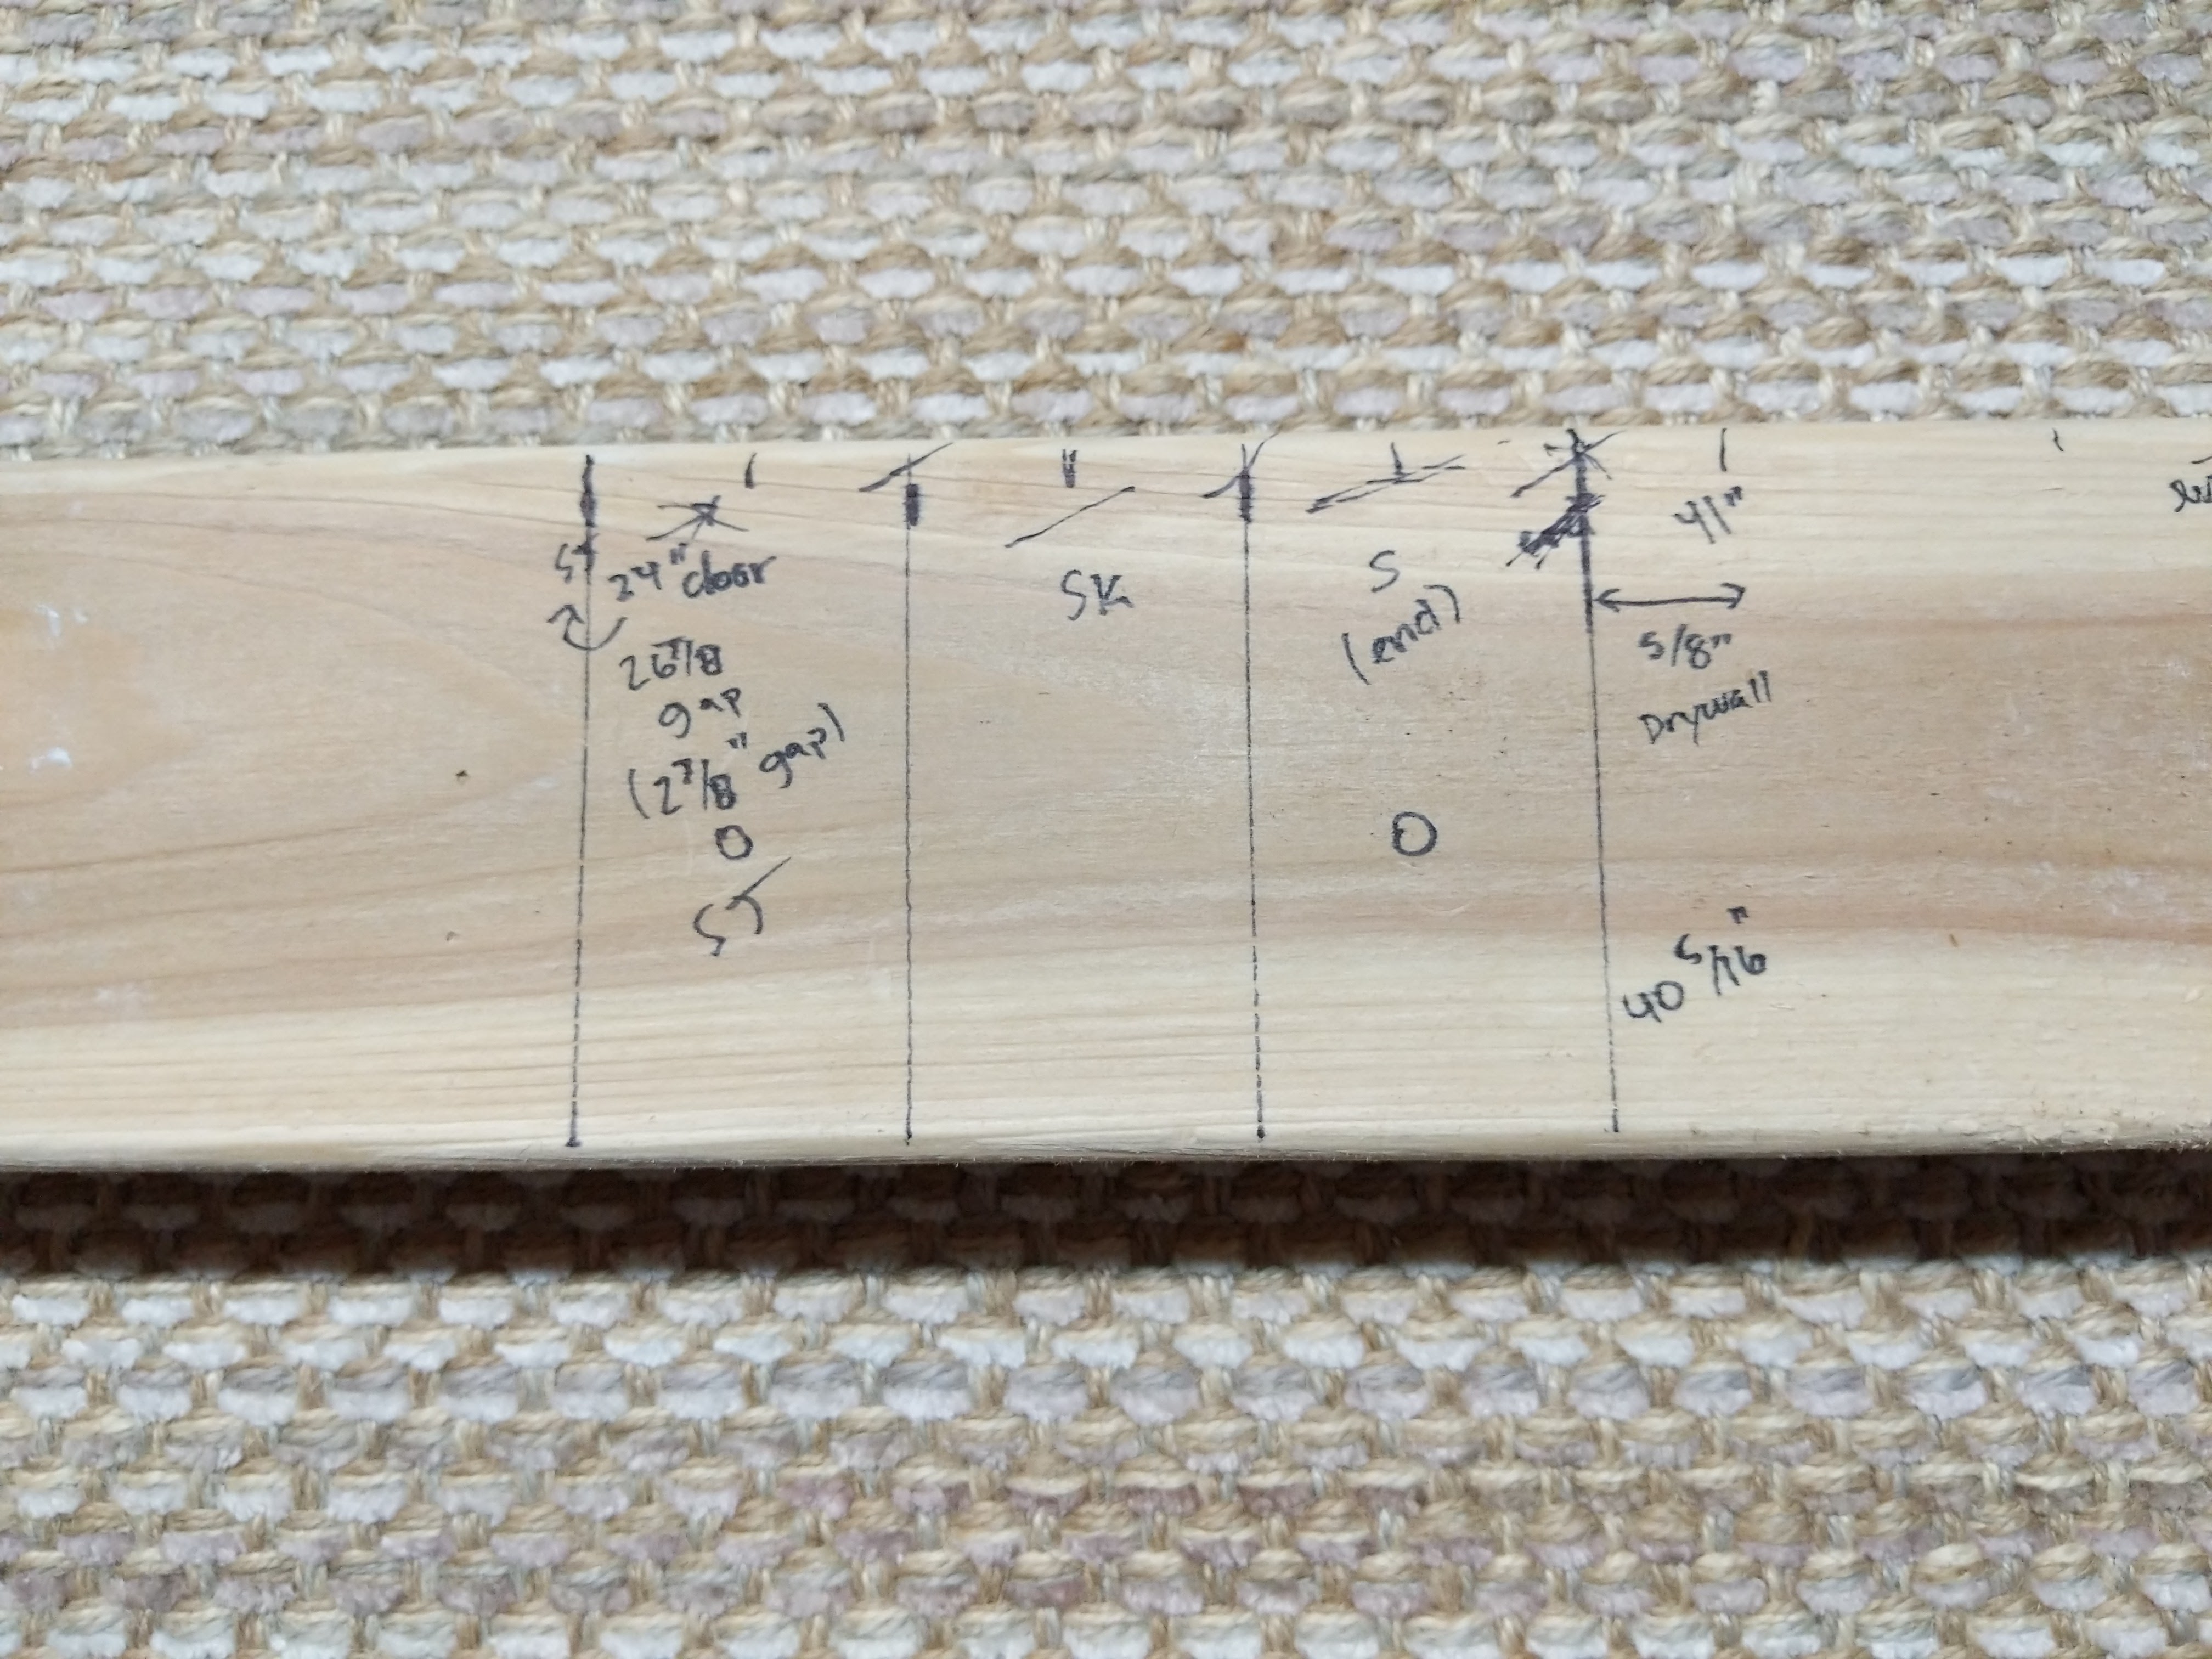
I used this template stud to make sure the door opening was planned and for seeing where I wanted to put the concrete anchors. When I cut back all the finishes, I could actually get the exact measurements recorded so that's why you see so many notations on there.
I measured the door frame wrong
The standard rough measurements for a door frame are:
- Width: Door Width + 2"
- Height: Door Height + 2 1/2"
I actually made a mistake and added 3" instead of 2" for the rough door width in the framing and didn't realize the mistake until I tried hanging the door (more on that process soon!). For some reason, I thought one video I watched recommended 3" but this turned out to be too much space for shimming easily. The jamb size is 5/8" on each side, which is a total of (Door Width + 1 1/4"). If the rough opening is 3", you then have an extra 1 3/8" on each side which is a LOT.
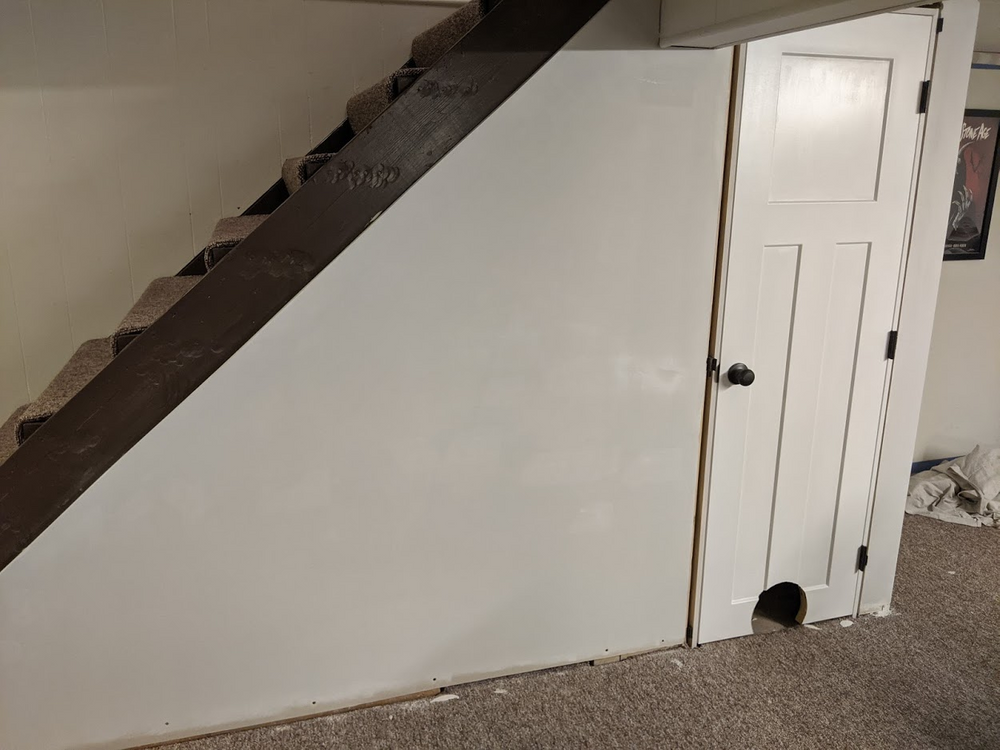
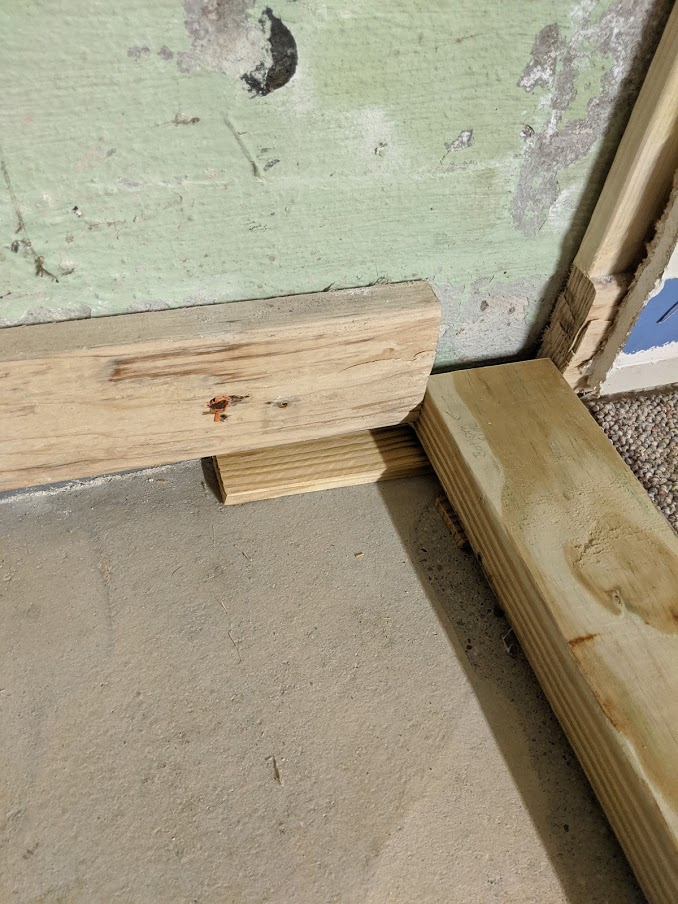
To close that gap, I ended up having to add a 1x4 board to pad one side of the framing:
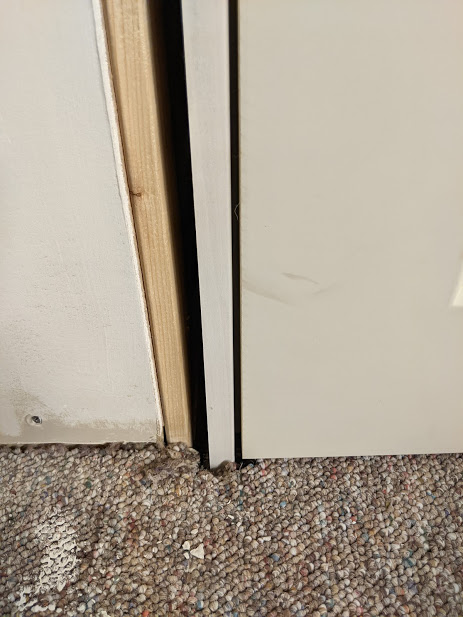
Luckily, the rough size ended up being more like 2 3/4", so one board was enough to do the trick. Remember, a 1x4 is really 3/4 x 3 1/2" so the 3/4" was just enough to make it easier to shim. I chose the latch side for the board since I wanted the hinge side to be secured well into the jack and king studs.
👉 Pro tip: If you have a table saw, you can cut a board from an existing 2x4 and make the board a bit wider than 3/4". I don't have a table saw (yet) so I just bought a 1x4 board. 🤷♂️
It's not a huge deal to fix but I wish I had double checked before I finished framing! I've included the correct sizing in the diagram above so you can avoid the same mistake if you're doing this for the first time too.
Calculating the lumber you need
Using the measurements and the diagrams I drew, it wasn't hard to calculate how much lumber I needed for the project. 2x4s come in different lengths but only 8' would fit in the van.
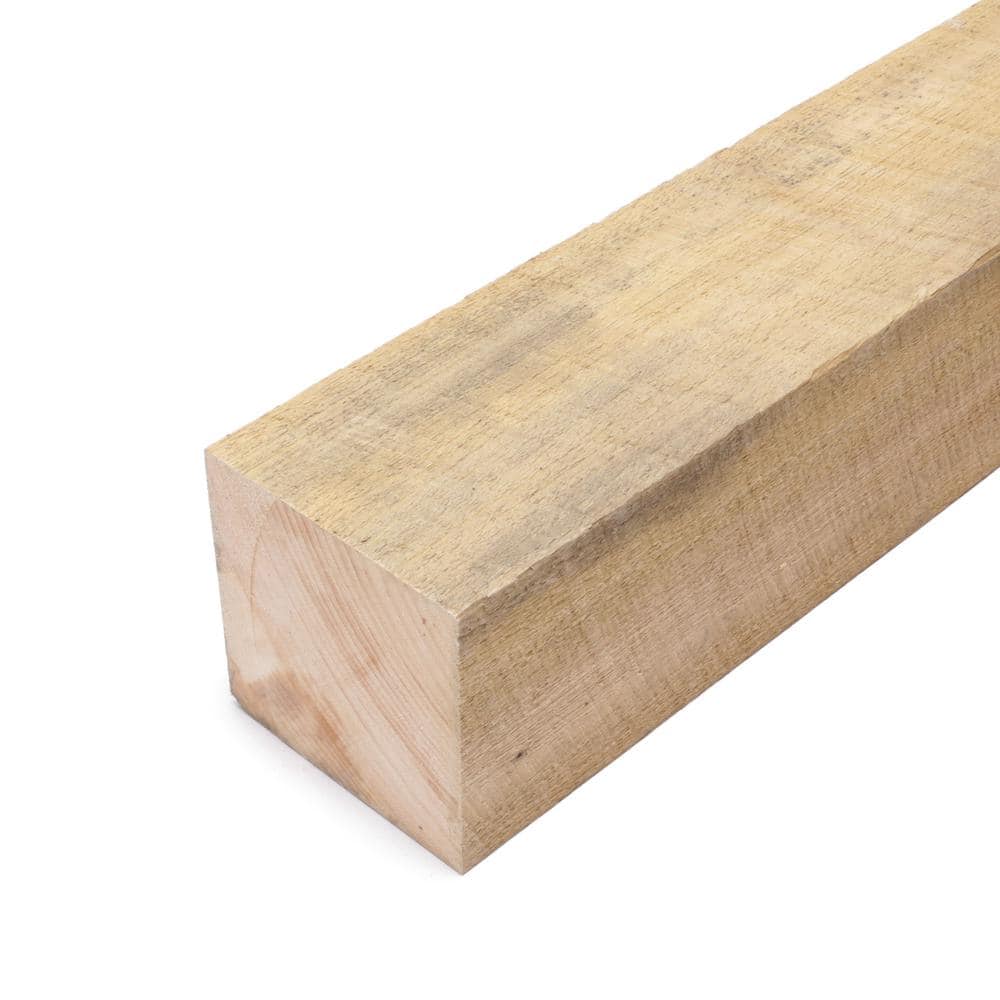
Types of lumber you need
A framing project can involve multiple types of lumber and you'll need to know where and when to use each kind. This was news to me being a total amateur. I thought it was all just "studs" and there's like one bin full of studs I can buy. "One stud, please, and make it your BEST." No, there's like a dozen flavors of studs. If I keep saying stud I'm worried what you'll think of me.
"Stud" grade vs. higher grade lumber
Lumber comes in different grades. Studs will usually fall under No. 2 lumber for framing. No. 1 lumber will look better than No. 2 but not necessarily needed for framing. Personally I chose the "Premium kiln-dried" stud grade and then for the door studs, I chose the No. 2 SPF lumber. In some videos I've watched, they suggest only using No. 2 lumber.
👉 Caveat emptor: Some lumber will say "Premium" but this is not a standard grading term, it just describes the quality of the cut. I found the premium lumber to work okay although it took me awhile to find straighter boards.
I'm no expert and I will defer to Home Depot which has a good rundown on the types of lumber:
Pressure-treated lumber
For wood that touches concrete slab building code requires us to use pressure-treated lumber. These are specially treated studs that are compressed and resistant to moisture so they won't deteriorate over time when exposed to moisture-prone basements. PTL is usually more straight than regular lumber so you could use PTL for all your framing but it's also super heavy! At Home Depot, I went with their No.2 pressure treated 2x4s.
Ordering lumber
This wasn't my first time buying lumber since I purchased cedar lumber for the window cover earlier in the year. However, it was my first time buying lumber for framing.
Home center or lumberyard?
I bought my lumber at Home Depot – it's easy and convenient. I shopped in person in the store, which is slow and not super efficient. However, I only needed like 12 boards or so. If I was doing a large job I would purchase in bulk from a local supplier instead. Usually you can get better pricing because a warehouse/lumberyard lower overhead than a big box retailer and that's reflected in the price you can get. More importantly, you get better quality lumber that is straighter and should have less defects.
Don't take my word for it though, check out this video for a nice breakdown:
If you're in Minnesota and looking for a local supplier friendly to homeowners, I typically shop at Scherer Bros as they have multiple locations and have convenient will-call and delivery service. That's actually where I bought my doors from and I'll cover that process in a future post.
Laying the bottom plates down
I laid down the bottom plates so that I could take my laser level and mark the final placement of the top plates (as the top will be fastened first) on the ceiling.

I want to call out a couple things here:
- In typical framing videos/examples, I have only seen it where the perpendicular wall frame coming out is flush with the face wall. In this case, I didn't do that because it would have meant a smaller door than 24" and I wanted to try and keep it at 24". See my diagram for details on what I mean.
- I used a T-square to try and ensure the wall would be as square as reasonably possible. By not fastening in the bottom, this gives you some wiggle room to adjust.
Now setting my laser level in line with the edge of the perpendicular wall frame, I could mark on the ceiling exactly where to measure for the top plate. It is important that the laser line is still square with the existing exterior wall! Otherwise your wall will be plumb but not square! So I took measurements at the start and end of the new wall to ensure the measurements matched closely.
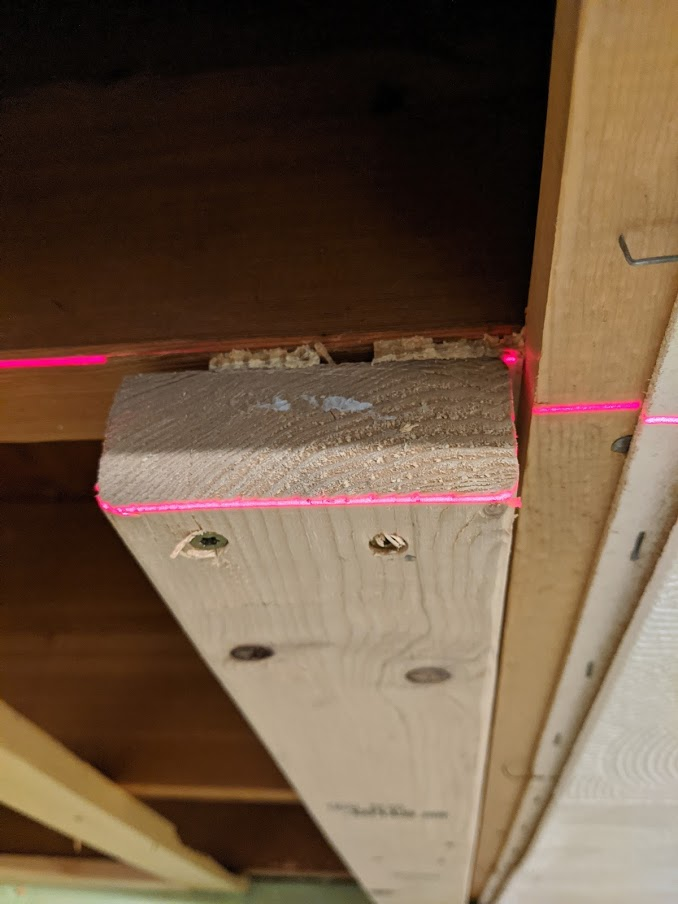
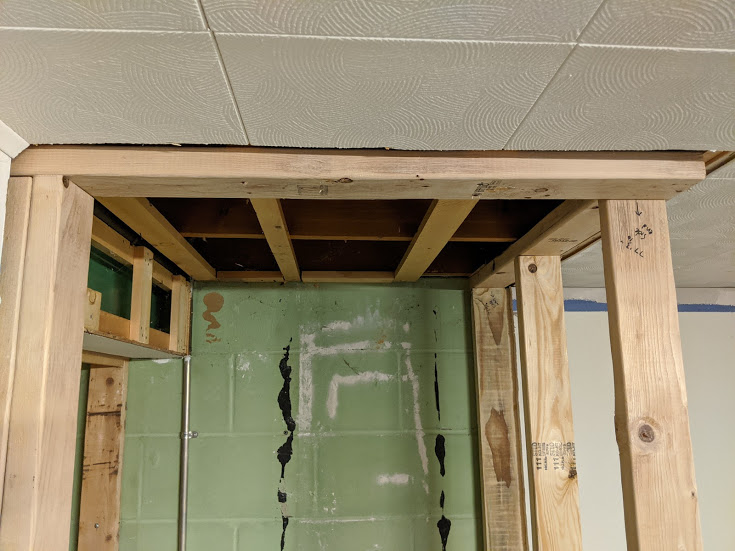
Fastening the top plate
With the laser marking where to set the top plate, I measured and cut to fit.
The top plate spanned 3 joists and typically when you raise a framed wall in place, you take the shortest height and subtract 1/8-1/4" or so to account for shimming. I was framing in place so I basically set the top plate and moved it side to side to see which joist was lowest. It turned out the middle joist was the lowest between the 3 so I fastened that first.
With the middle secured, I could then take my level and use shims on both sides to get the top plate level.
I screwed through the shims into the joists and then I had my level top plate.
Screws vs. nails for framing
For fastening the framing to existing structure I used 3 1/8" #9 GRK framing screws (they are labeled as "multi-purpose" but they're wood structural screws). I also used screws to fasten adjoining studs together. However, I used the air gun framing nails for fastening the studs to the top and bottom plates.
Why not framing nails all around? It came down to being an amateur and using screws allows me to undo any mistakes. Bigger picture though: if I do end up redoing the stairs, I will have to take down or redo the framing and I'd like to reclaim as much as I can. I am treating this framing as an add-on to the existing (crappy) structure.
Based on what I've researched and seen in forums, nails are preferred because they allow for some give and take since wood expands/contracts. Screws resist pulling apart but they transfer vibrations more which is why you never screw in stripping for drywall to the ceiling. Since this is a non-loadbearing wall, we don't have to be too concerned with "shear" strength which nails excel at. 🤷♂️
What does the code have to say about screws? Well, it doesn't say you can't use them 😏 I think structural screws should be acceptable especially for a non-loadbearing wall into existing structure.
Did you know? Collated fasteners like the nails used in the pneumatic air nailer have adhesive on them that heats up when the nail is shot in the wood, resulting in a stronger bond and higher shear strength. That is why the building code has a "schedule" of fasteners with varying options. Source
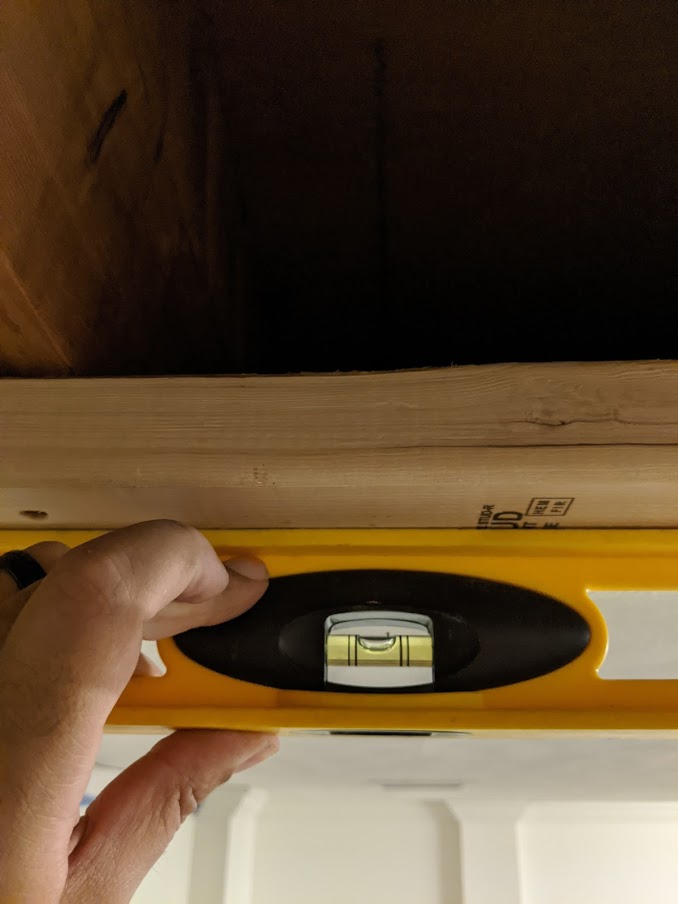
Level the bottom plate
The next step after fastening the top plate is to level the bottom plate, not for fastening (yet) but for measuring the studs and to ensure they sit on a level surface.
Like I mentioned before, these plates sit on concrete slab and it's a little rough. After I ground it down, it was smoother but it still wasn't level because the slab slopes a bit near the wall.
👉 Tip: Use composite shims for the bottom plate
I used wooden shims (cedar) on the exterior side to level off the plate. The purpose of using pressure treated lumber on the bottom is that it resists moisture. Cedar shims will resist moisture (it's why cedar boards work well outdoors) but I forgot I had some composite shims which are impervious to moisture. Those would have been the better choice, I wasn't even thinking about it!
Frame the side of the closet
After leveling the top and bottom plates, it was time to cut each of the studs to fit and get them into place. I started with the side of the closet (see previous diagram).
Standard framing uses 16in on-center (O.C.) stud placement. The way I handled this was to start the measurement from the exterior wall outward since this would line up with the ceiling joists. According to code, when using a single top plate, studs can be within 1" of a ceiling joist. What ended up happening was that all the studs lined up perfectly – I shouldn't be surprised, the stairs end at a joist so the existing framing lined up.
I took my measurements with measuring tape and wrote it down, marked the studs with a square, and took them to the miter saw to cut them. I only needed 3 for this wall and they ended up all the same exact height (a testament to having a level top and bottom plate).
I set them into place using my hammer to tap lightly to create a compression fit. If the measurements are right, it should fit snugly and should not need a ton of force to move into place.
Tip: According to Jeff at Home Renovision, if your floor above your wall has tile (like mine), you don't want to hammer a wall into place because it could cause the joist to raise up and crack your tile. Leave a little breathing room for shimming (1/8" or so). Since I was framing in place, I didn't have to worry much about this but it was a good tip.
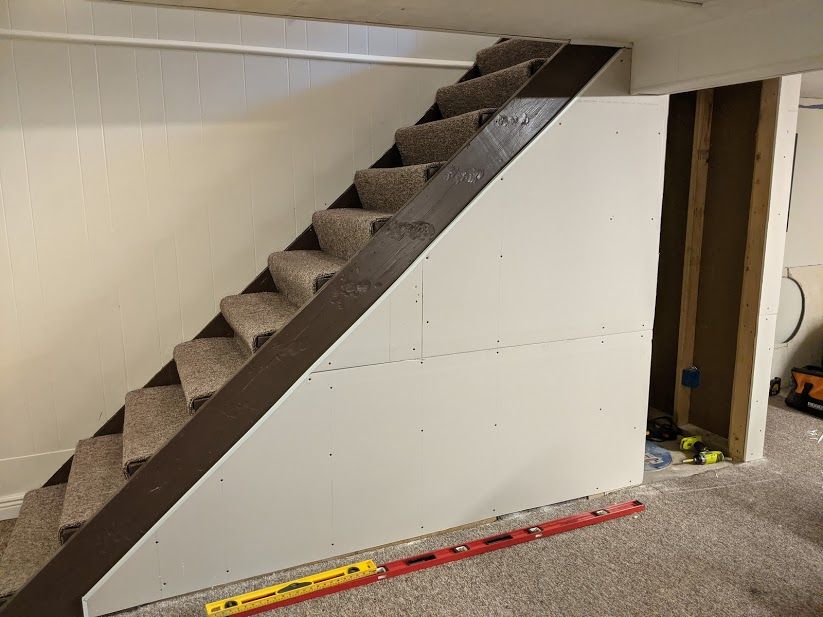
Framing the front of the closet
After the side was framed in, I needed to frame the front of the wall. It's possible I ended up using too much lumber on the corner but you need two studs for the door frame and then I wanted to ensure there was enough space on the side so the third stud did the job.
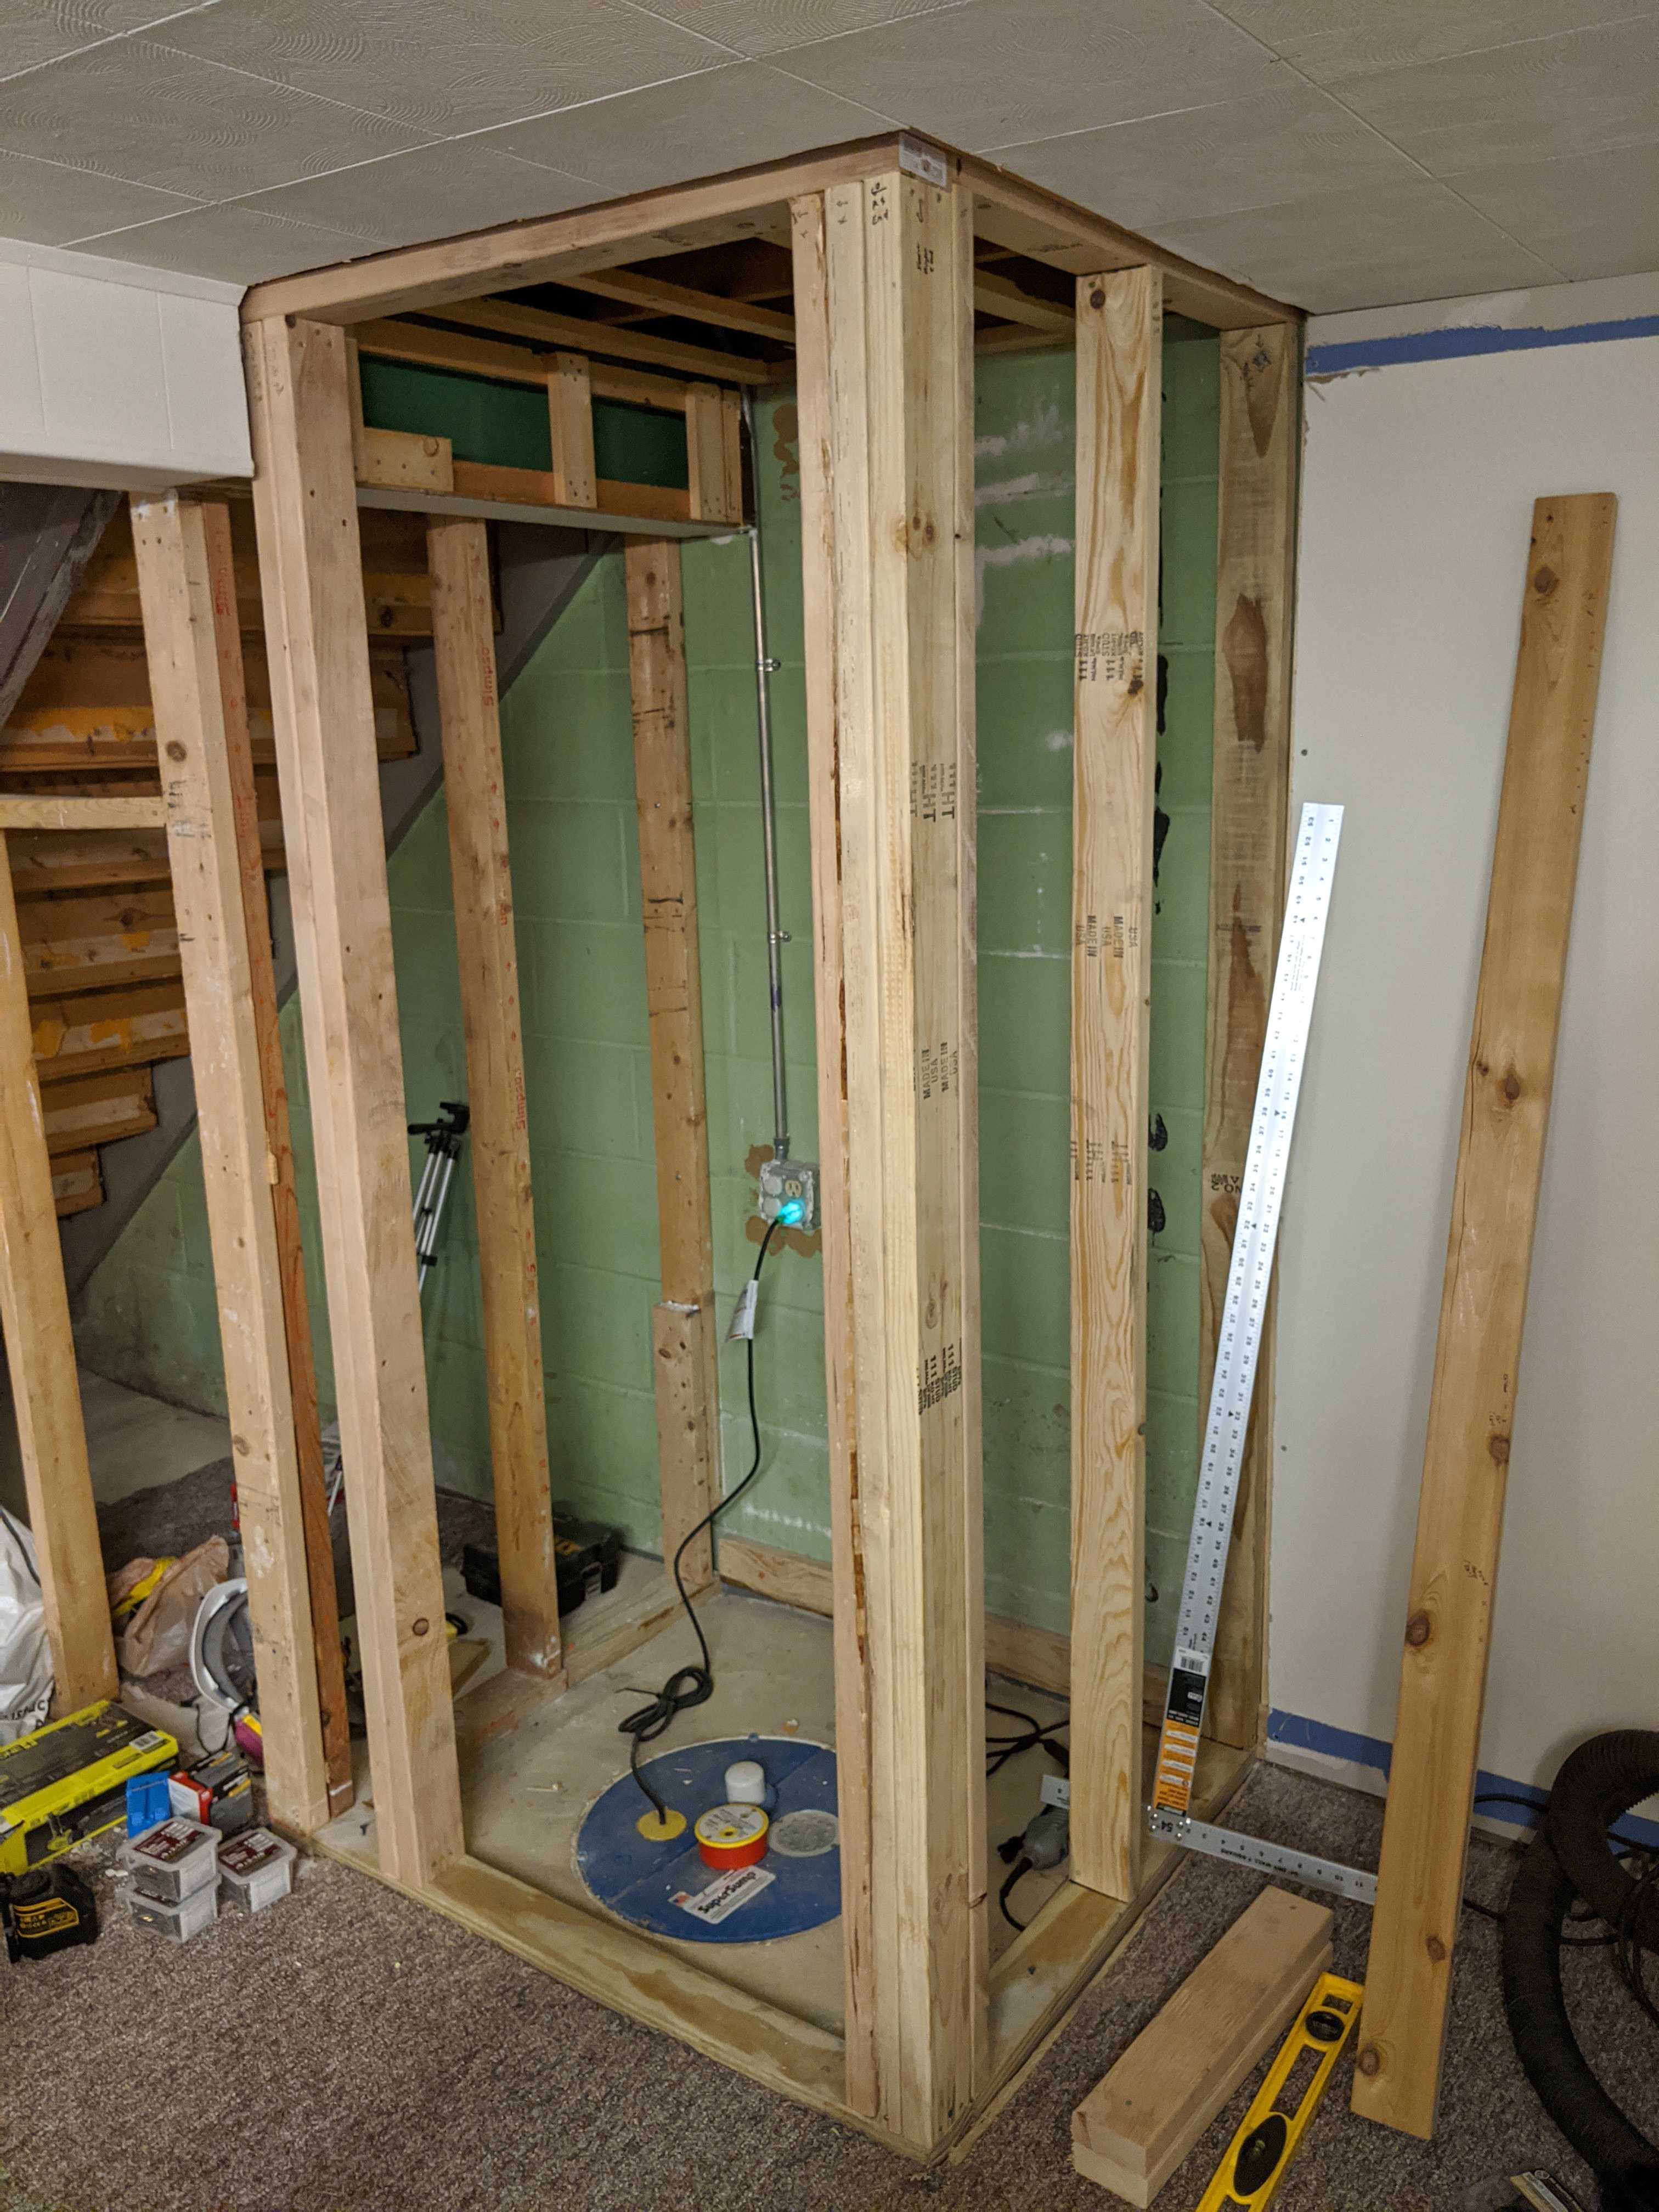
As you can see in the photos, I basically "attached" the new framing to the old. In an ideal world, I would have reframed the entire stairs but sometimes you just have to work with what you have. The stairs were totally out of plumb so I had to adjust the old framing to make a more level surface with the new framing. It still wasn't close to perfect but I just had to live with it for now!
No such thing as a perfectly straight stud
Since this was a small project, I got my lumber at Home Depot. The issue is that it can be really tough to find super straight pieces of lumber there. If I were doing a bigger project, I would have ordered and gotten lumber delivered from a local lumberyard to try and get better quality lumber in bulk.
When doing framing, the most important pieces that have to be straight are for the door/window frame. I saved the straightest pieces for that area.
One other trick I learned from watching videos: if you must place a bowed stud next to another stud, face their curves toward each other. When a piece of lumber curves, it will want to continue curving in that direction. When you place two pieces where their curves are against each other, they will push on each other and end up not moving. Woulda thunk! Here's a video snippet of the explanation in case you're trying to visualize it:
Securing the bottom plates
With the front and side framing completed and fastened at the top, it was time to ensure the walls were plumb before I fastened the bottom plates in and made the changes more permanent.
👉 Pro tip: Ensure the wall and door rough openings are plumb before securing the bottom plate. Use a sledgehammer and a piece of scrap 2x4 to slam the wall into place. See more handy tips from Family Handyman on hanging doors. Out of plumb openings will totally mess with your door install.
Fastening bottom plates to concrete
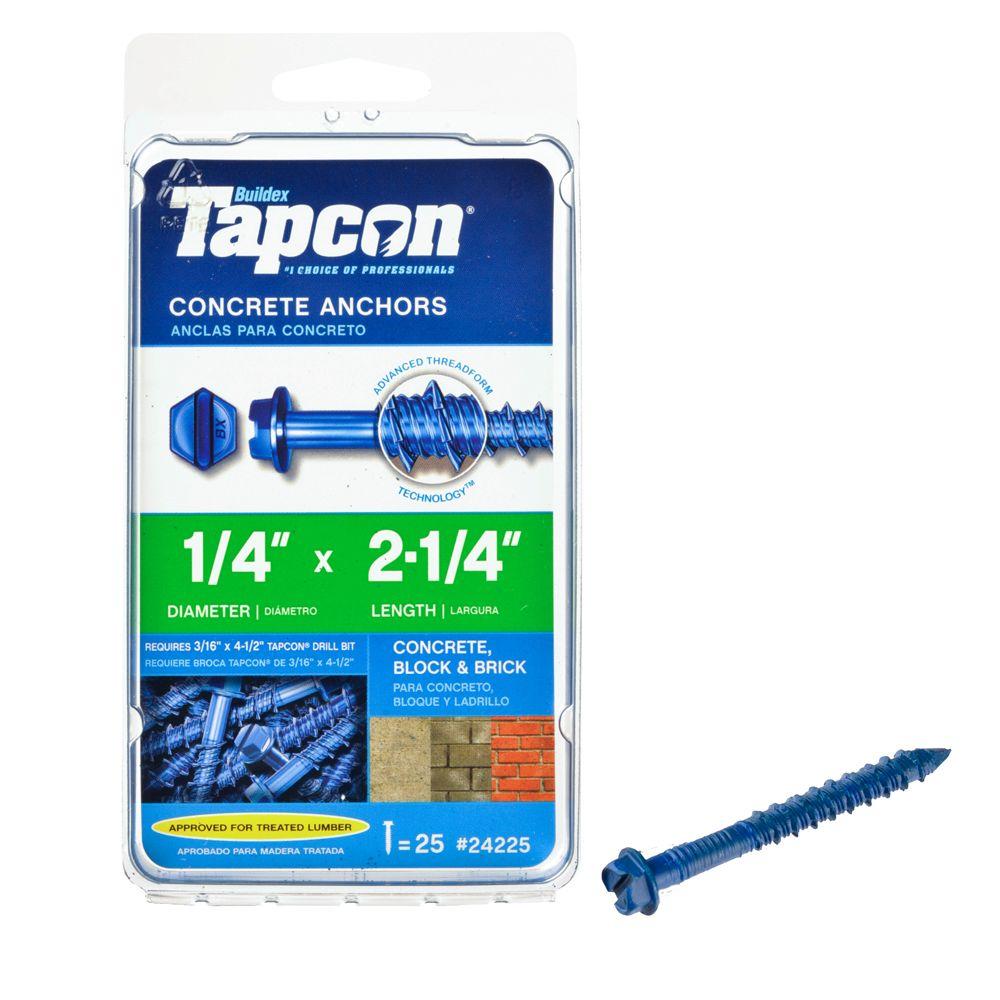
To secure a bottom plate to concrete (60 year old concrete, to be exact), you need concrete anchors. The standard fare here is Tapcon screws.
It is very important you get the right length screws because I didn't! I just assumed I could use 3" screws but actually, the appropriate length is only 3/4 to 1" embedded into the concrete and 3" was too long. Instead I should have used 2 1/4" screws. You also want to use the 1/4" diameter screws, not the 3/16" as they are a little too thin and may break when driving in.
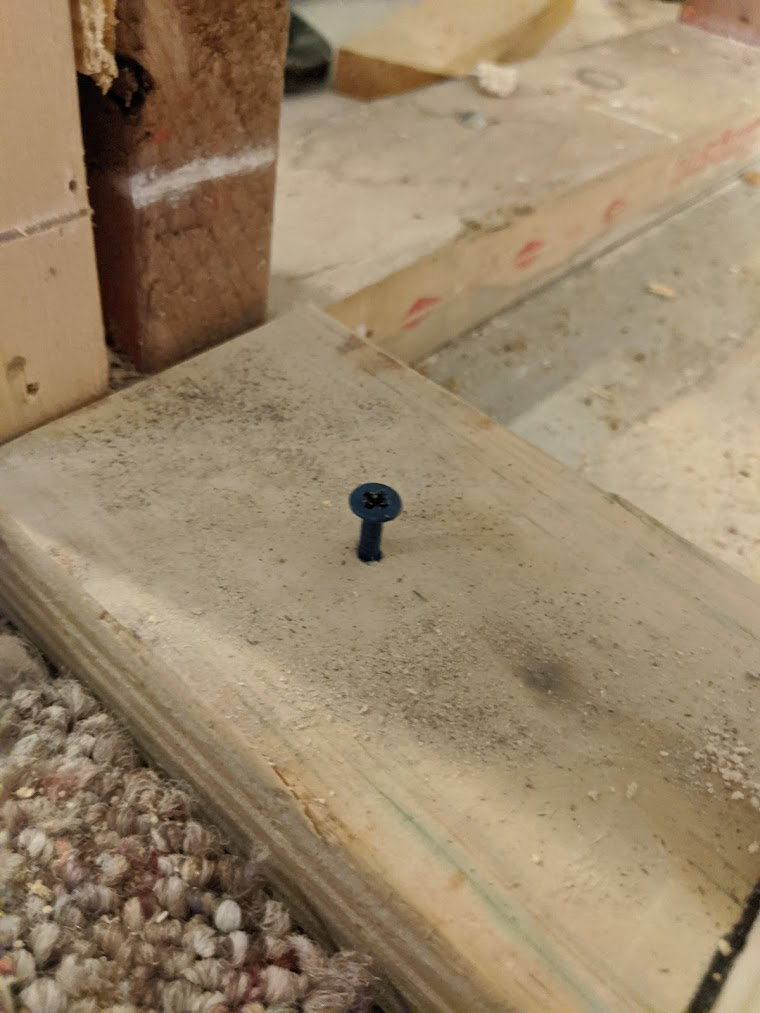
If your Tapcons stick out like this, they are too long. I was reading that this is a common issue for Ye Olde Concrete like mine and less of an issue for newer builds.
You'll also need a hammer driver to drill the holes and drive the screws in. For this reason, I recommend using the hex-head Tapcons and not the Phillips-head (unless you maybe use the proprietary Tapcon driver). Just like an impact driver, it's likely the driver won't sit in the screwhead well as soon as it meets any resistance.
At first I tried this using the Ryobi hammer driver but ended up returning it in favor of using the Ryobi SDS Rotary hammer drill which packs more punch and also works great for mixing. By this time, I had driven all my tapcons and the bottom plates weren't going anywhere but now I have the SDS to handle most tasks.
Backframing for drywall
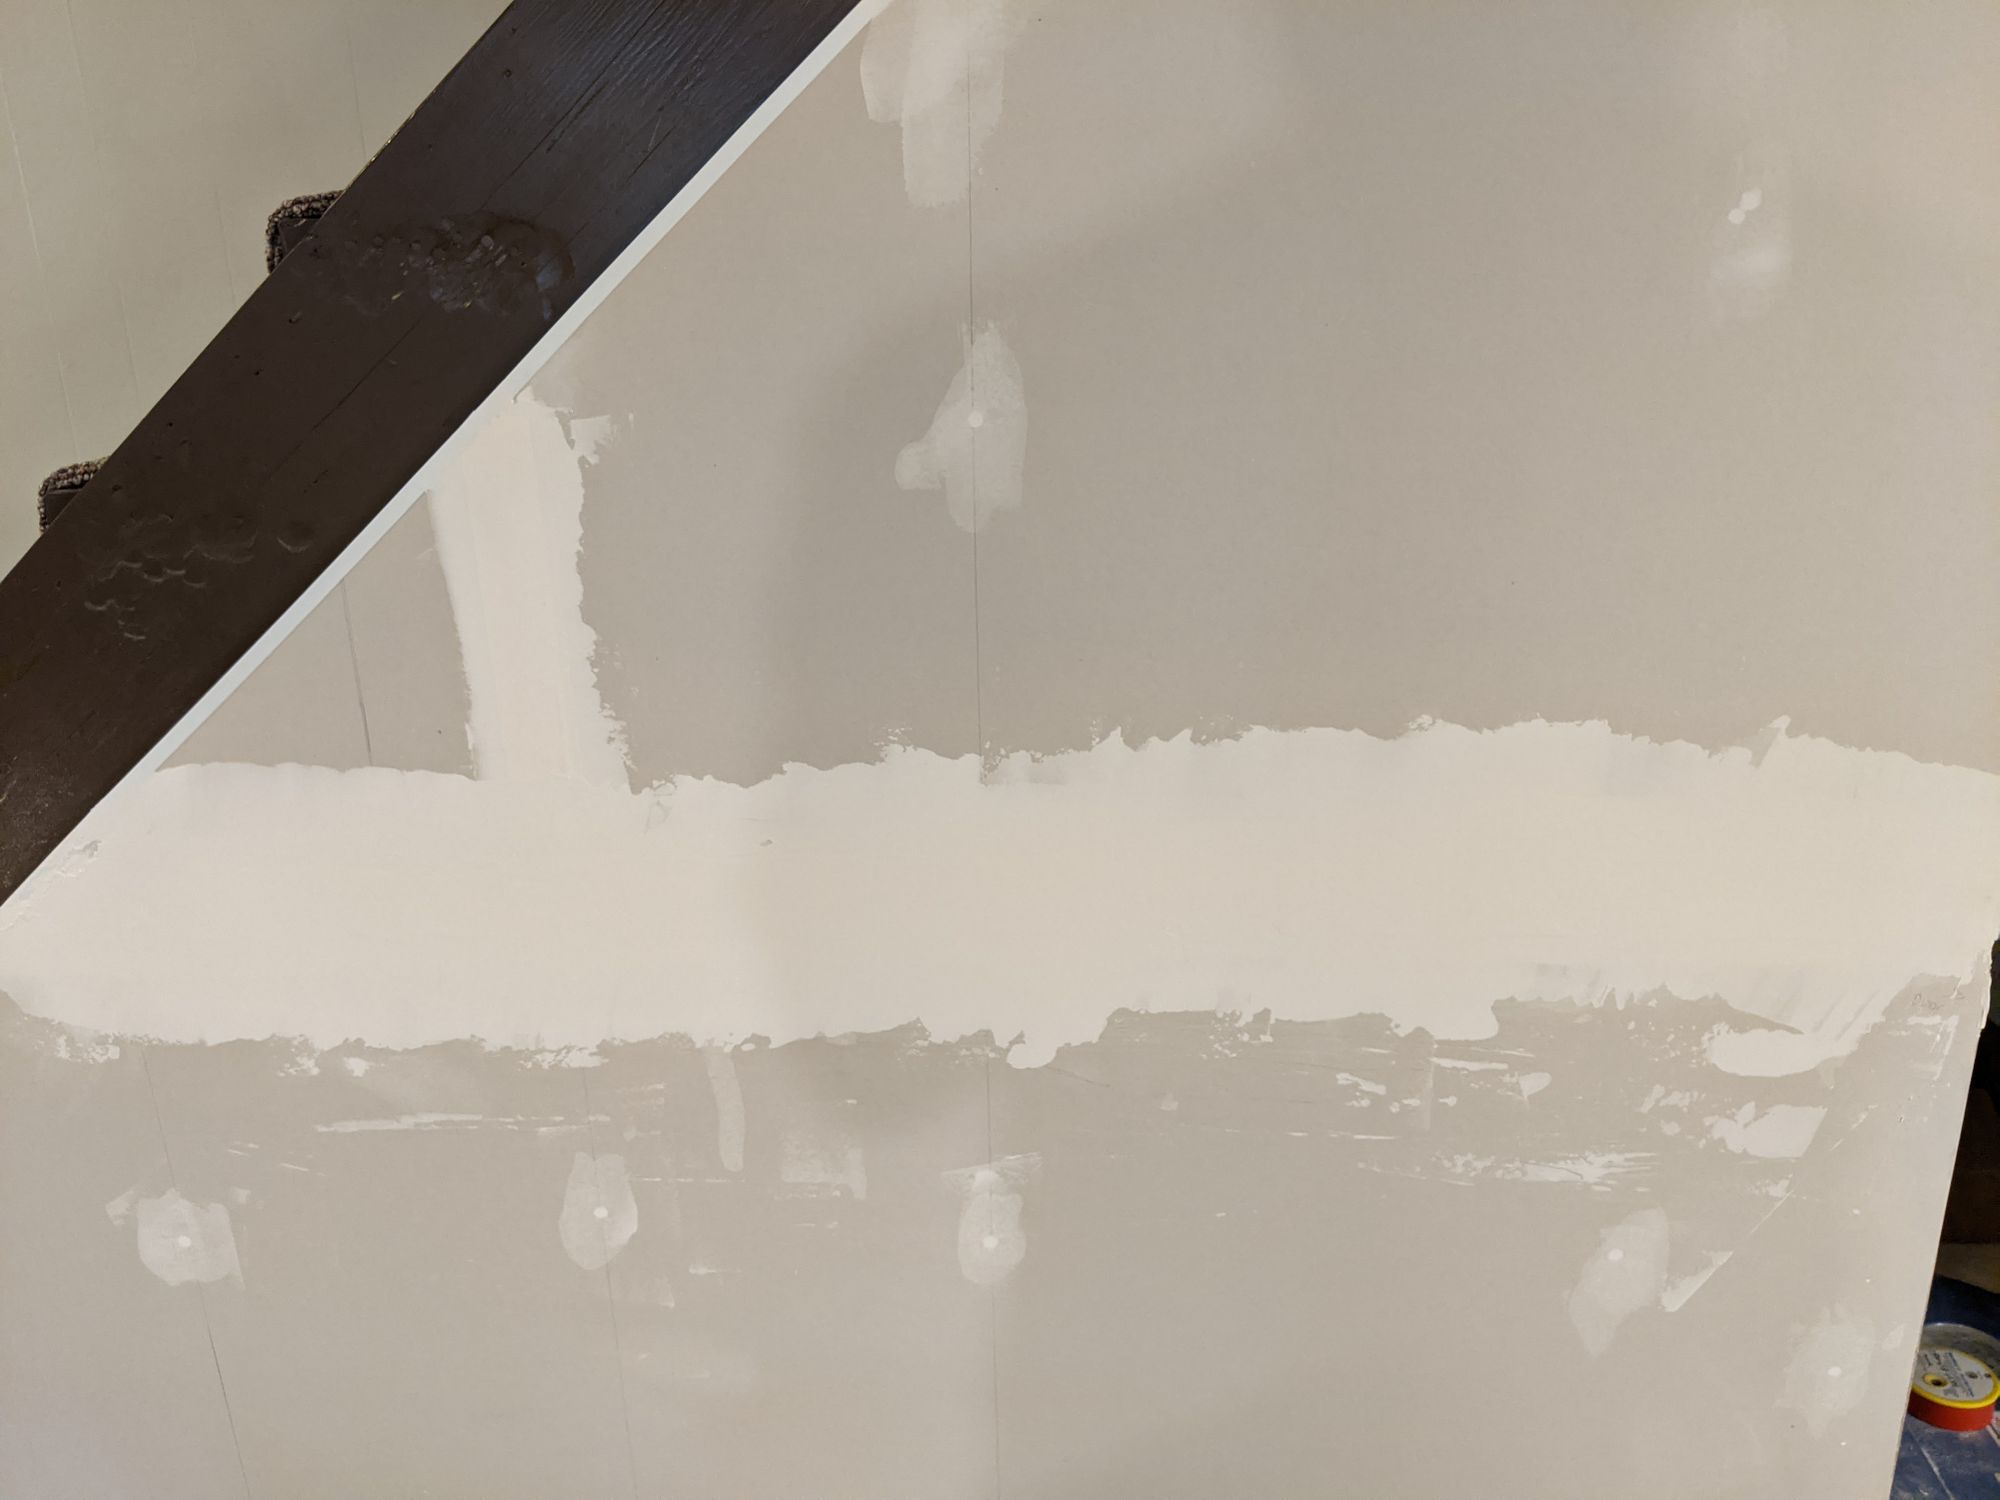
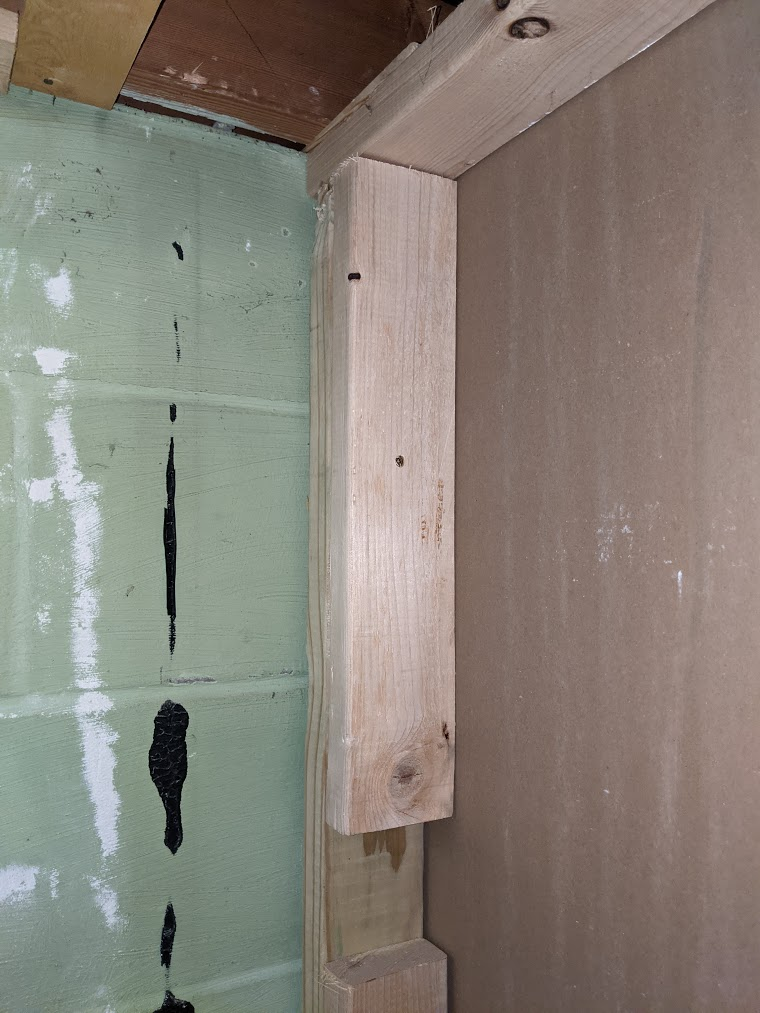
There may be parts of the wall where you need to add backframing. This is to help create additional surface for the drywall to attach to. I had to add some 1x3 stripping behind the wall I cut on the exterior like this:

To fasten this I used the Tapcon screws again and that worked great. Since it's two layers of drywall, I had to use 2" drywall screws instead of the standard 1 1/4". I had plenty leftover from removing the old drywall so back in they went! I made sure to embed them well so later I could mud over them.
For the new framing next to the wall intersection, I didn't like how tight it would have been to screw the drywall in so I basically took some scrap 2x4 left over and cut 3 blocks and screwed them into the stud.
Backframing is something I can see easily overlooking but as long as you have access to the other side of the wall you can add it in if you forget it. 😅When framing you also have to think about the other aspects of construction coming after.
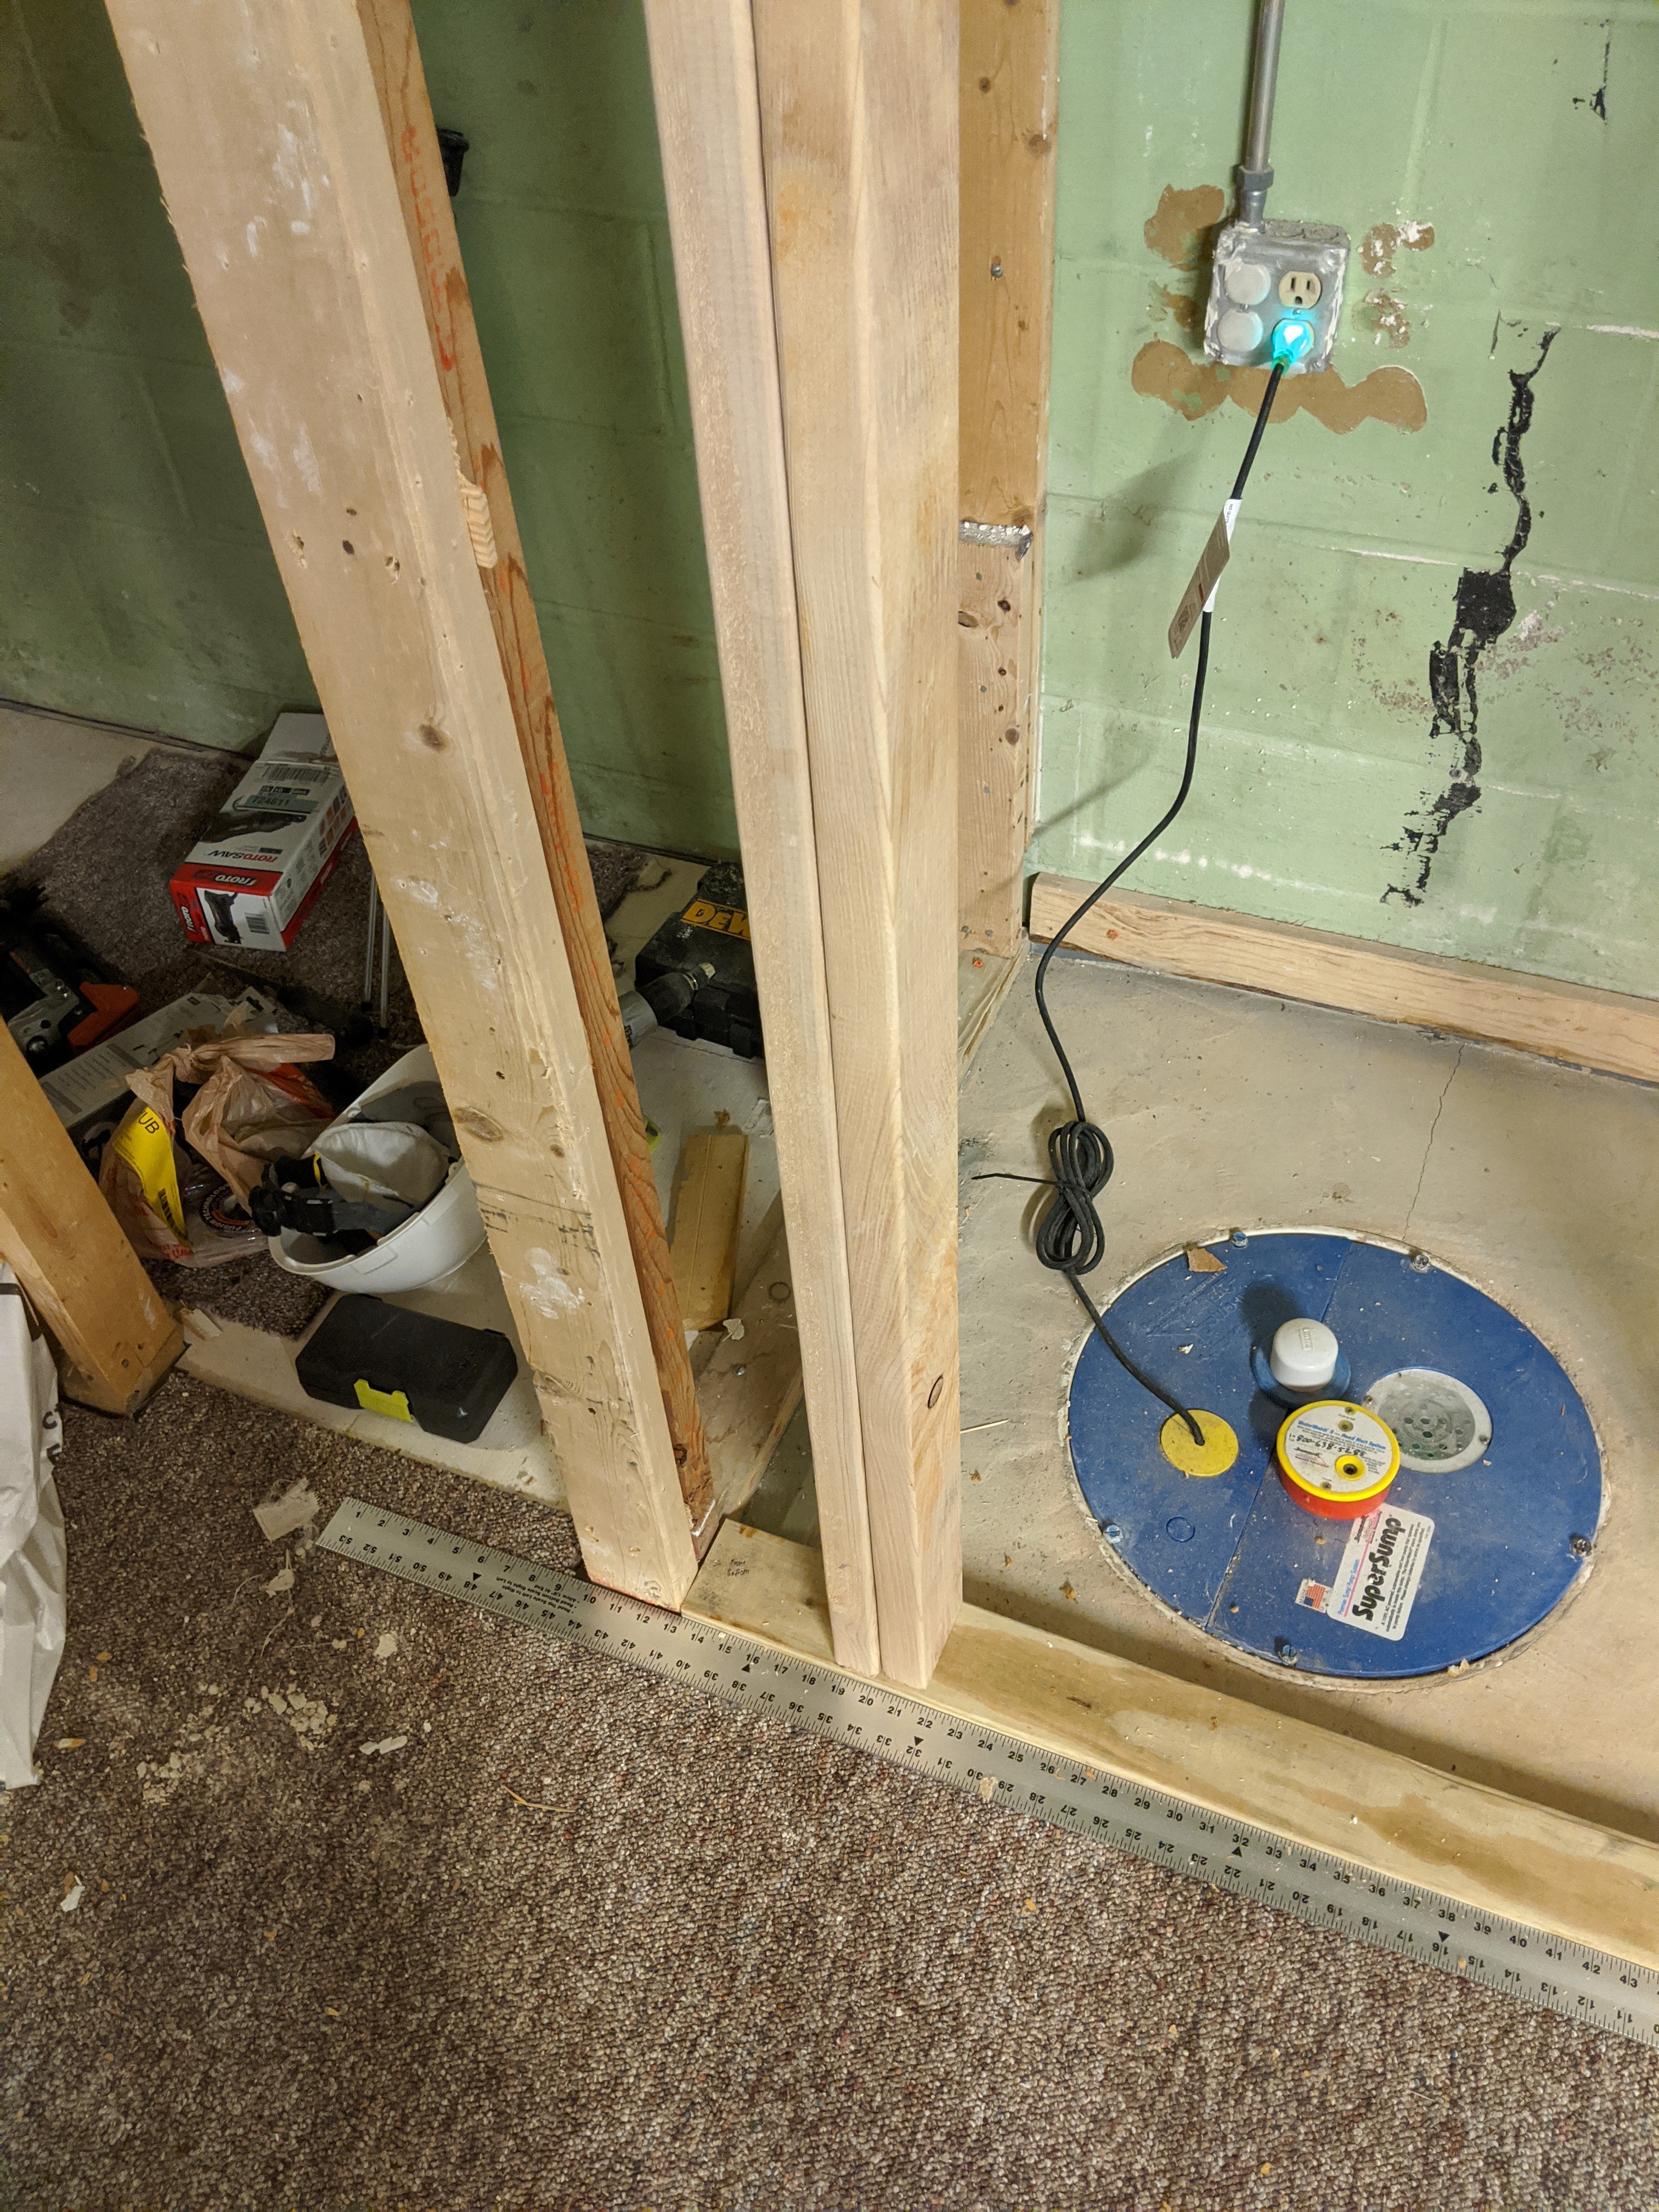
Adding an electrical box
I'll cover electrical in another post because it isn't something I'm tackling right now but I did go ahead and add a box so that I could rough it in so that it was ready when I wanted to hook it up.
There's a bunch of electrical jargon and topics to learn about but for this post I'll keep it simple. I reviewed this video first:
Based on that, I went with a "new work" plastic box and placed it in the middle of the side wall:
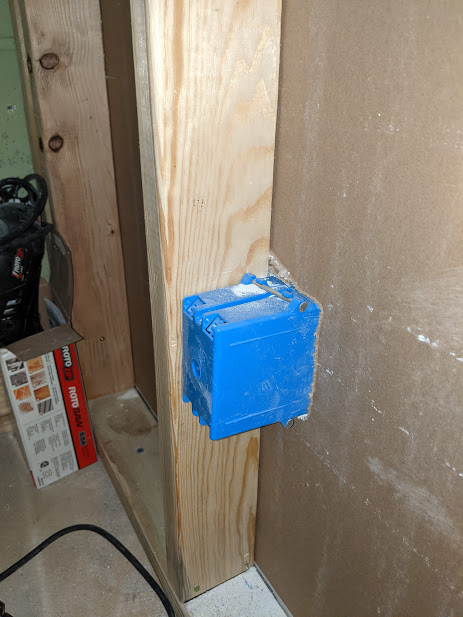
Standard height to place outlets are usually 12-15 inches from the finished floor to the bottom of the box. Minimum code states to place an outlet within at least 6' of a door opening and then every 12' (6/12 rule). If you are doing new construction, it's even better to plan outlets according to what will be there (home theater, appliances, etc.). One tip is to use a scrap 2x4 to keep all your boxes at a consistent height.
They did not finish my basement correctly so on at least two walls I have zero outlets for 12' or more, it's maddening. This outlet will be super handy because I can use it to maybe move my home theater to be against this wall. I would have liked to have at least one more outlet on the exterior wall but it would have meant tearing out even more which I wasn't about to do (yet!). This outlet will be good enough for now.
Thoughts on learning how to frame
I really enjoyed the framing process. It was fun to plan what the framing would be and then to see it all come together. While there are a lot of details about fastening to understand it also seems like there's a lot of "flex rules" in the code and in practice.
One thing is for sure: level, level, level is the name of the game. Ensuring everything is plumb and square goes a LONG way to making later stages of the project go smoothly. The old framing being out of plumb and not square definitely affected the finished product. A lot of times, good finishing can hide issues like this but it's so much better to just spend the time up front to avoid future pain. An old house won't ever be level or plumb but things you build within it can try to be.
A lot of videos online showcase building an interior frame on the floor and raising into place but I had seen online that for shorter (older) basements framing in place can be easier. I have to echo that sentiment. I managed to find a few resources online that I referenced as examples from Fine Homebuilding, Simple Practical Beautiful, and Woodshop Mike, linked below:
 Tom O’Brien
 January 18, 2018
 Mike
Mike
I also went ahead and got an eBook/video package on finishing basements by another homeowner who recorded his journey. I'll say that it's a useful reference but since he's not a contractor, it's good to corrobate/verify the stuff he's doing 😅
As far as toe nailing goes, I was doing it slightly wrong because nearly every toenail I did the heads stuck out. I even adjusted the nailer. Using the multi-tool I could quickly fix all that but I think I just need more practice!
Next up: hanging drywall, mud, and tape
With the walls all framed in it was time to move to hanging drywall and the whole tape/mud process which to be honest I was d r e a d i n g. 😱